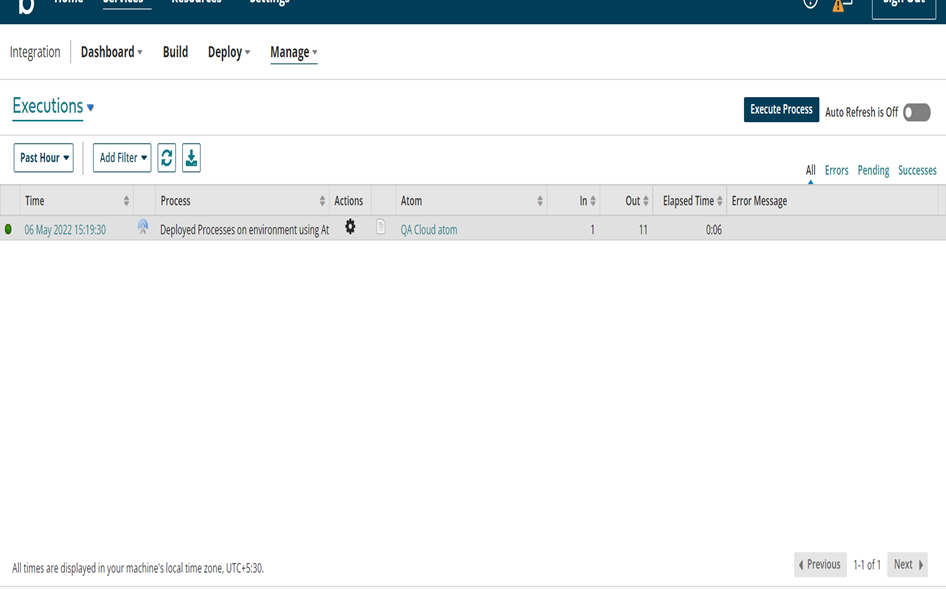
How to find the list of deployed processes on an environment using Atomsphere API from the Postman
In this blog, we will learn how to find the list of deployed processes on an environment using Atomsphere API from the postman.
The Atomsphere API provides programmatic access to functionality that is normally accessed through the Boomi Atomsphere platform. The API is built around an object/verb hierarchy. This hierarchy parallels the basic object-oriented programming paradigm as well as the web service implementation behind REST.
1: Objects represent structures and relationships within Atomsphere, such as Account, Account User Role, Atom Startup Properties, and Environment.
2: Verbs are the various operations that you can perform for each object, such as GET, QUERY, and UPDATE. These verbs are referred to as object-based operations. Verbs that do not fall into the object/verb hierarchy, such as execute the process, are referred to as action-based operations.
Postman–The Postman testing tool is a complete API development platform with various built-in tools that support every stage of the API lifecycle. Postman tool allows you to design, mock, debug, automated testing, document, monitor and publish the APIs – everything from one place.
Log on to the Boomi platform (https://platform.boomi.com/) with the required credentials i.e. Email Address and Password.
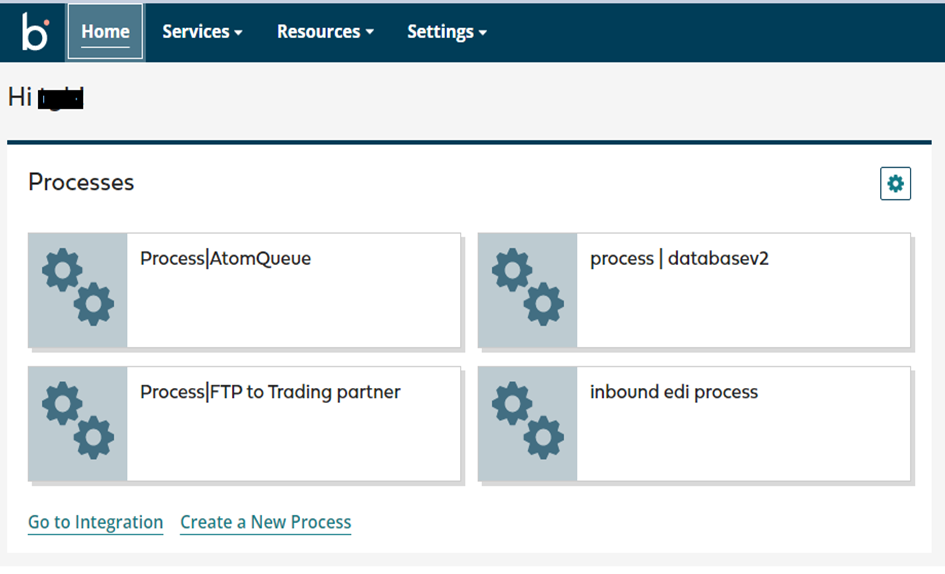
Step 1: Once logged into Boomi platform, we will be able to view home page.
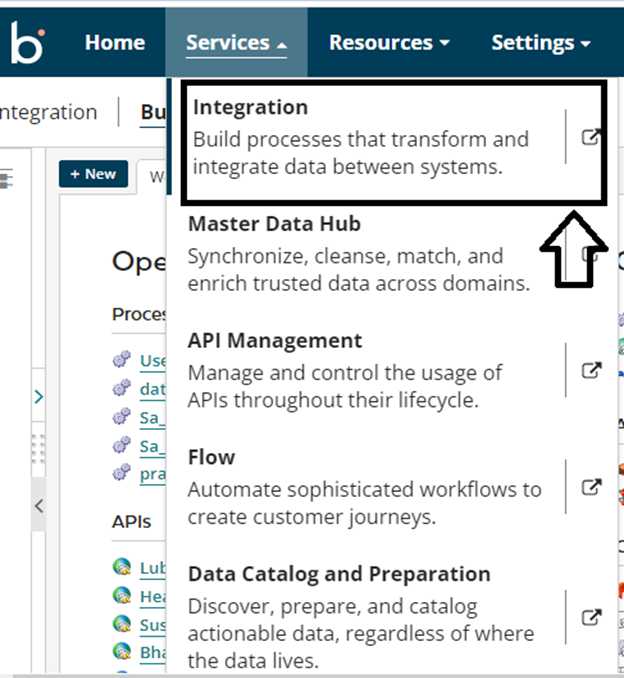
Step 2: Now, click on Services followed by Integration. We will see the Build page. Click on New.
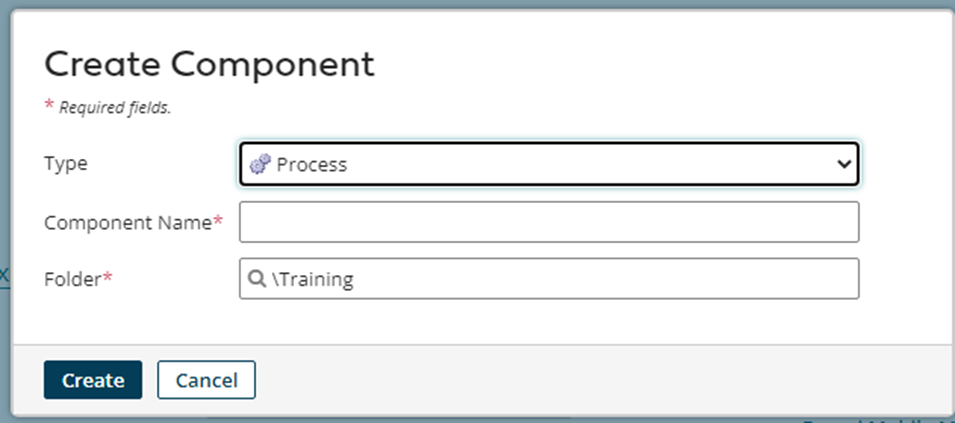
Step 3: Once, clicked on New, we will be able to see three fields i.e., Type, Component Name, and Folder.
• Select Type as a process as we are building a process. Component Name and Folder can be given based on your choice (i.e, which name to be given and where do we want to create the process). Click on create
Step 4: We see that the process gets created with a start shape which is configured with AS2 SharedServer by default.
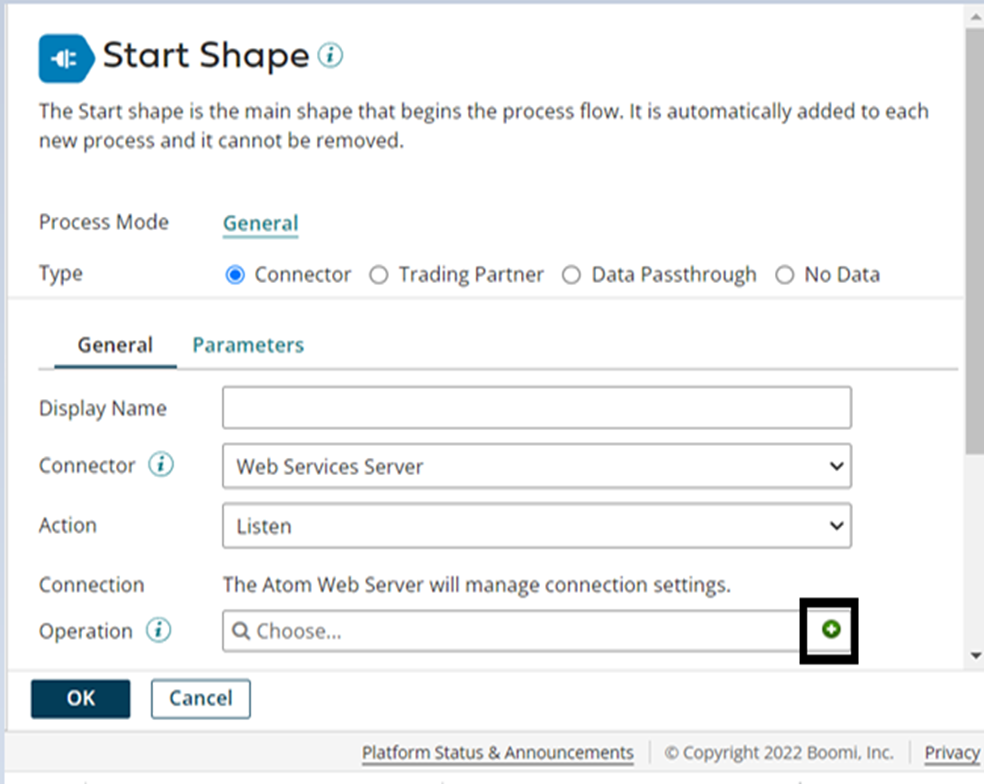
Step 5: Configure the start shape with web services server connector. Now configure the operation by clicking the ‘+’ symbol. As below.
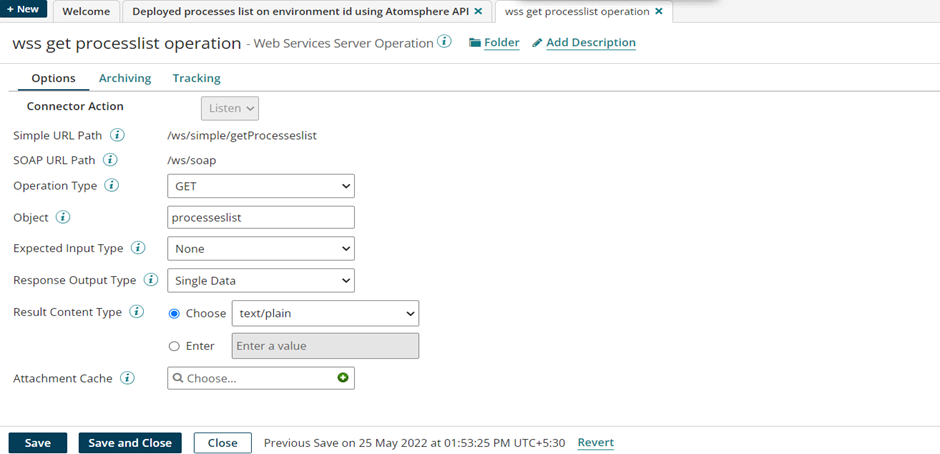
Step 6: Name the web services server operation (mention name by involving operation type to identify easily) and configure the fields (operation Type, Object name, Expected input Type, Response Output Type) as below.
Here we have taken operation type as GET, object name as processes list, and chosen response output as single data because we are expecting single data from this connector as a response. And click on save and close.
To get the list of process names using Environment id, we need to follow two steps:
1:-Get ‘ComponentID’ using ‘Environment id’.
2:-Get ‘Process name’ using ‘Component id’.
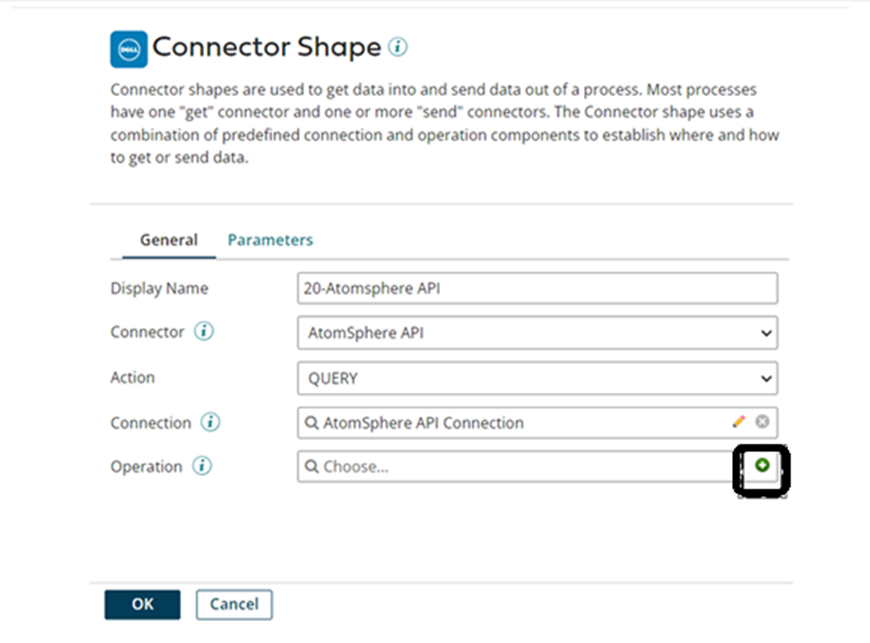
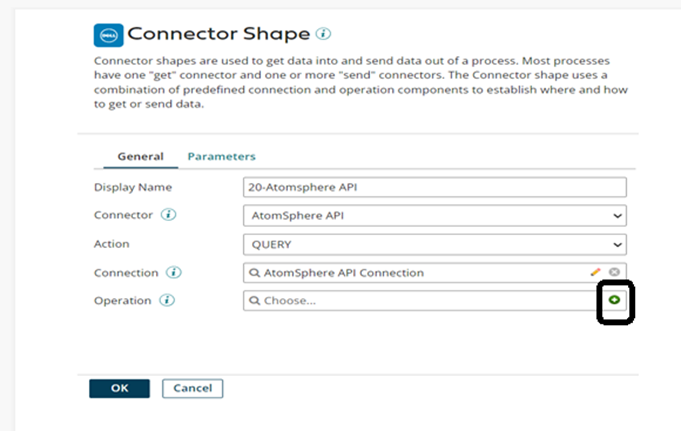
Step 7: Next place the Atomsphere API connector on the process canvas from the connectors list. And configure the action, connection, and operation. Configure action as Query.
Step 8: To configure the connection, click on ‘+’, and follow the below steps.
Location of the Boomi Integration SOAP API service’s WSDL. This should always be https://api.boomi.com/api/soap/v1/{accountID}?wsdl where accountID is your Boomi Integration Account ID. To obtain your account ID, navigate to Settings > Account Information and Setup > Account Information under your account name in the main menu bar.
Username
The email address of the user who logged into Boomi Integration.
Password: The password used to log into Boomi Integration.
API Token: The API Token used for authentication on public & partner API calls.
Generate API Tokens on your user account for use in the Atomsphere API connection by navigating to the Settings > User Information > Atomsphere API Tokens page.
Note: The connector automatically handles the HTTPS certificate. You do not need to manually import a certificate component.
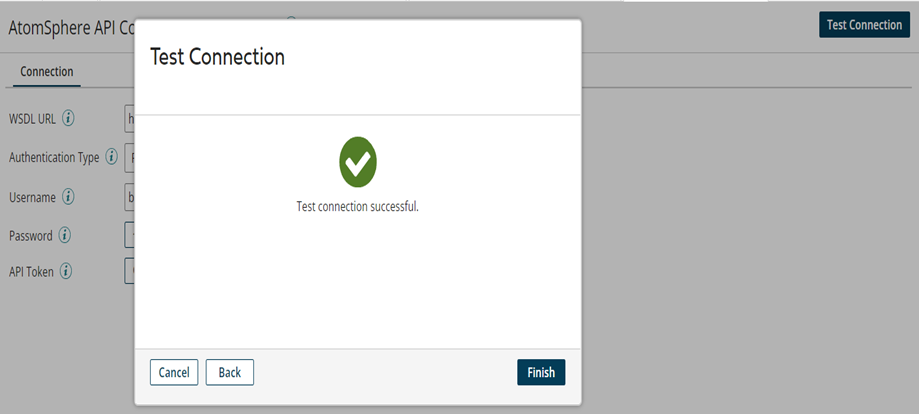
Test connection
You can test your connection settings before you use the connection in a process or even before you save the connection. Test Connection ensures that the connection settings that you specify are correct, valid, and can be accessed. If the test connection is successful, you can save the connection. Otherwise, review and correct any incorrect settings, then test again. Click on finish.
Attention: Test Connection may only be performed against containers associated with your account (local Atoms, Molecules, and Atom Clouds).
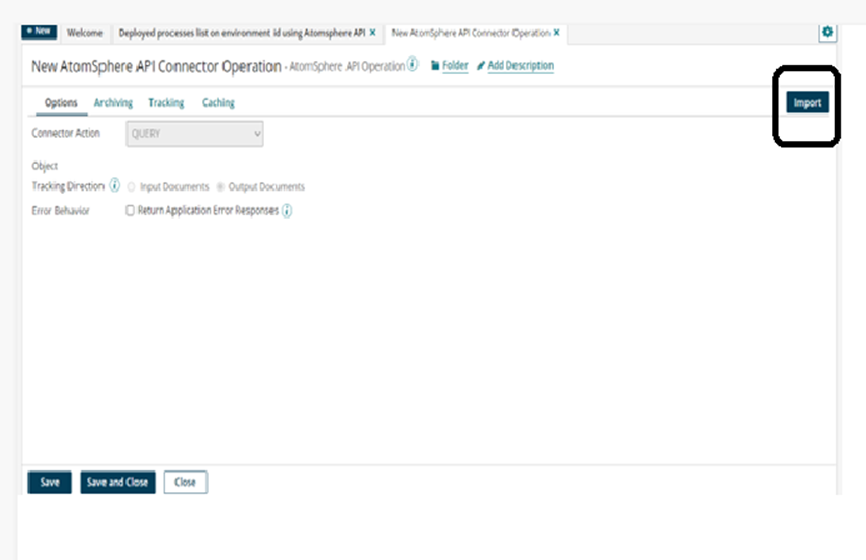
Step 9: To configure the Atomsphere API operation, click on ‘+’.
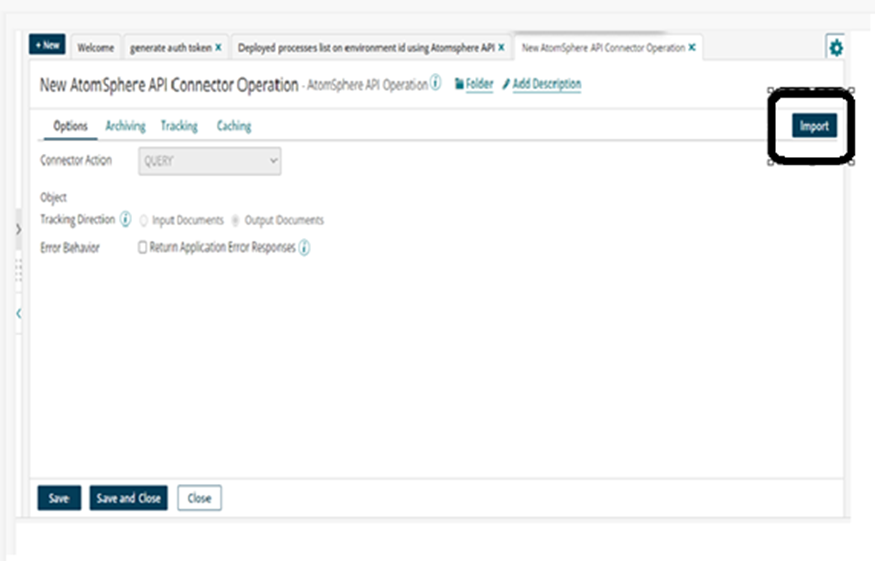
Name the Atomsphere API operation. Click on import you will get the Atomsphere API Import Wizard dialogue box as below
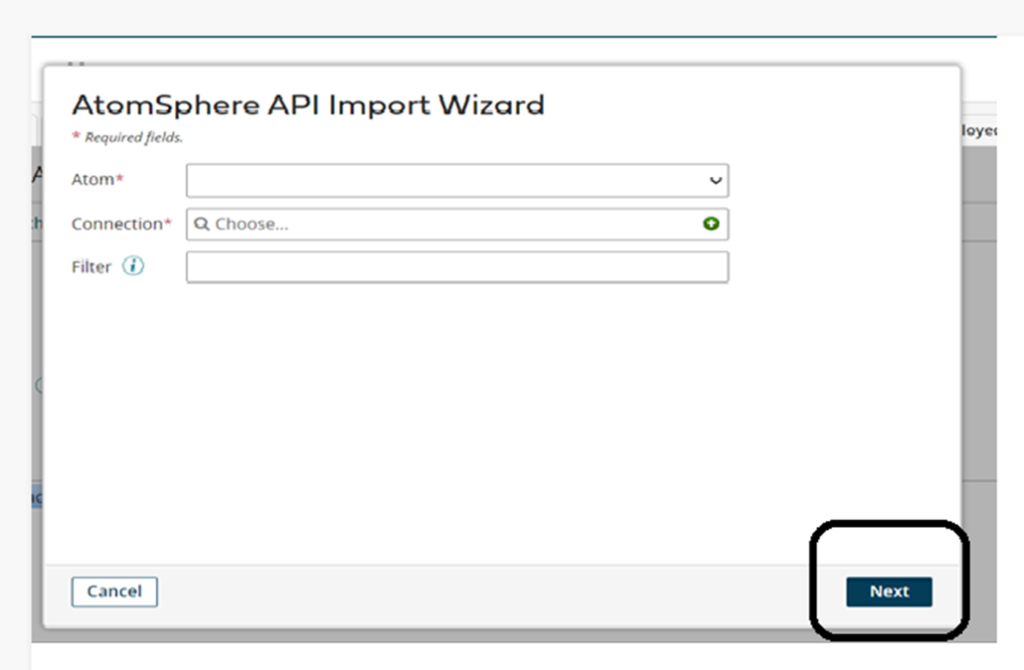
Select the atom, Atomsphere API connection, and click NEXT.
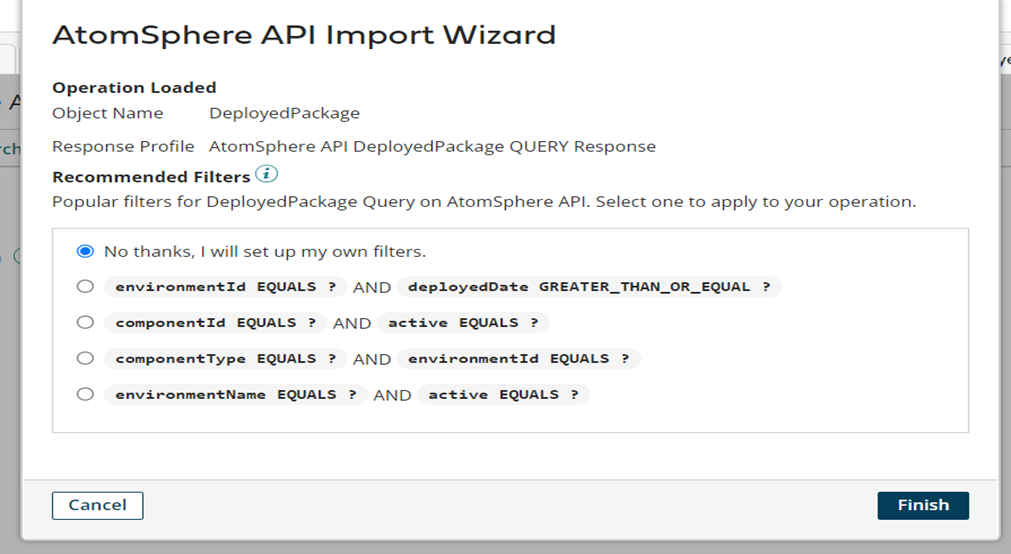
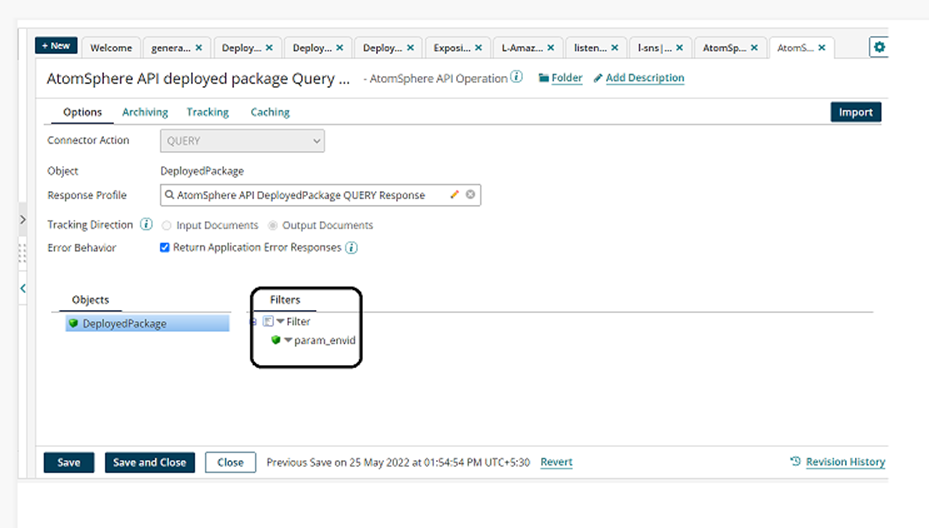
As explained in step 6, to get the Componentid, Select Deployed Packages object type from the dropdown and click Next.
choose the suitable option as below. Click on Finish.
Now click on triangular shape beside Filter label, click on ‘add expression’ to the filter and name it as ‘param_envid’.
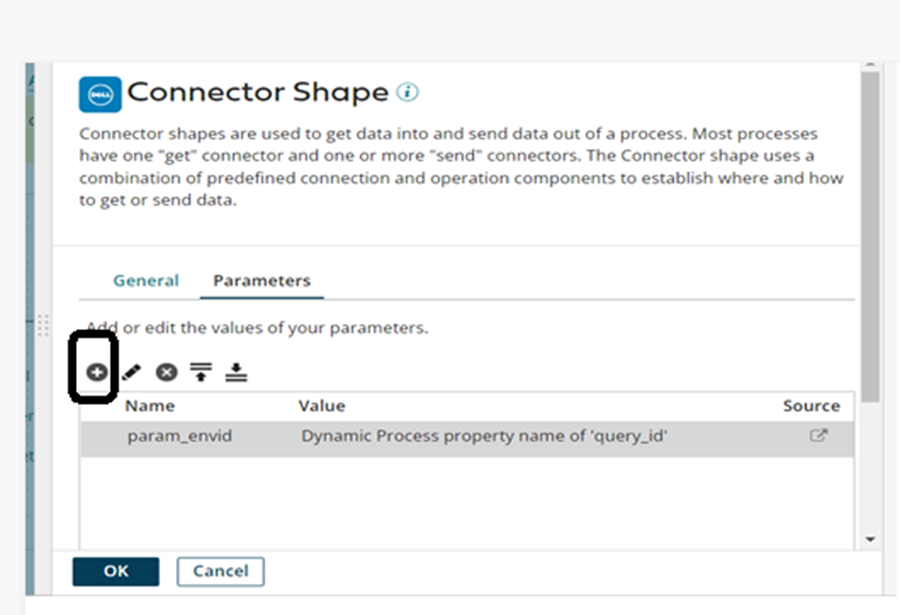
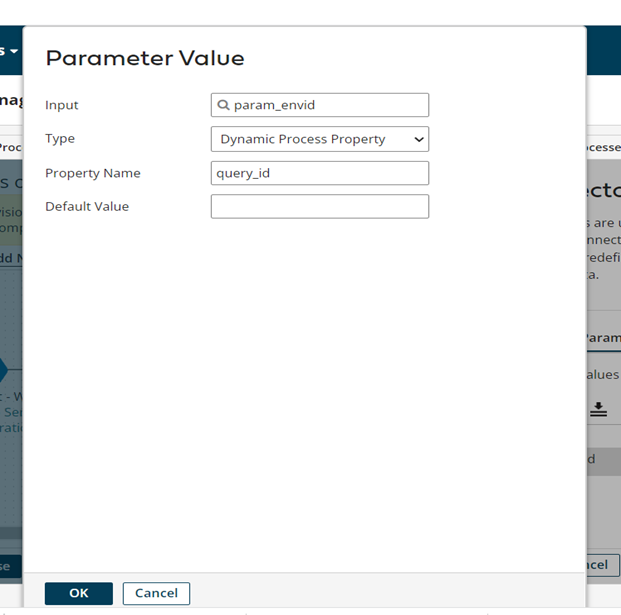
Step 10: Now add the parameter values as shown below. To add a parameter, click on + and add as below, click on ok.
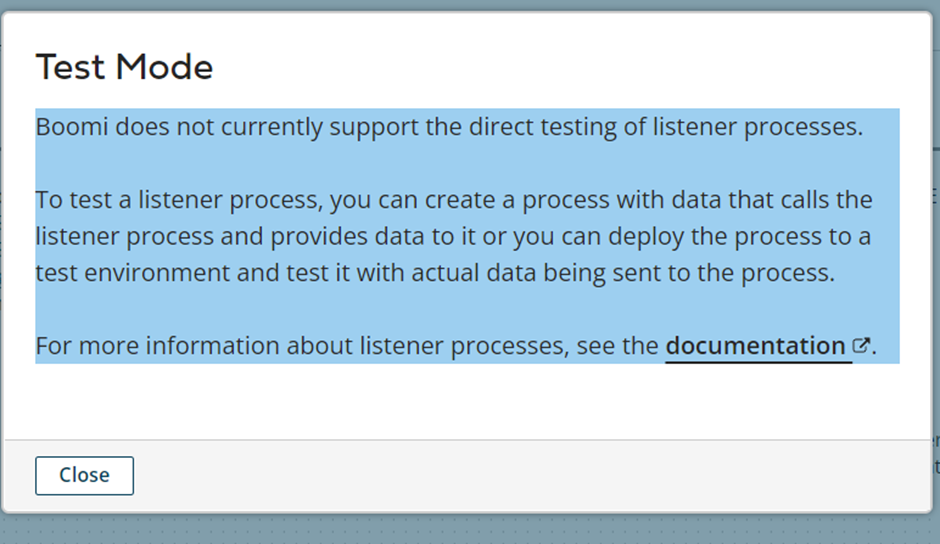
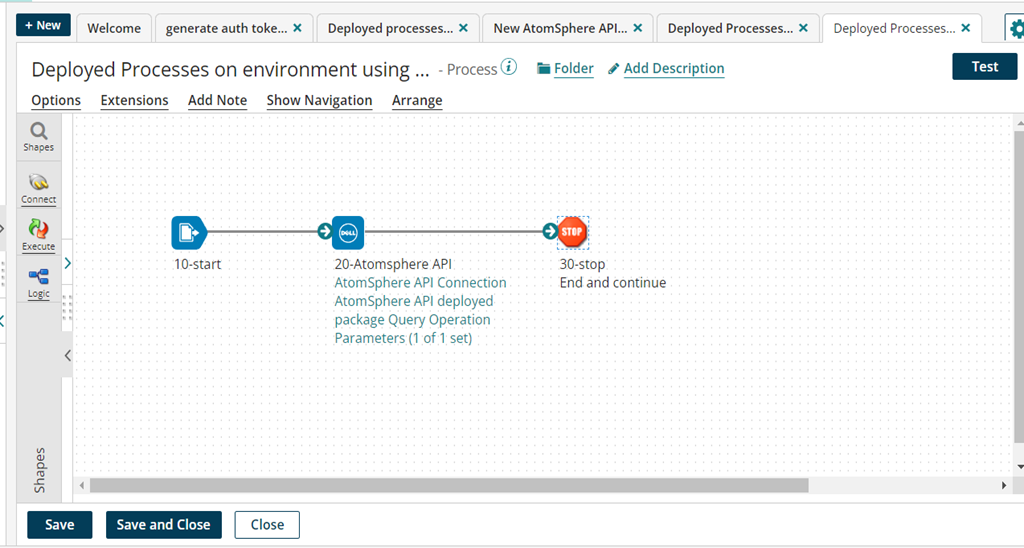
Now click on ok and to see the response of Atomsphere API, configure start shape type with Nodata (Because we can’t test this process in test mode, if we try to test we will get pop up as below. To see the response of listener process in process reporting we need to create the package and deploy that process with any environment) .
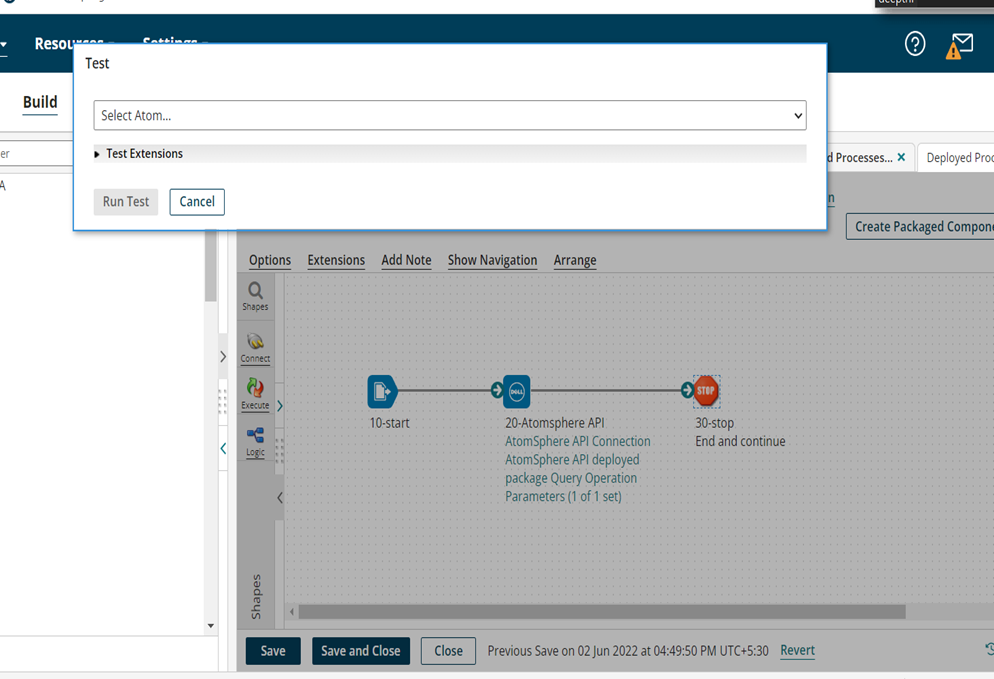
Place stop shape at the end. Now click on save and click on Test.
Select the atom from the drop down and click on Run Test
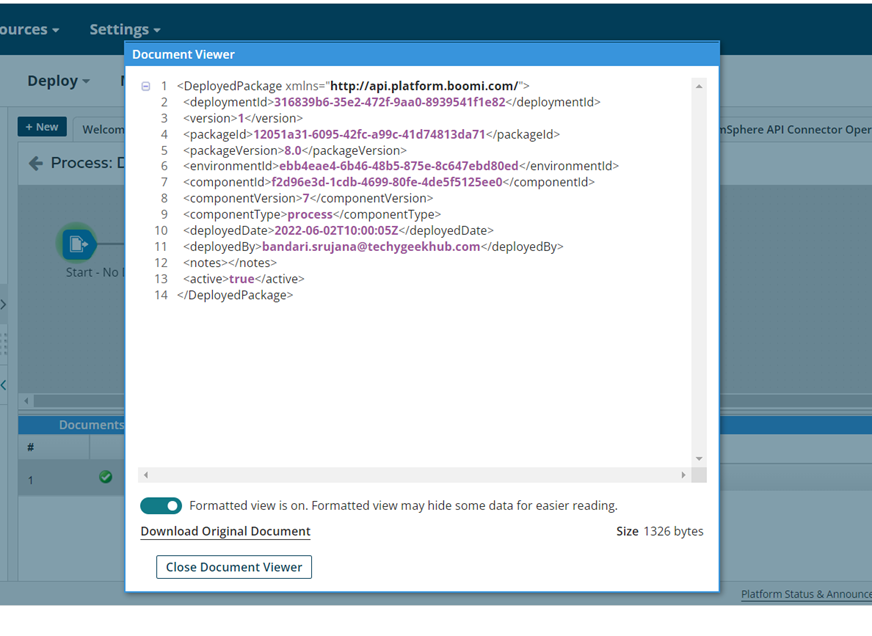
We can see the response below. Here we got only one document. It means only one process is deployed to that particular Environment. We can see, what that document looks like and what fields it consists of as below.
As we got the component id here, we can use it to fetch the process name later.
To get process name, we need to take another atmosphere API connector, and import
object” COMPONENT METADATA” which consist “PROCESS NAME “as field and configure as below
Step 11: Now place the Atomsphere API connector on the process canvas from the connectors list. And configure the action, connection, and operation. Configure action as Query and Reuse the connection which we configured in step8.
Step12: To configure Atomsphere API operation, click on ‘+’.
Name the Atomsphere API operation. Click on import you will get a dialogue box as below
Select the atom, Atomsphere API connection, and click NEXT.
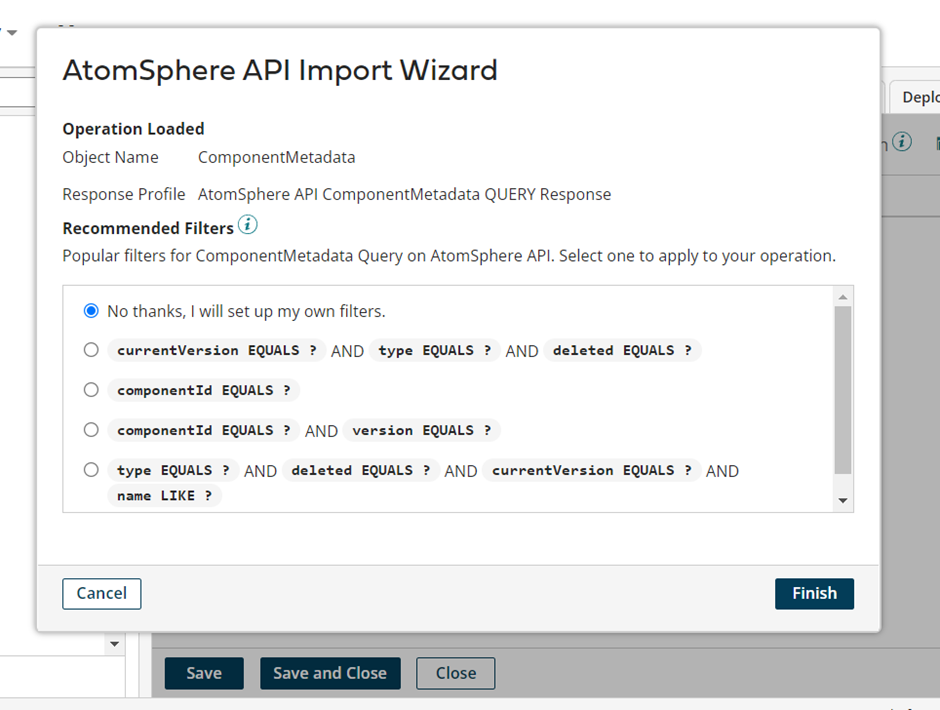
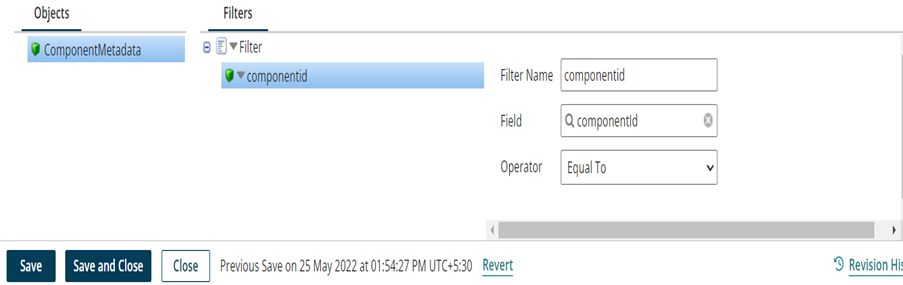
Select Component Metadata object type from the dropdown and click Next.
After clicking NEXT, we will get Recommended Filters options we can choose from them or we can create manually. Here we have selected option as below. Now click on finish.
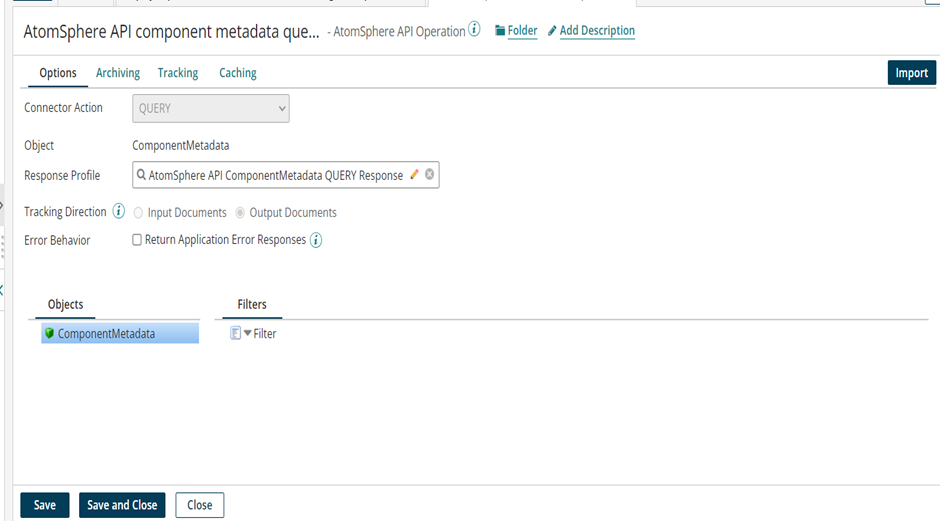
After clicking finish, we can see as below. Now we need to add filter here as below.
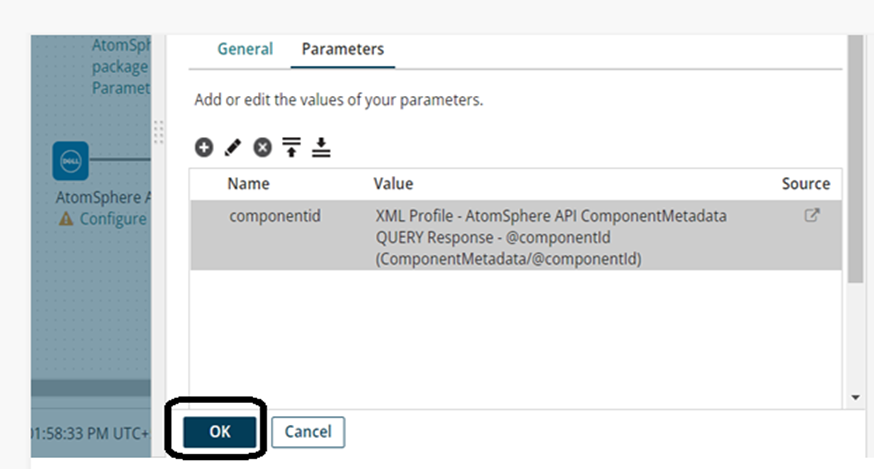
Now add the parameter by clicking ‘+’.
Choose the parameter componentid and select Type as profile element, Profile Type as ‘xml’, choose the profile “Atmosphere API ComponentMetadata QUERY Response”, select componentid element from the profile elements.
Now click on ok.
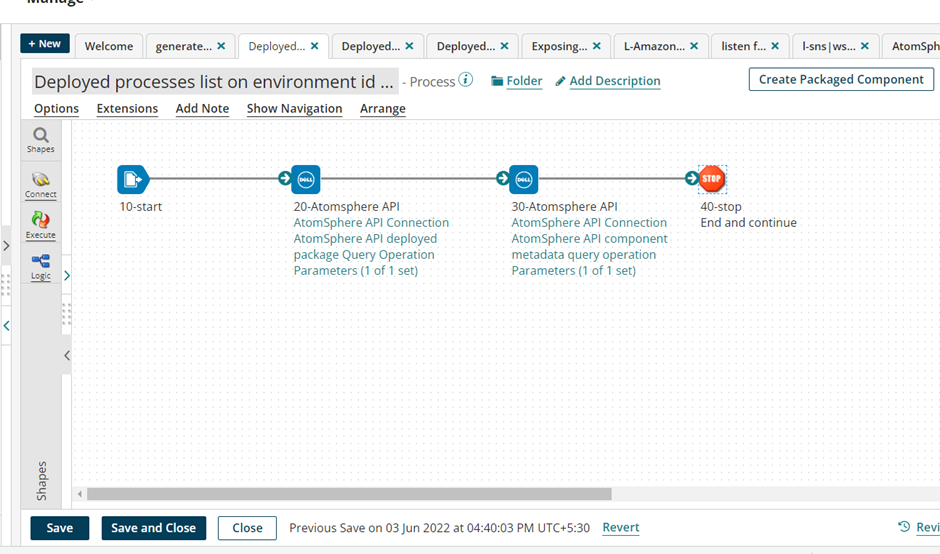
Now our process looks like below. Now click on save and test the process to see the response. Now click on Test and select the atom and click on Run Test.
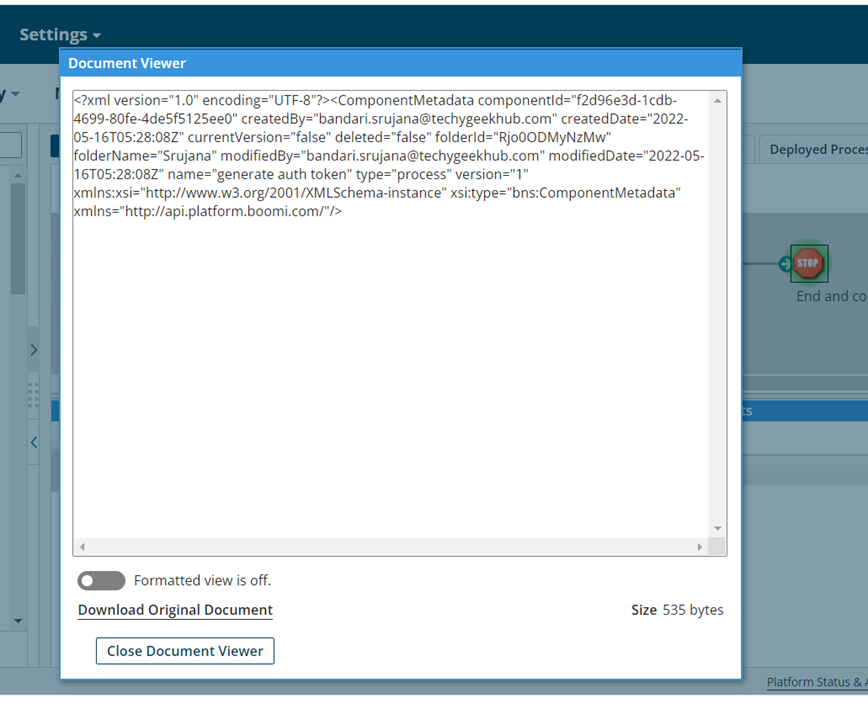
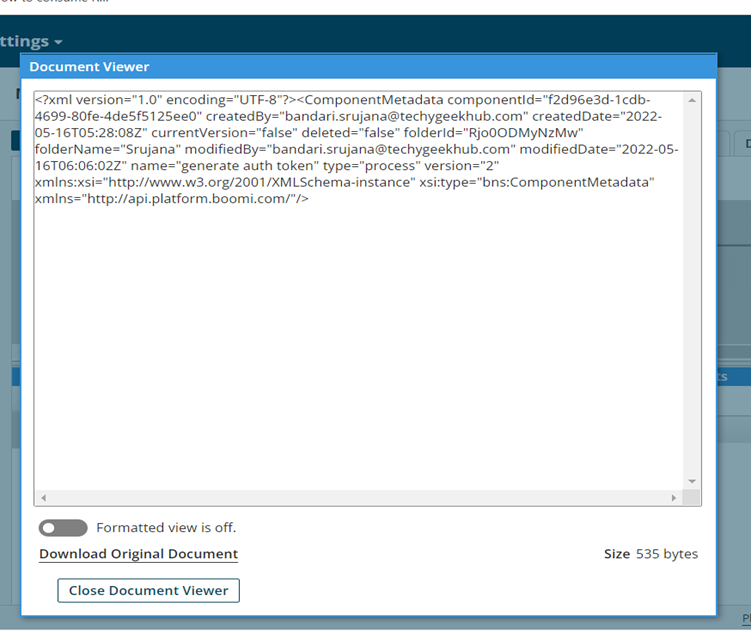
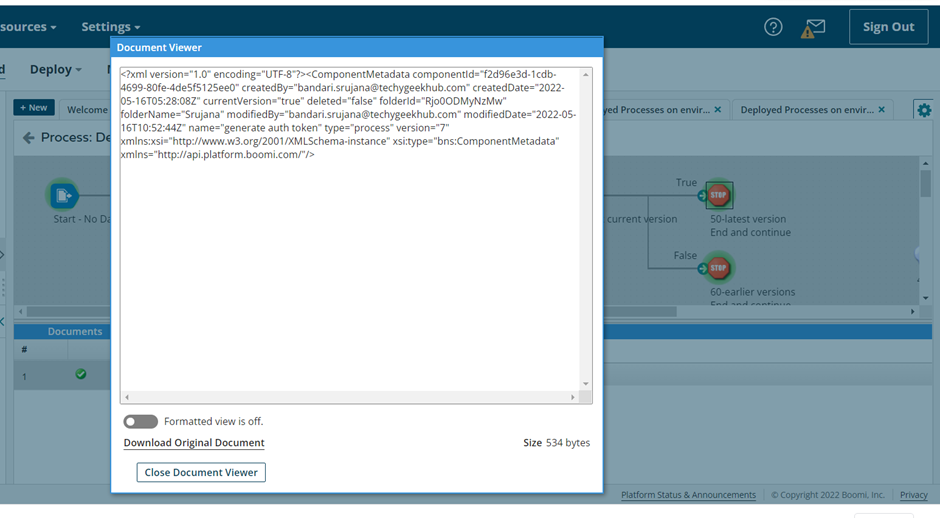
We can see the response as below. Here we got few documents. We can see, how those document looks like as below. By clicking on stop shape we can see the response of 2nd Atomsphere API connector.
As we can see in the above documents, Atomsphere API returns a document for each version of the process. If a process has 5 versions, the API will return 5 documents for the same process.
If the ‘current version’ field in the document is ‘true’, it indicates that it is pointing to the latest version.
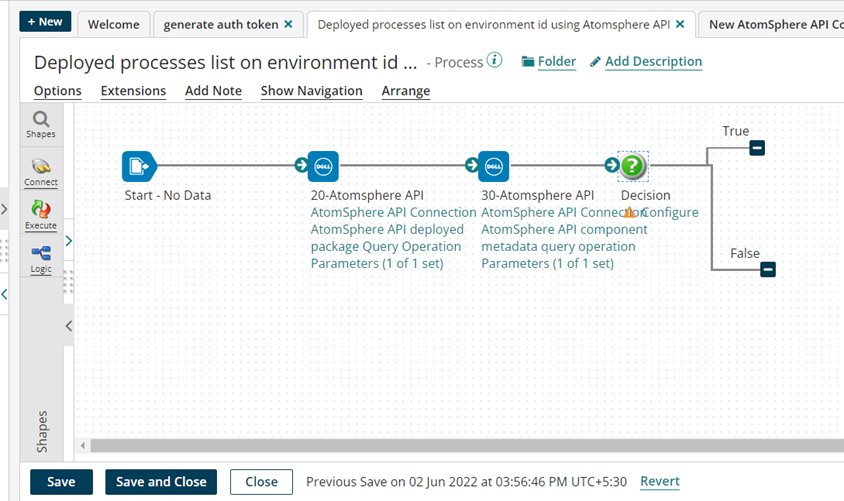
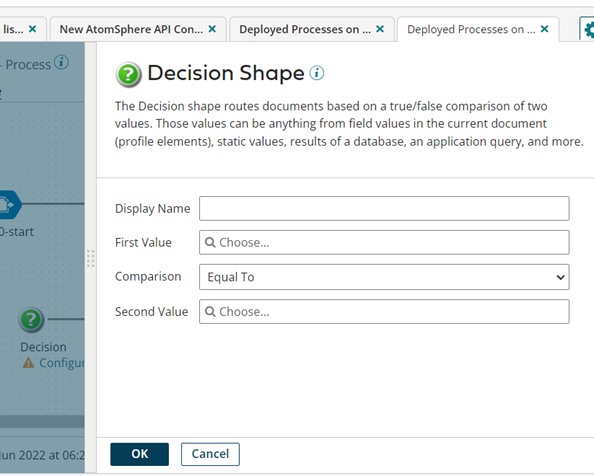
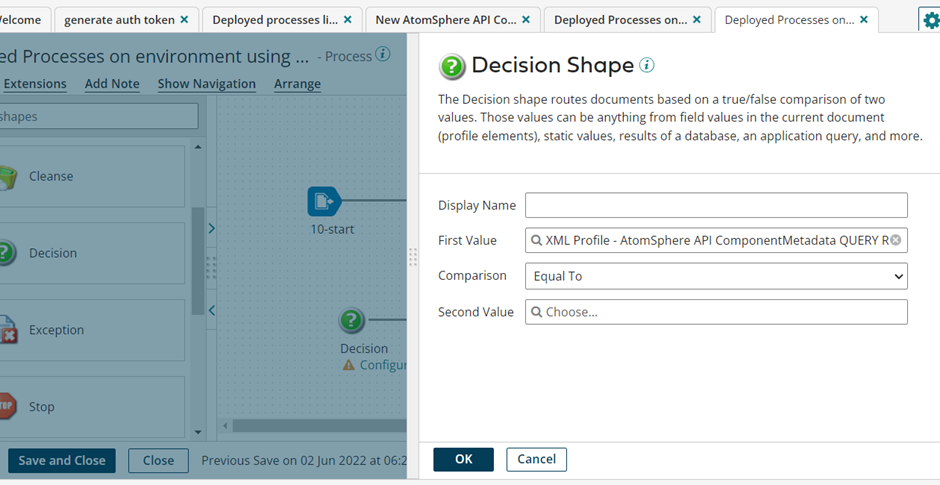
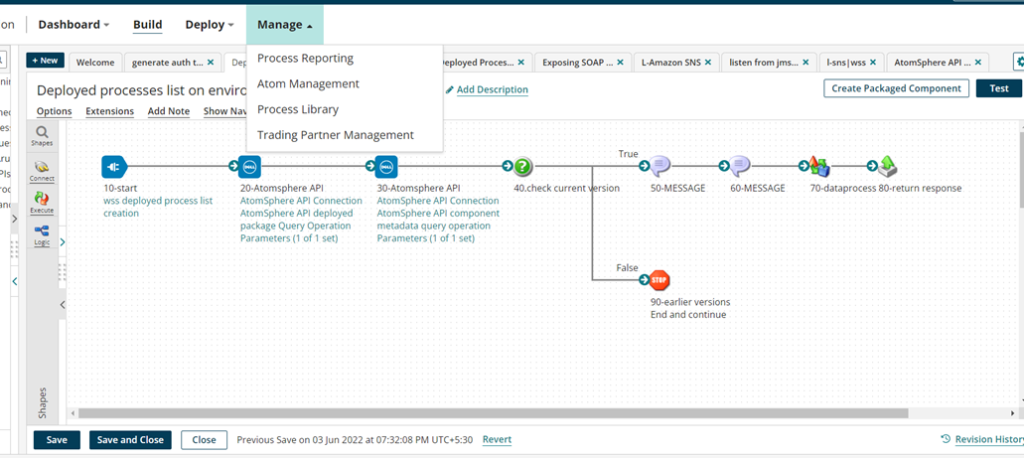
Place the Decision shape on process canvas to check if the current version is ‘true’ as below:
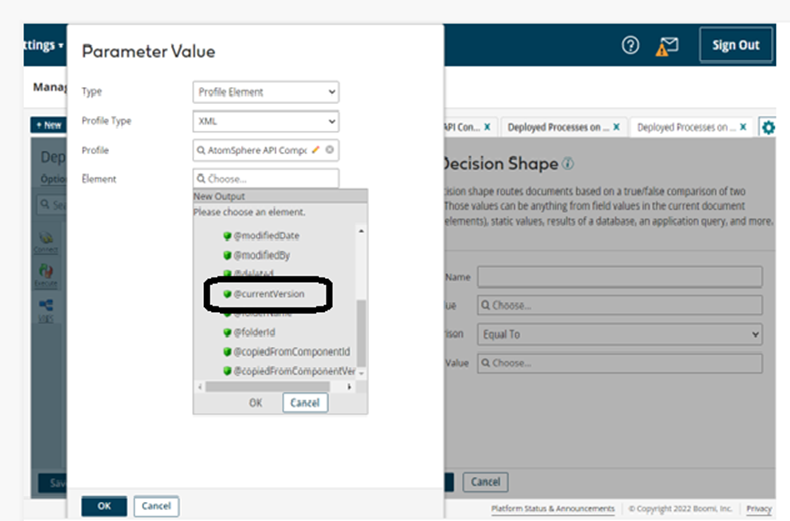
Choose the first value, Parameter value dialog box will open. In that select the type ‘Profile element’ from the dropdown list and choose profile type as XML, then choose the profile as “Atomsphere API ComponentMetadata QUERY Response” and then choose ‘current version’ element from the selected profile and click ok, click ok.
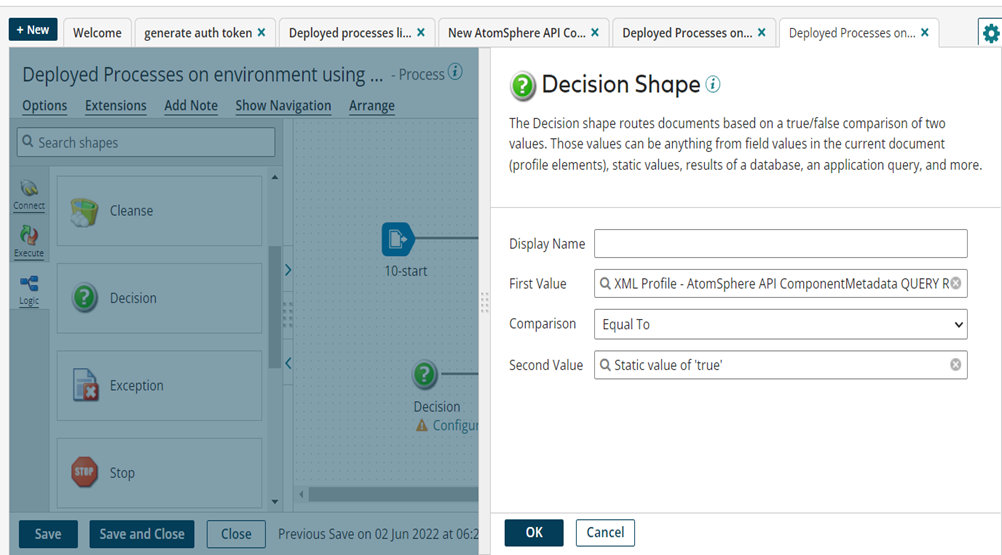
Now choose the Comparison value as ‘Equal To’ from the dropdown list.
Now choose the second value, Parameter dialog box will open. In that select ‘static’ from dropdown list and mention static value as true as shown below. And click on ok
Now click on ok.
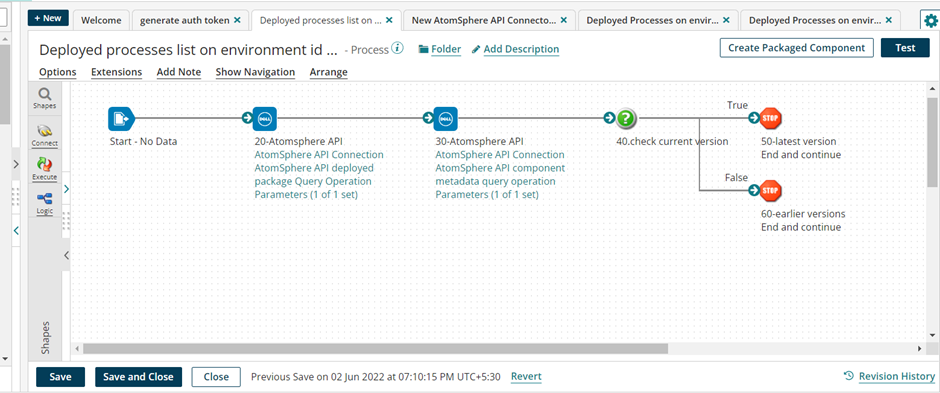
Now place the stop shape at end of true path and false path as shown below and test the process to see the response.
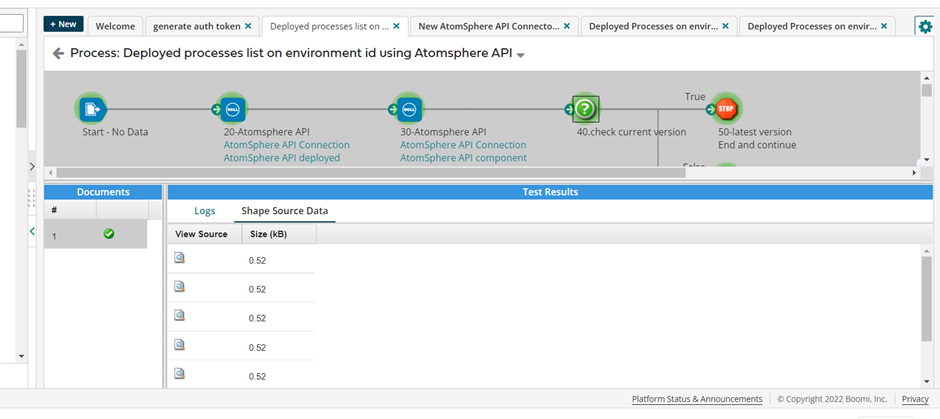
After testing, click on decision shape we get few documents as below.
Now click on the stop shape which is placed at the end of false path. As shown below we got few documents, if we open that document, current version value is ‘false’
Now click on stop shape which is placed at the end of true path as below. Here we got only one document with latest version. Open the document and observe current version
Here, finally we got response as expected.
In this case we have only one process deployed to mentioned environment.
If we have more than one processes deployed to mentioned environment, then we will get all those documents here.
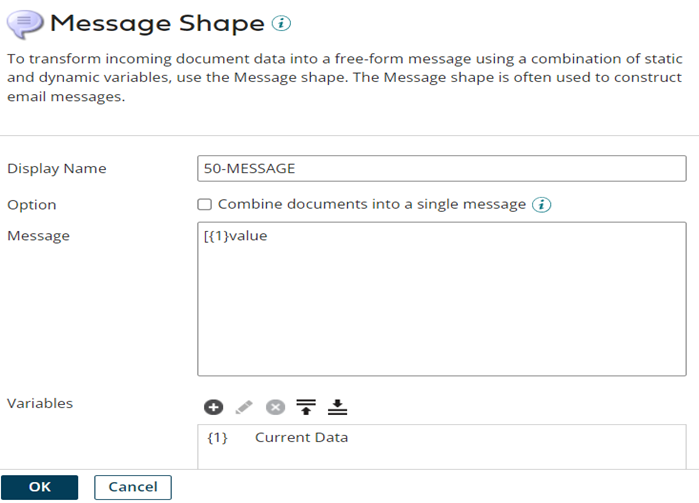
Here based on component id, we are able to fetch Process name. To capture only process name, we have configured message shape as below.
Step13: Place a message shape on the process canvas and configure it as below.
Now place stop shape after message shape and test the process.
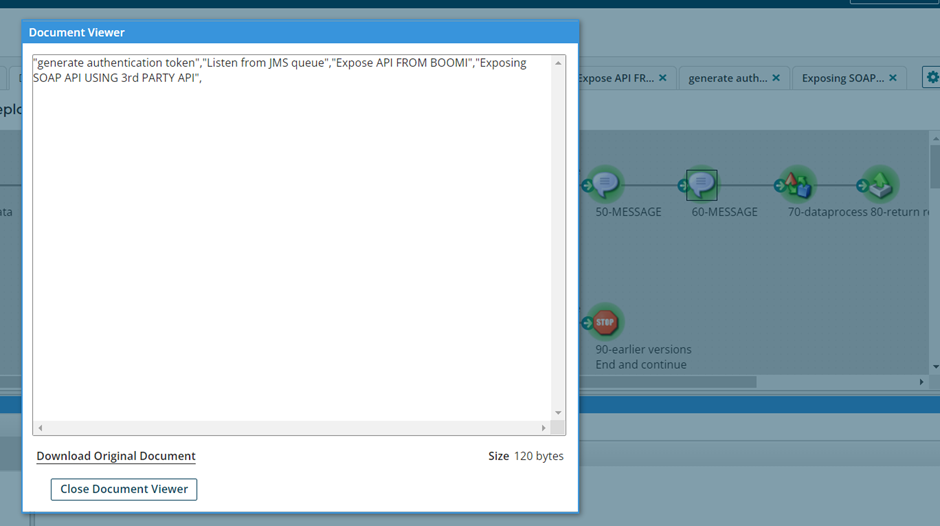
Now click on shape source data and view the document. we will get response as below.
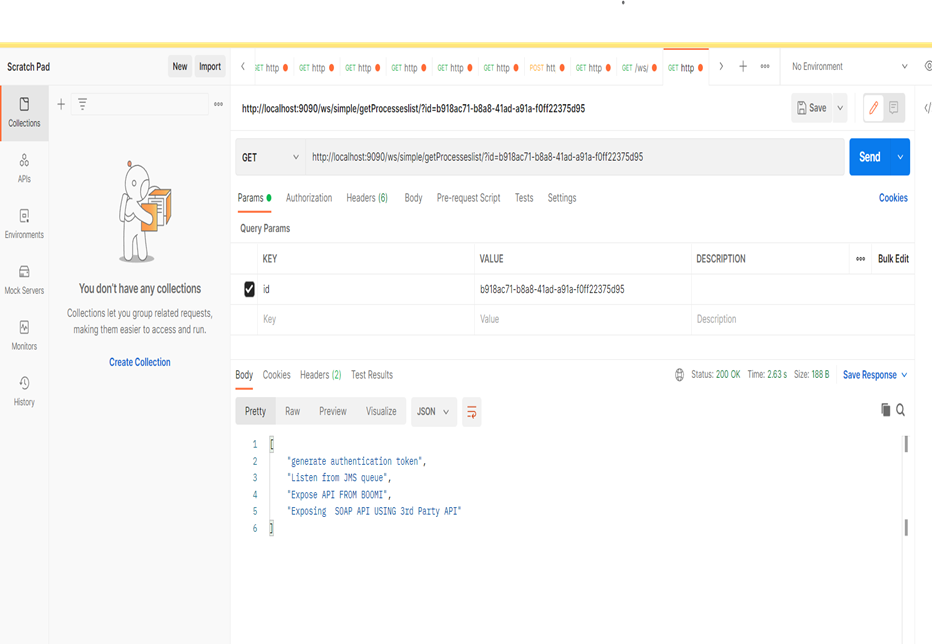
As shown above “generate auth token “is the process name which is deployed to mentioned environment. Now if we have 2 more processes deployed to mentioned environment. If we test now we will get response as below.
here we got 3 process names separated with comma in same line. This is not looking well so we tried to show you process names in separate lines
at the end of process name we have comma, to remove this we are following below steps.
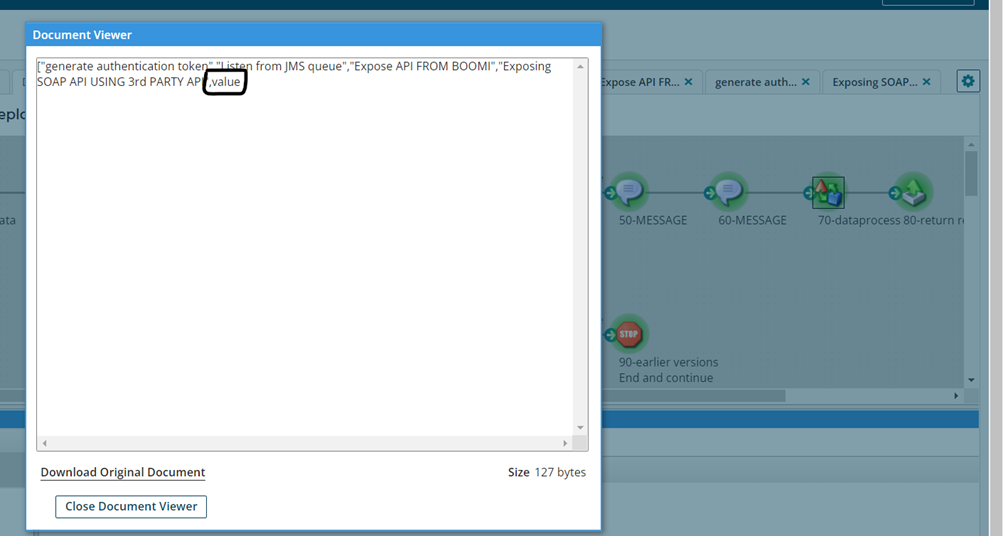
Step14: Place a message shape on the process canvas and configure it as below. Using this message shape and append ‘[‘ before ‘value’ at the end of current data. We will get response as below
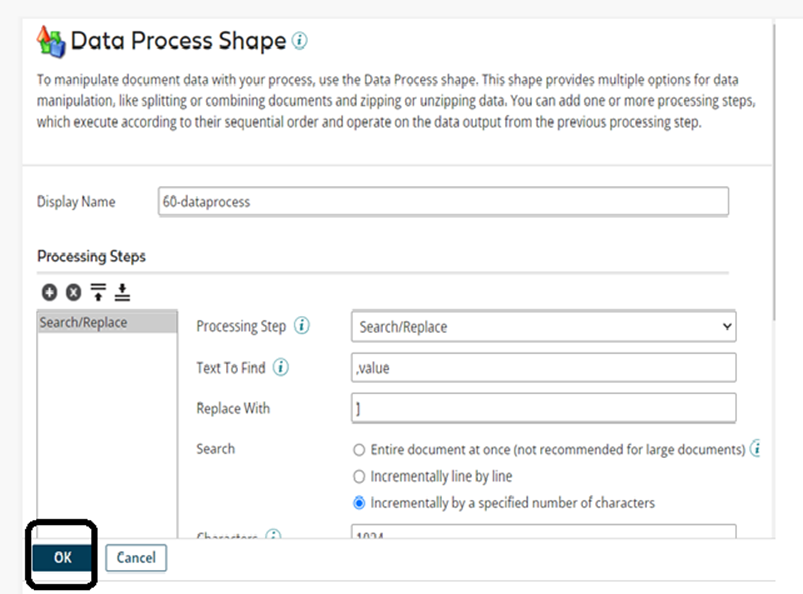
Step15: Place a Dataprocess shape on the process canvas and configure it as below. Using this shape. We are replacing ‘,value’ with ’]’. Click on Ok. And test the process.
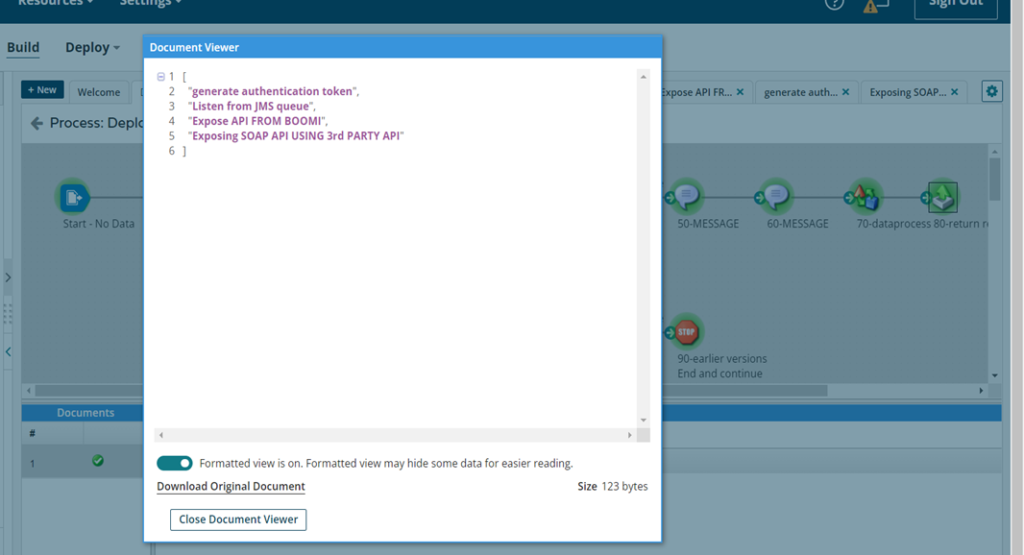
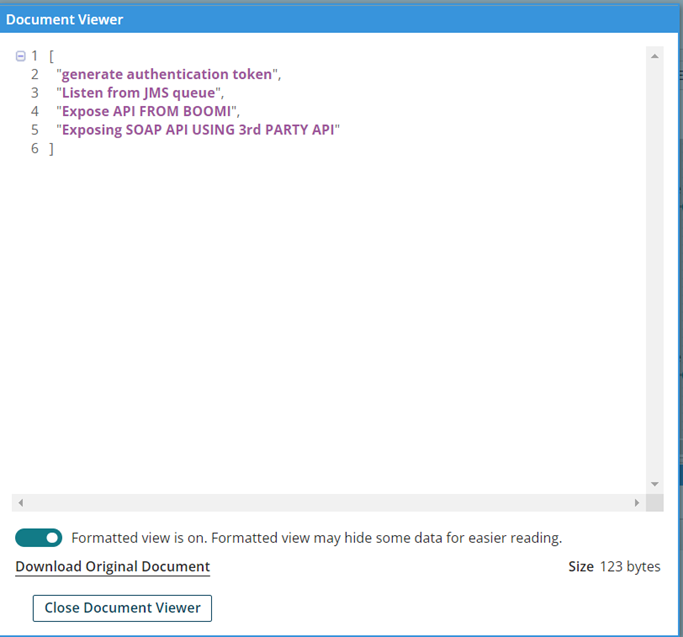
After placing this shape, we will get response as shown below.
See above, This is the response we are expecting. All the processes names which are deployed to mentioned environment, we can see all these in the form of list.
Upto now, to see the response in test mode we have configured start shape with Nodata.
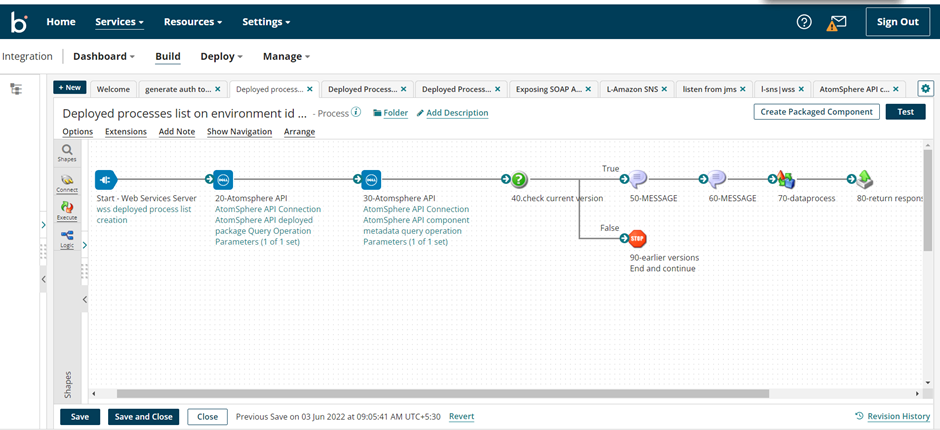
Now configure start shape with web services server connector type and follow steps 5,6.
Step 16: Now drag the Return document shape onto the process canvas and attach it as below to return the response.
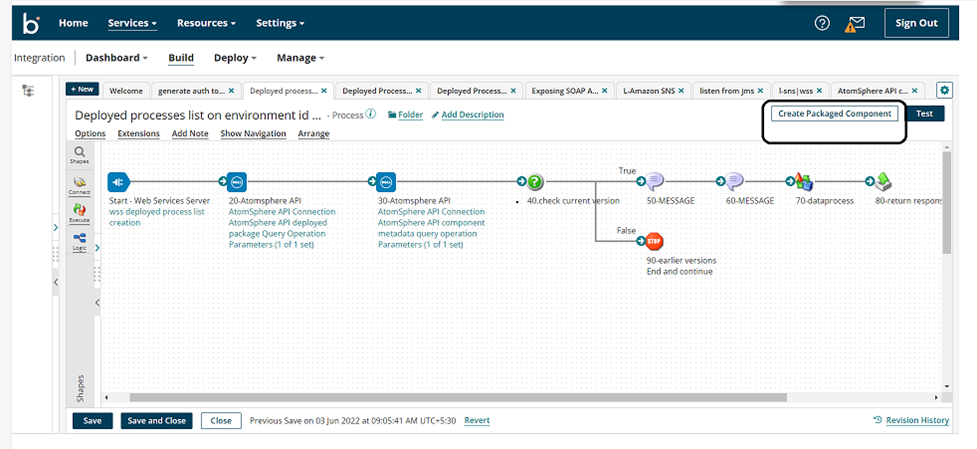
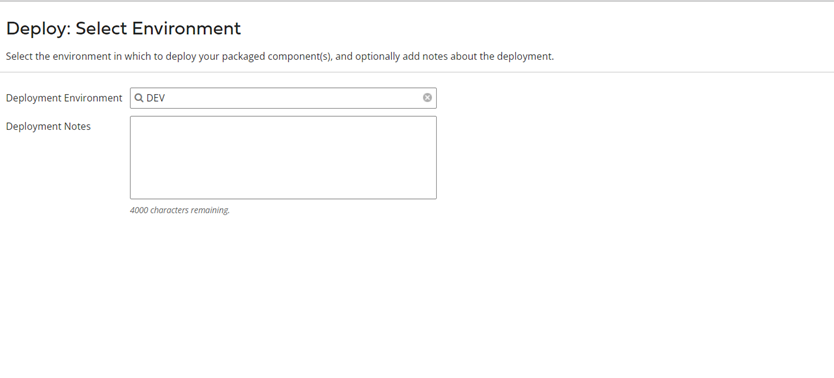
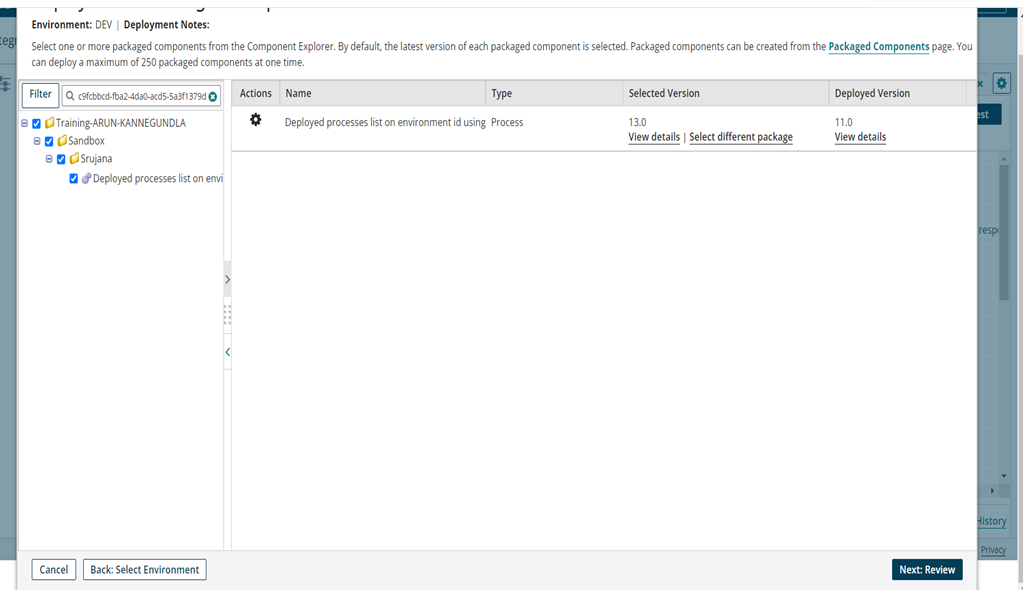
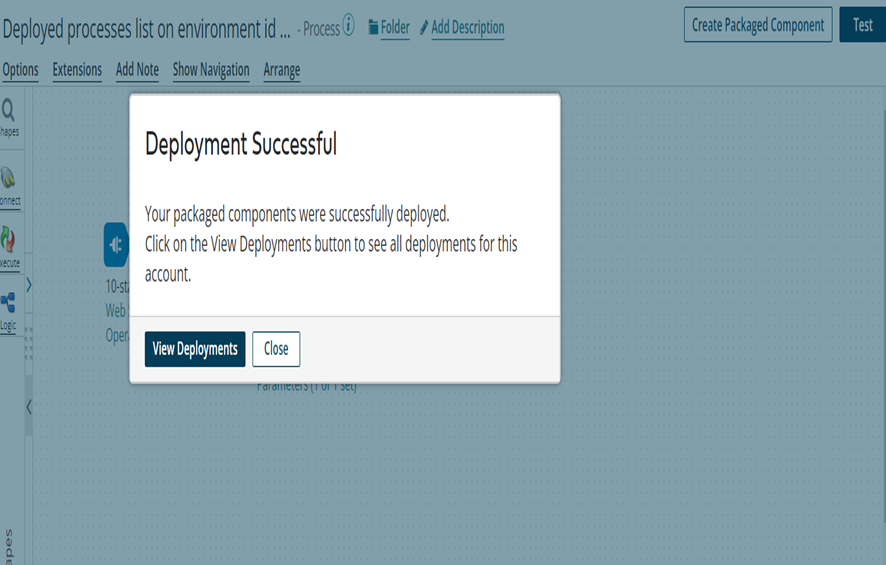
Step 17: Now save the process and click on Create Package Component and Deploy the process.
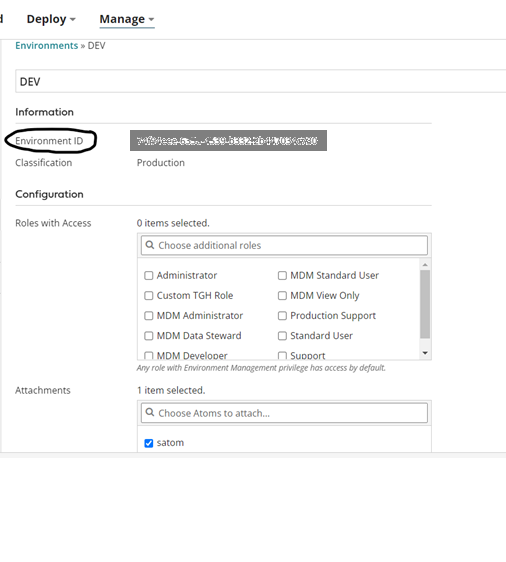
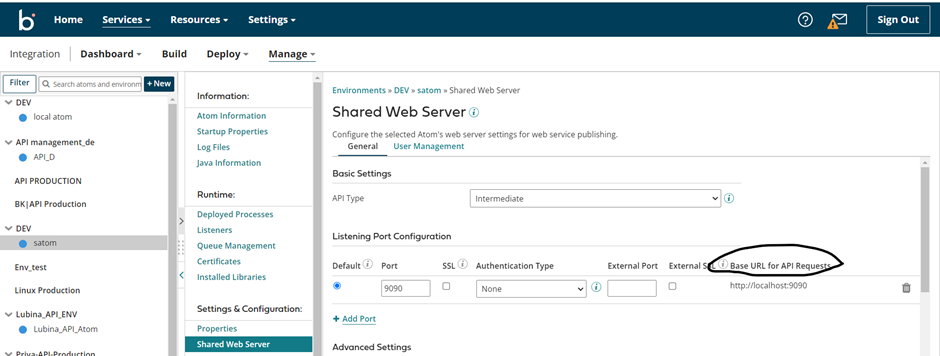
Open POSTMAN, give the operation type and request URL, and query parameter id(environmentid).
Capture environment id from Manage->Atom management-> click on any environment.
Copy this ‘id ‘paste in the Postman URL path as below. It will look as shown below.
This URL contains 2 parts. Base URL and simple path URL. As shown below.