Snowflake Integration with Key Pair Authentication in MuleSoft
Overview: –
- Integrating data warehouses like Snowflake with application integration platforms like MuleSoft is a common requirement in modern data architectures, where security is a top priority. Snowflake, a cloud-based data warehousing platform known for its scalability, security, and performance, requires secure authentication when integrated with MuleSoft to ensure safe data transfer. Traditional username/password authentication, while functional, can pose security risks. Among the recommended authentication mechanisms, Key Pair Authentication stands out as a highly secure method that eliminates the need for password-based authentication. This approach is essential for establishing a robust and secure connection between Snowflake and MuleSoft.
- This blog will guide you through the Key Pair Authentication mechanism for Snowflake and its integration with MuleSoft to establish a secure connection.
What is Snowflake Key Pair Authentication and Its Benefits?
- Key Pair Authentication is a method that uses asymmetric cryptography to authenticate users securely. This involves generating a public-private key pair.
- Snowflake key-pair authentication involves using a private key and a corresponding public key to establish a secure connection. where the public key is registered with Snowflake, and the private key is used to sign authentication requests.
- Instead of sending a password over the network, the client uses the private key to sign a request, which Snowflake verifies using the associated public key.
- Snowflake also supports rotating public keys in an effort to keep data secure and meet compliance standards.
- This authentication method requires, as a minimum, a 2048-bit RSA key pair. You can generate the Privacy Enhanced Mail (PEM) private-public key pair using OpenSSL.
Implementation: –
- Before implementing Key Pair Authentication in MuleSoft, ensure you have the following:
- A Snowflake account with appropriate permissions.
- OpenSSL installed for key generation.
- MuleSoft Anypoint Studio
Configuring key-pair authentication in Snowflake: –
- Generate the Key Pair: you have the option to generate encrypted or unencrypted private keys. Generally, it is safer to generate encrypted keys.
- Open a OpenSSL terminal and run the following commands:
- You can generate either an encrypted version of the private key or an unencrypted version of the private key.
- To generate an unencrypted version, use the following command:
openssl genrsa 2048 | openssl pkcs8 -topk8 -inform PEM -out rsa_key.p8 -nocrypt
- To generate an encrypted version, use the following command:
openssl genrsa 2048 | openssl pkcs8 -topk8 -v2 des3 -inform PEM -out rsa_key.p8
For encrypted version, you have to provide Encryption password.
Here, I’m using encrypted version.

Note: The Above command will generate a private key in PEM format which will be stored generally in local root directory.
2.From the command line, generate the public key by referencing the private key. The following command assumes the private key is encrypted and contained in the file named rsa_key.p8.
- To generate Public key, use the following command:
openssl rsa -in rsa_key.p8 -pubout -out rsa_key.pub
Then, Enter pass phrase for rsa_key.p8

- Open the current directory in the system explorer, where you can find two files named rsa_key.p8 and rsa_key.pub. To open the current directory from command line you can use following command:
explorer .

- Assign the public key to a Snowflake user:
1.Log in to your Snowflake account, navigate to Projects, then click on Worksheets. To create a new SQL worksheet, click on the ‘+’ icon.

2.Run the below command in the command line and Copy the content of the public key, but make sure to exclude the —–BEGIN PUBLIC KEY—– and —–END PUBLIC KEY—– lines
type rsa_key.pub

3.Add the following SQL command in the worksheet, replace username with the username you want to use for key pair authentication and also replace public_ssh_key with encrypted public key which we copied before, and then run the command:
ALTER USER username SET RSA_PUBLIC_KEY=’ public_ssh_key’;
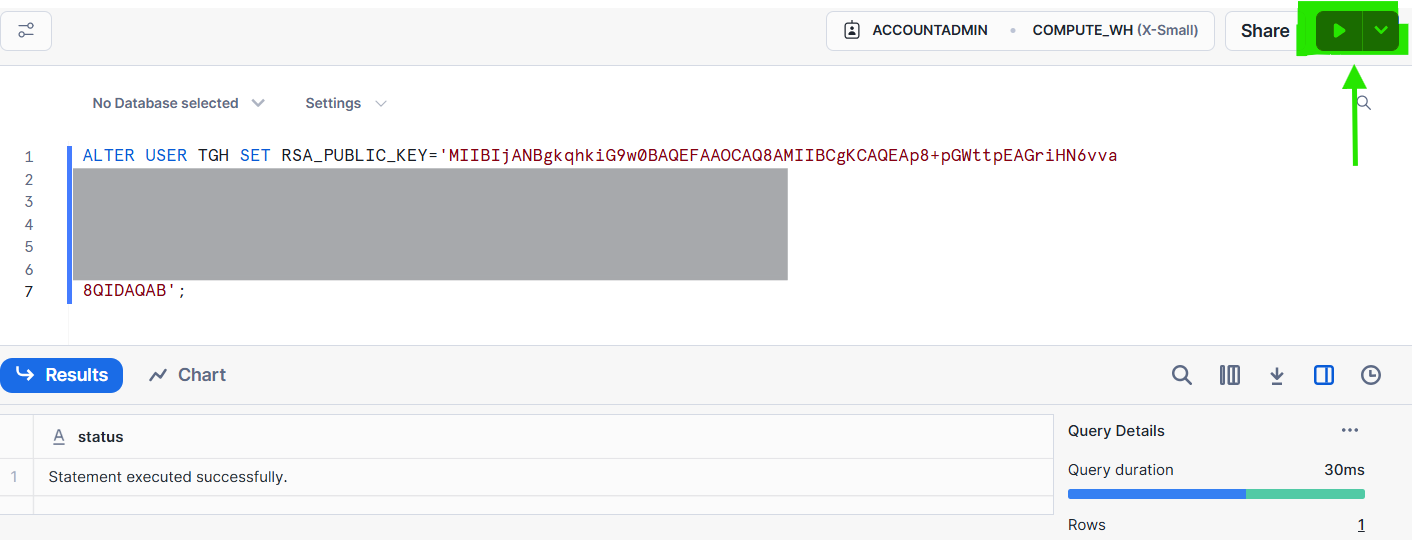
Note: Only owners of a user, or users with the SECURITYADMIN role or higher can alter a user.
4.Execute the following command to retrieve the user’s public key fingerprint. Replace username with the desired username, then copy the output:
DESC USER username;
SELECT SUBSTR((SELECT “value” FROM TABLE(RESULT_SCAN(LAST_QUERY_ID()))
WHERE “property” = ‘RSA_PUBLIC_KEY_FP’), LEN(‘SHA256:’) + 1);

5.Run the following command on the command line:
openssl rsa -pubin -in rsa_key.pub -outform DER | openssl dgst -sha256 -binary | openssl enc -base64 writing RSA key

6.Compare both outputs. If both outputs match, the user correctly configured their public key.
Note: –
-
-
- Snowflake supports multiple active keys to allow for uninterrupted rotation. Rotate and replace your public and private keys based on the expiration schedule you follow internally.
- Currently, you can use the RSA_PUBLIC_KEY and RSA_PUBLIC_KEY_2 parameters for ALTER USER to associate up to 2 public keys with a single user.
-
Snowflake key-pair Configuration in Anypoint Studio:
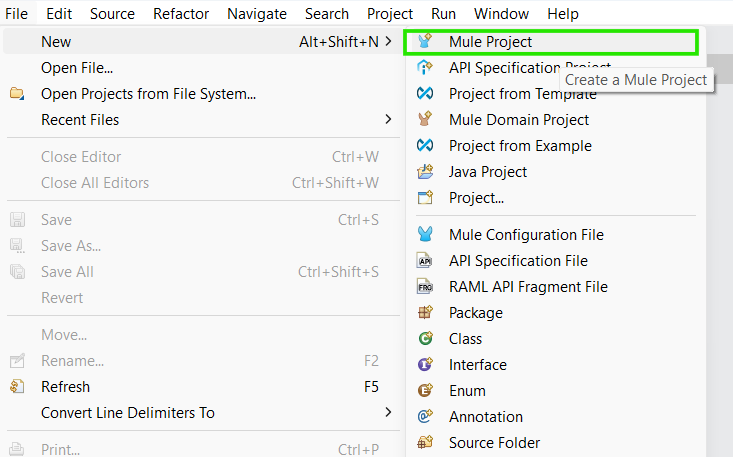
1.Create a new project in Anypoint Studio. To create click on the “File” menu at the top left corner of the window. From the dropdown menu, select “New” and then choose “Mule Project”.
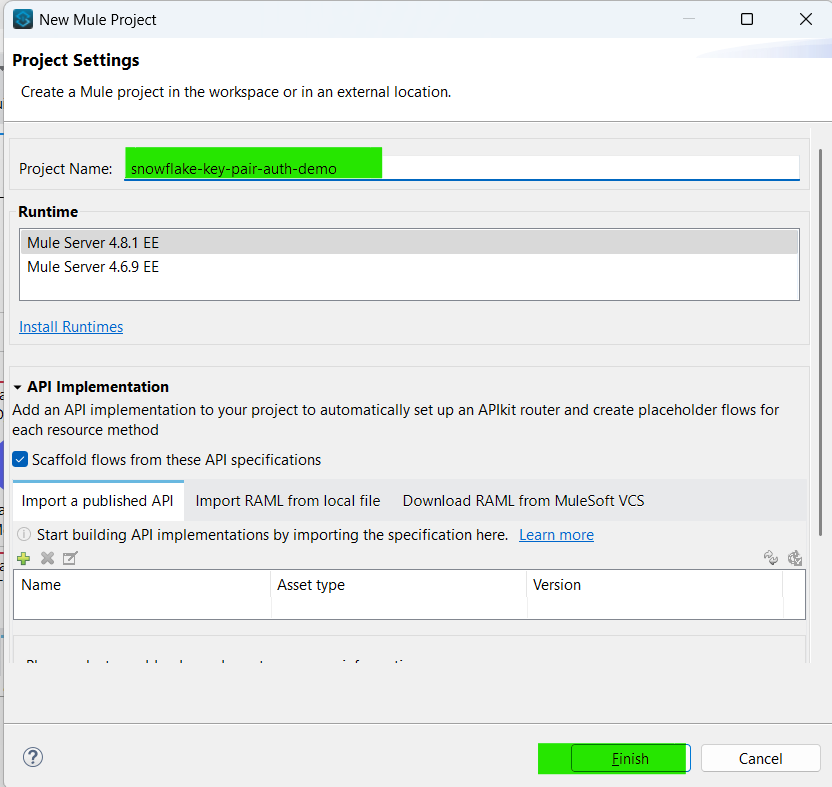
2.A dialog box will appear where you can enter details about your new Mule project. Provide a name for your project in the “Project name” field. And click on finish.
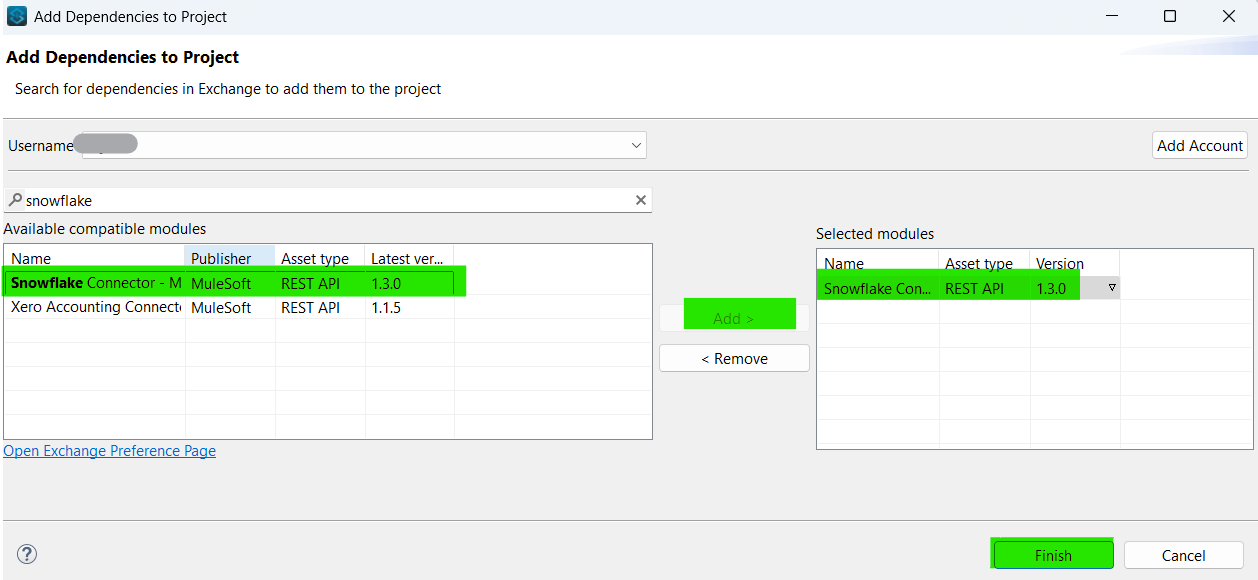
3.Import the snowflake connector module from the Exchange. Click on Search in Exchange in Mule palette > search for the Salesforce composite connector and add it to the selected modules then click on Finish
4.Now click on the global elements in the project file And click on Create.
5.Search for Snowflake_Config and click on it. It will open the snowflake configuration and select connection type as “Key-pair Connection”.
6.Click on Configure…> Add Maven dependency > Add the maven dependency which was given below and click on Finish:
<dependency>
<groupId>net.snowflake</groupId>
<artifactId>snowflake-jdbc</artifactId>
<version>3.14.4</version>
</dependency>
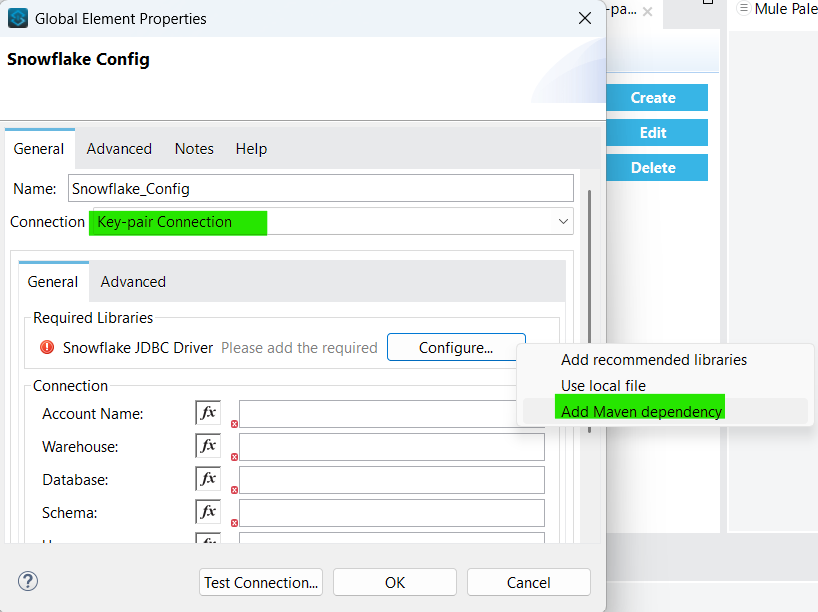
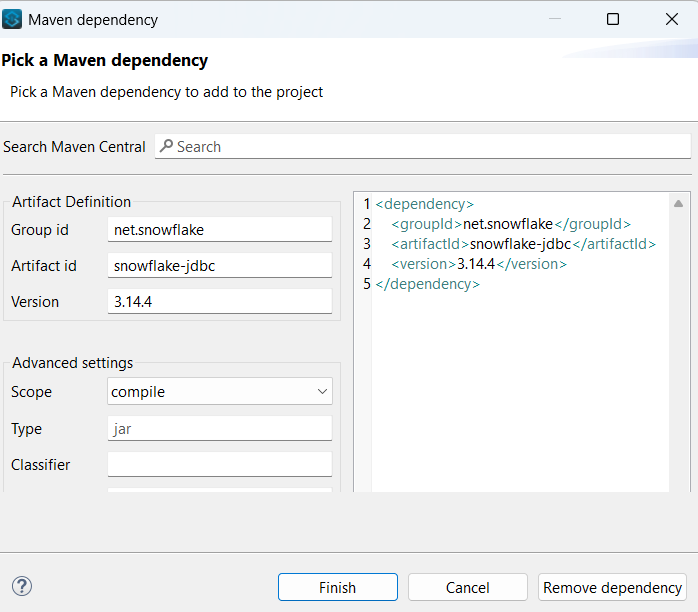
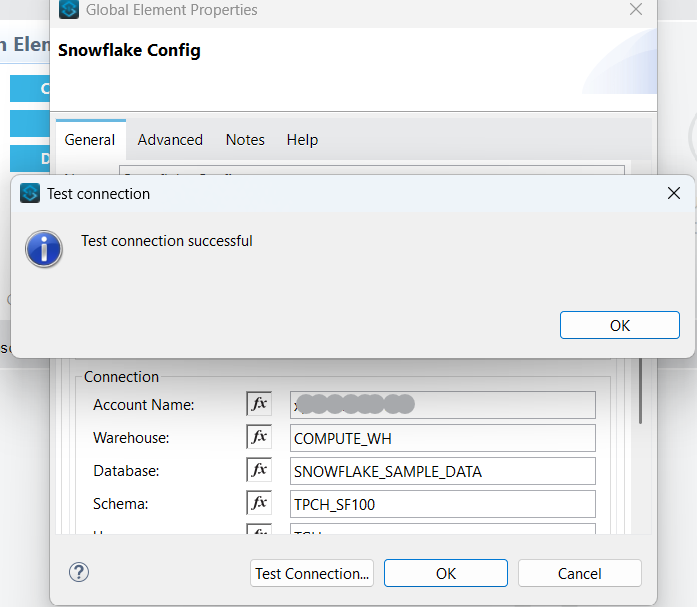
7.Enter all the necessary connection details, including the Account Name, Warehouse, Database, Schema, and Role. For the Private Key file path, provide the path to the rsa_key.p8 file that we created earlier and enter the password that was set for the private key in Private Key password section.
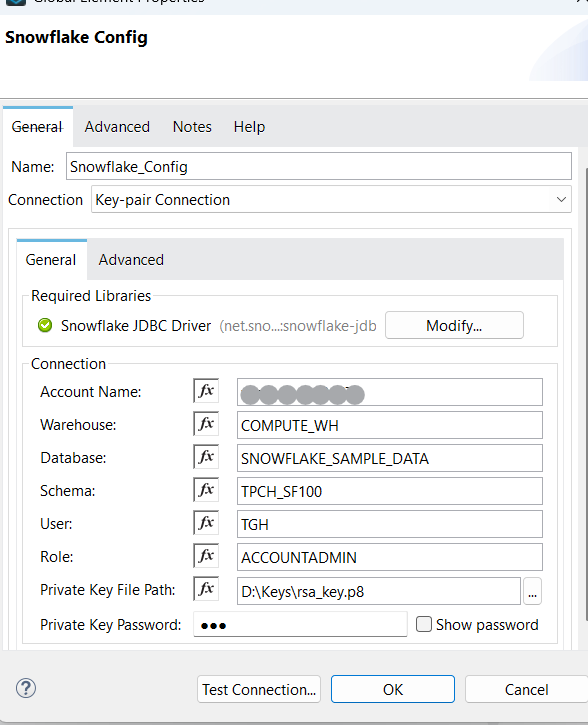
Note: Here, I am using Sample Database and Schema which was provided in Snowflake by default.
8.Click on Test Connection and check for the connection. If the connection was failed recheck the connection details
Usecase Implementation:
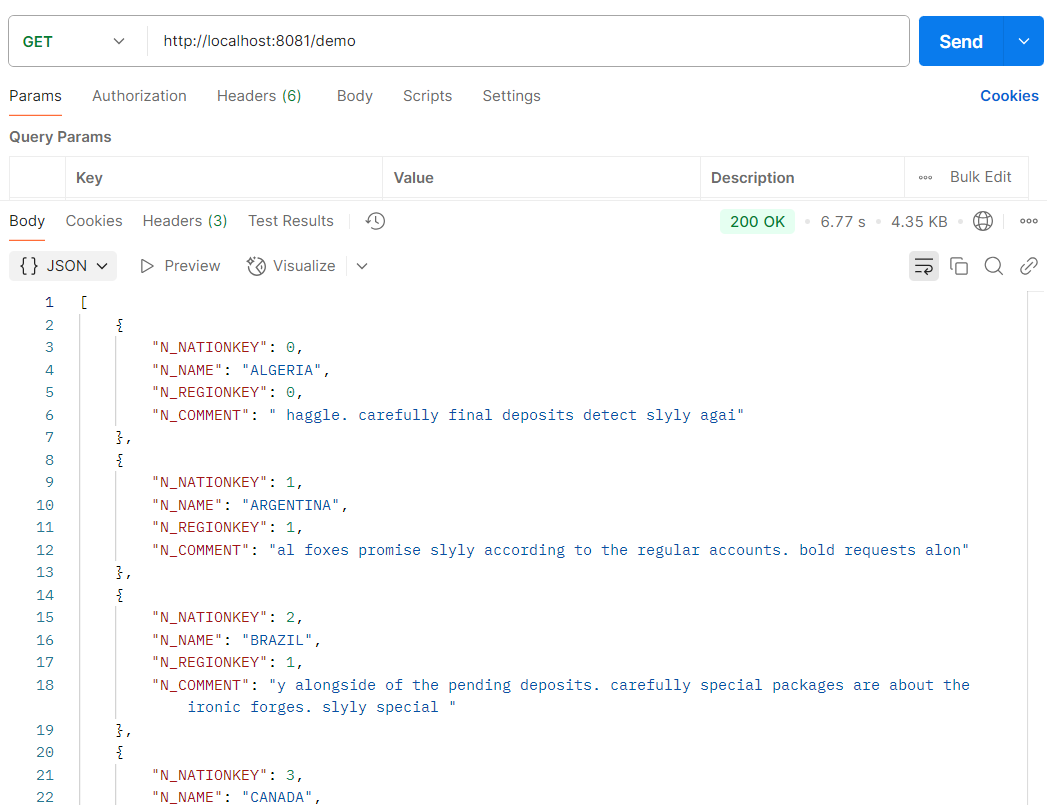
Let’s Implement a small use case to retrieve the data from Nation table from snowflake
9.Drag and drop the HTTP Listener Connector into the project from the HTTP module. Configure the listener, and select protocol as HTTP, set the host to All interface (0.0.0.0), port number as 8081 by clicking on the (+) in Connector configuration.
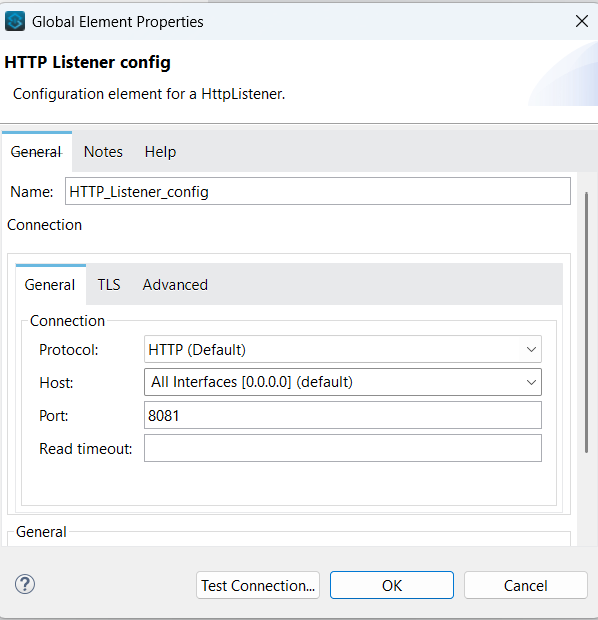
10.Set path for the listener component as ‘demo’

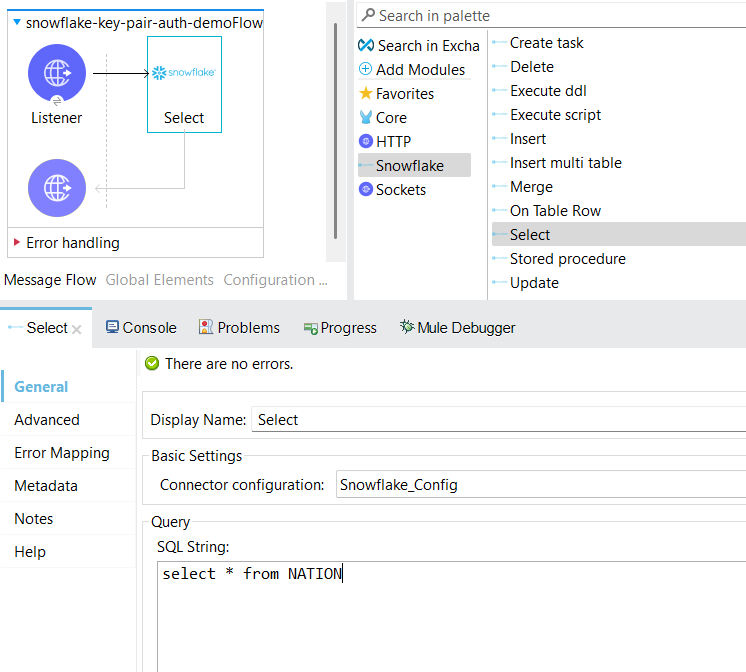
11.Drag and drop select component from the Snowflake module then select snowflake connector configuration that we created before then write a select query.
Here, I am using Nation table which was provided by snowflake by default.
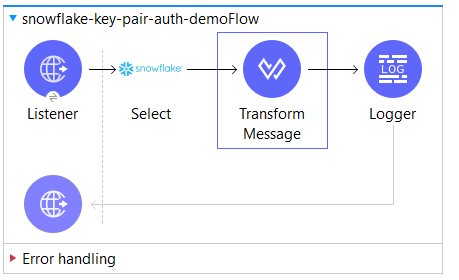
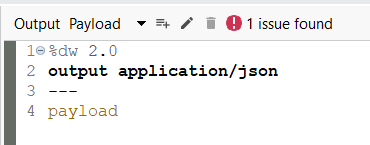
12.Drag and drop the Transform message from the code module, transform the payload to JSON, and add a logger to log the payload.
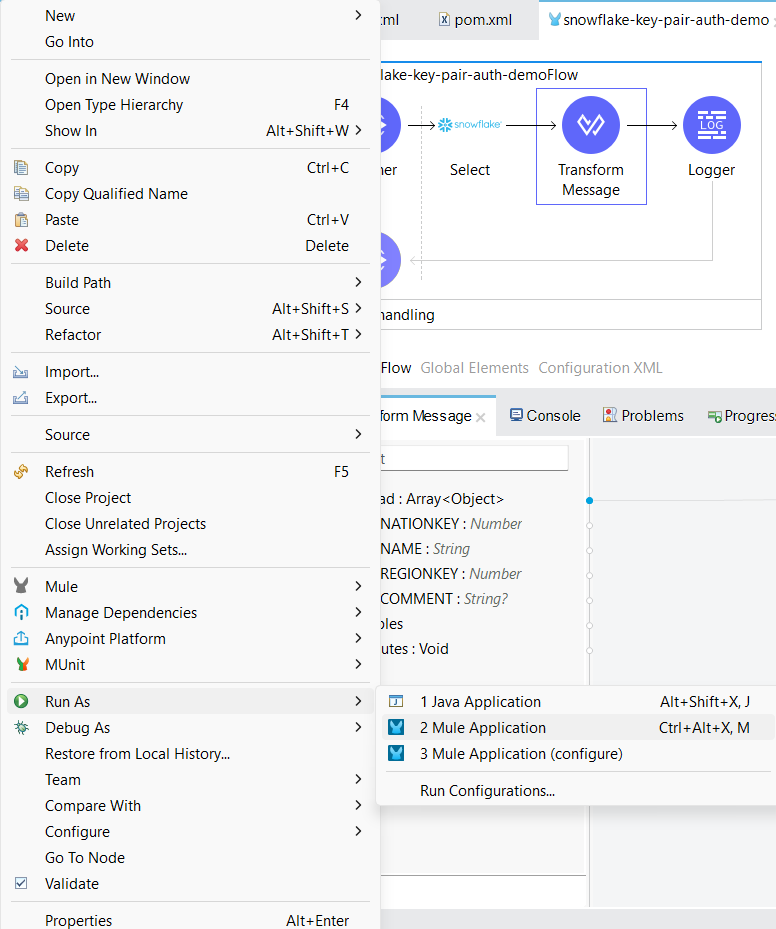
13.Deploy the application, to deploy the application we have right click on the project, go to Run As-> Mule Application
14.After deploying the application, open any testing tool like postman and test the application.
Now, you can check that the data will be retrieved from Nation table.
