JIRA Ticket Creation with MuleSoft
Overview: –
- JIRA, developed by Atlassian, is one of the most widely used tools for project and issue tracking. Integrating JIRA with your enterprise systems enables seamless automation, centralized reporting, and real-time updates.
- MuleSoft offers a JIRA Connector that helps automate JIRA ticket creation, updates, and issue tracking through APIs. In this blog, we’ll explore what JIRA is, the capabilities of the JIRA Connector, how to establish a connection, and a sample implementation for creating JIRA issues using MuleSoft.
What is JIRA?
- JIRA is a project management and issue tracking tool developed by Atlassian. It is widely used by development teams to plan, track, and release software. Key features of JIRA include:
- Issue tracking: Manage bugs, tasks, and stories.
- Custom workflows: Define how issues move through development stages.
- Agile support: Boards for Scrum and Kanban workflows.
- Automation: Rule-based automation for repetitive tasks.
- Integration: Connects with tools like Bitbucket, Confluence, GitHub, and now via MuleSoft.
MuleSoft JIRA Connector: –
- MuleSoft’s JIRA Connector allows developers to interact with JIRA’s REST APIs directly within Mule applications. With this connector, users can:
- Create and update JIRA issues
- Retrieve issue details
- Search for issues using JQL (JIRA Query Language)
- Add comments, attachments, or custom fields
- Automate JIRA workflows across systems
- The JIRA connector simplifies interactions with the JIRA API by providing out-of-the-box operations that reduce manual coding efforts and improve maintainability.
Implementation: –
- Before implementing Jira integration in MuleSoft, ensure you have the following:
- JIRA Account (Here I’m using free trail account)
- MuleSoft Anypoint Studio
Connection Configuration: –
- Sign to the Jira account, click on all projects and click on Create project

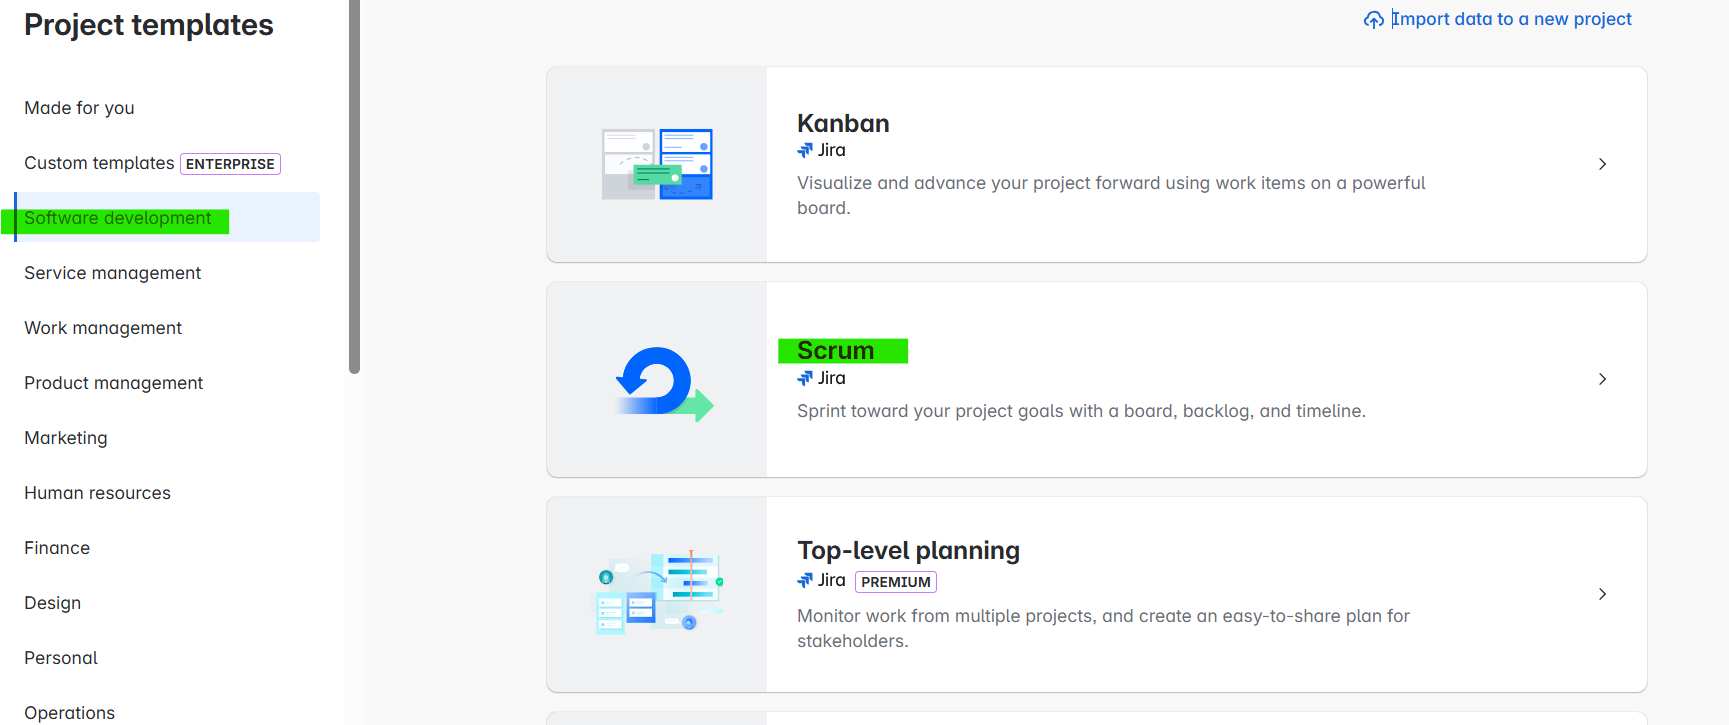
- Navigate to Software development and Select scrum > click on use template

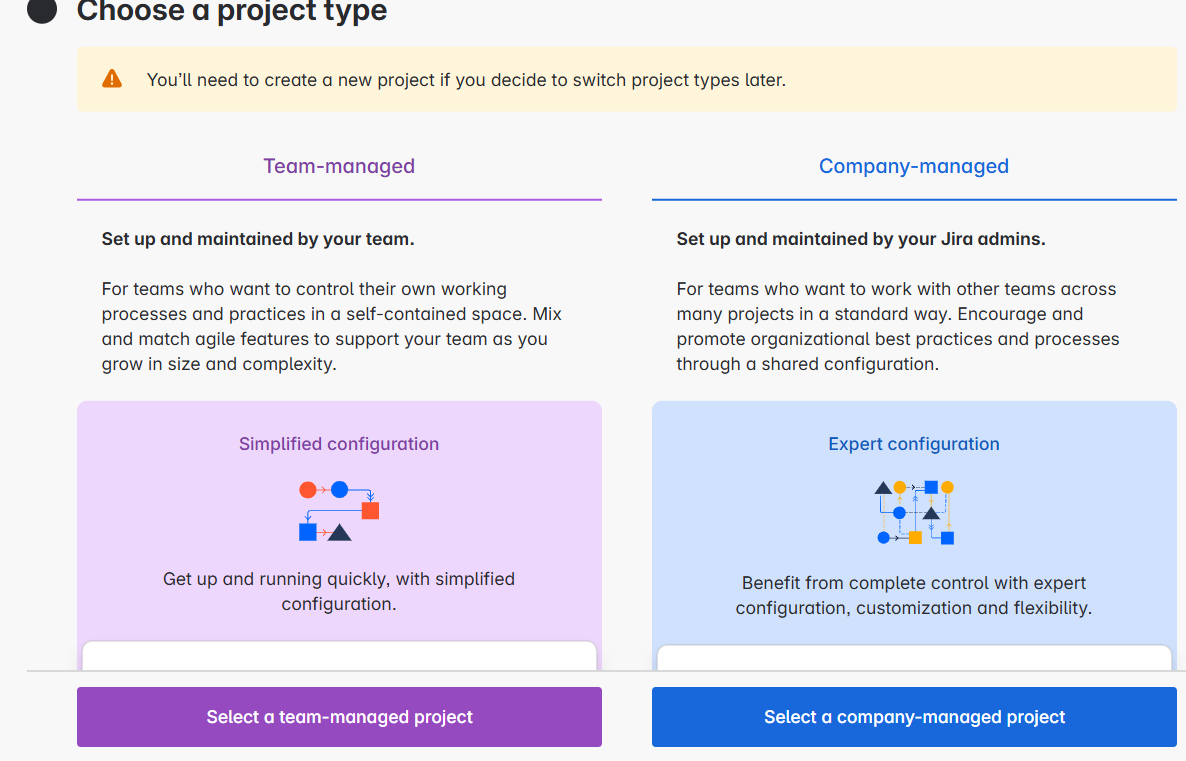
- Select any project type (here I’m selecting Team-managed)
- Add required project details like project name, key, Access and click on then create project
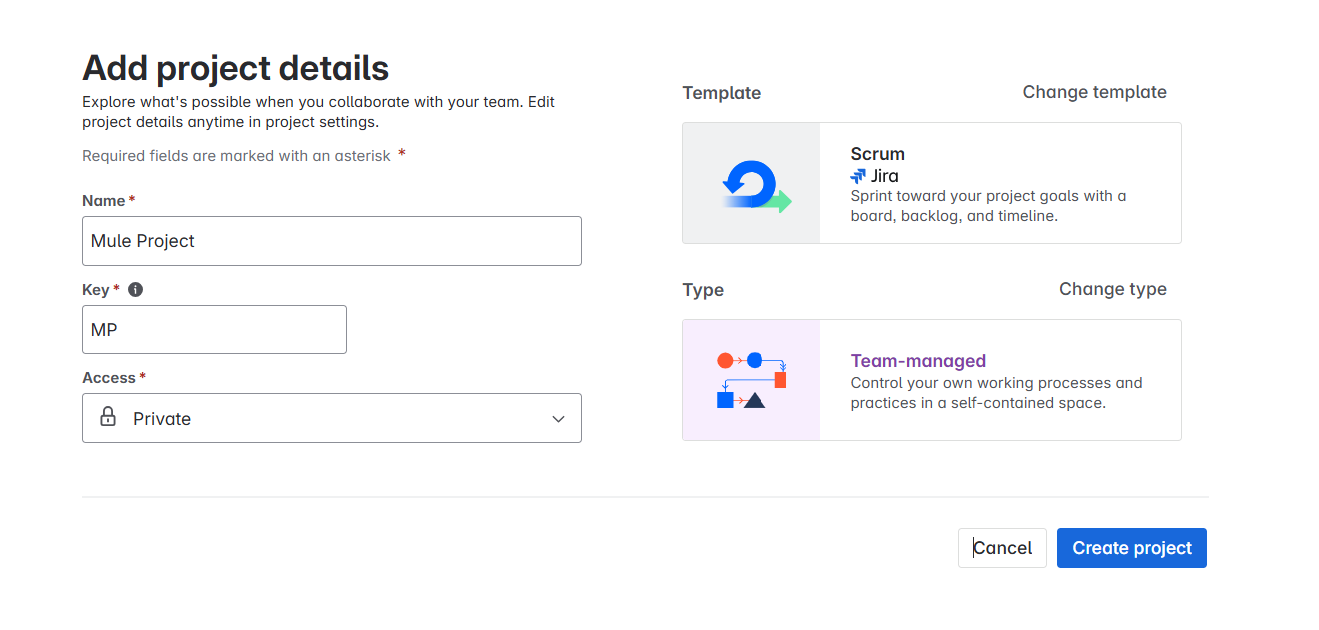
Now that we have successfully created the project, let’s generate an API token to connect Jira with MuleSoft.
- We can use two authentication types to connect with Jira.
- Basic Auth Connection Provider
- Oauth Connection Provider
Here, we are using the Basic Auth connection provider, which requires generating an API token in Jira.
Generate API Token:
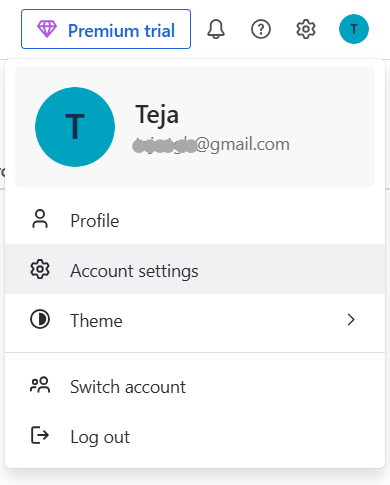
- Click on the profile Icon on the top right corner and click on Account settings
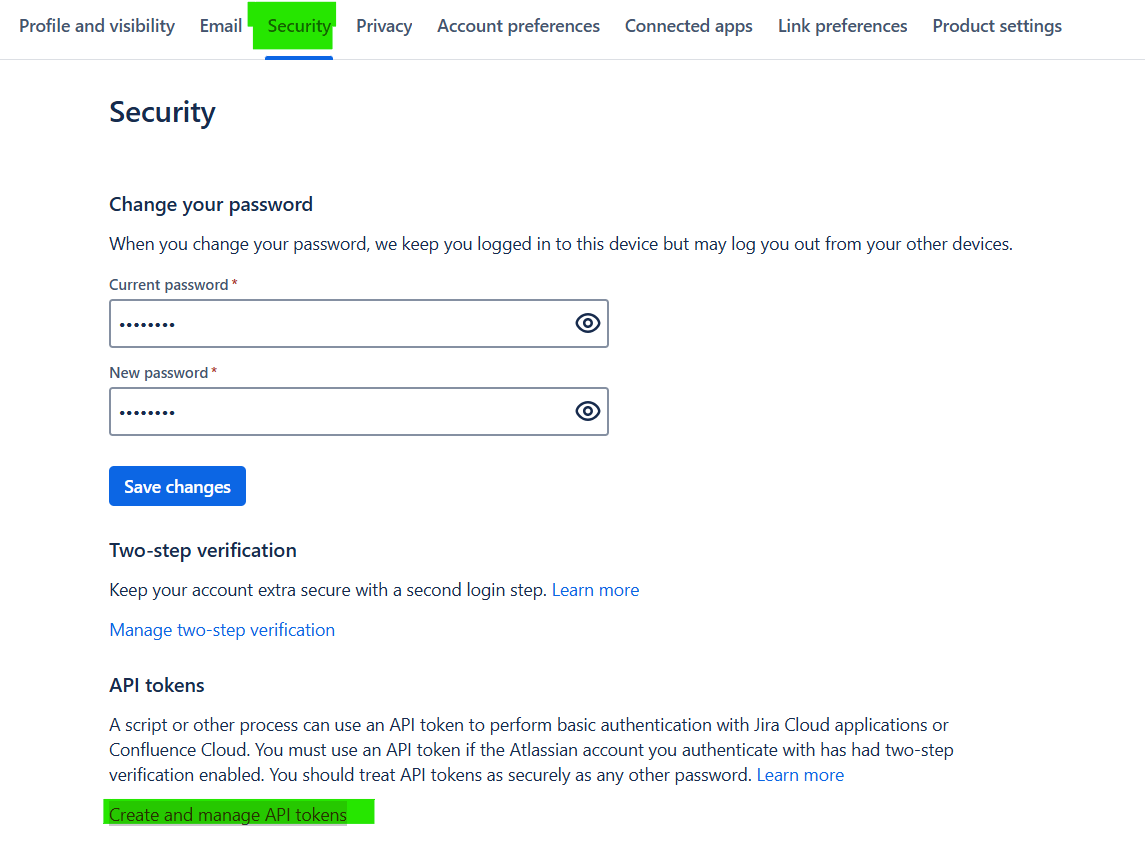
- Navigate to Security and click on Create and manage API tokens
- Verify yourself and then click on Create API Token

- Provide Token Name, expiration date and then Click on create

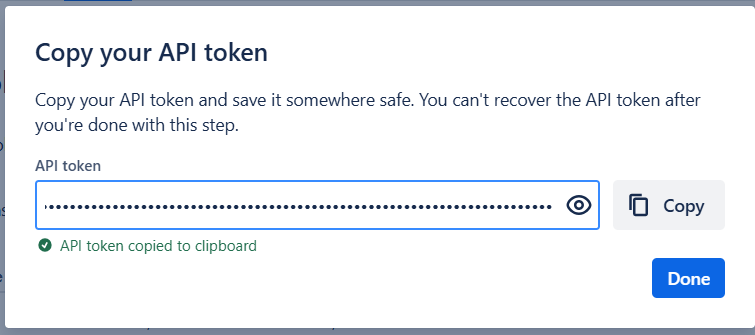
- Copy the API Token and save it for further use
Now that we have successfully created it, let’s go to Anypoint Studio and implement the use case to create a Jira ticket using MuleSoft.
Before implementing the use case, make sure you have the necessary Jira app credentials, such as the Username, API Token, Base URI, and Project Key (provided during project creation).
Jira Connection Configuration in Anypoint Studio:
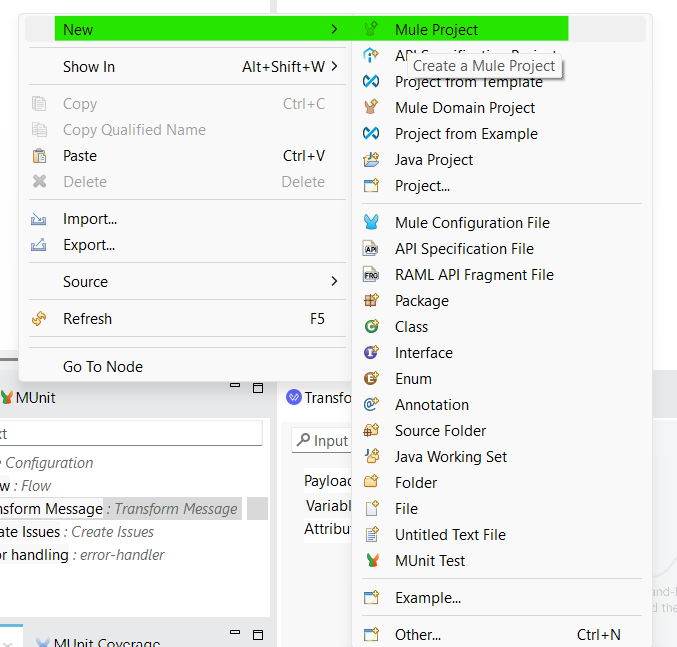
- Create a new project in Anypoint Studio. To create click on the “File” menu at the top left corner of the window. From the dropdown menu, select “New” and then choose “Mule Project”.
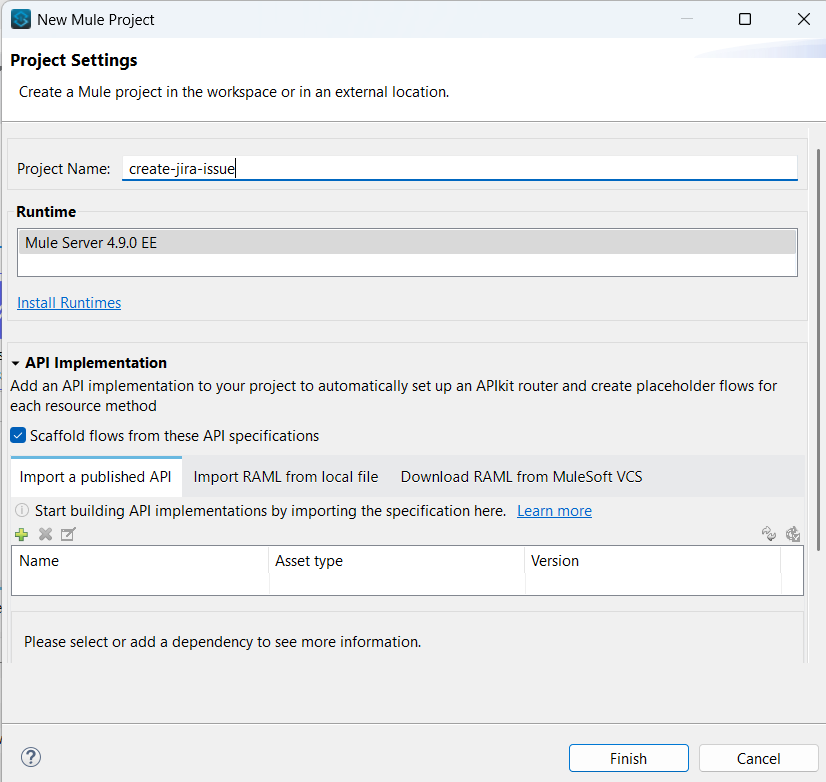
- A dialog box will appear where you can enter details about your new Mule project. Provide a name for your project in the “Project name” field. And click on finish.
- Import the Jira connector module from the Exchange. Click on Search in Exchange in Mule palette > search for the Salesforce composite connector and add it to the selected modules then click on Finish
- Now click on the global elements in the project file and click on Create.
- Search for Jira Connector Config and click on it. It will open the Jira connector configuration and select connection type as “Basic Auth Connection Provider”.
- Provide Username, API Token, Base URI and test connection.
If the connection was failed recheck the connection details
Now that we have successfully connected to Jira, let’s implement the use case to create a Jira ticket using MuleSoft.
Create a Jira ticket using MuleSoft Implementation:
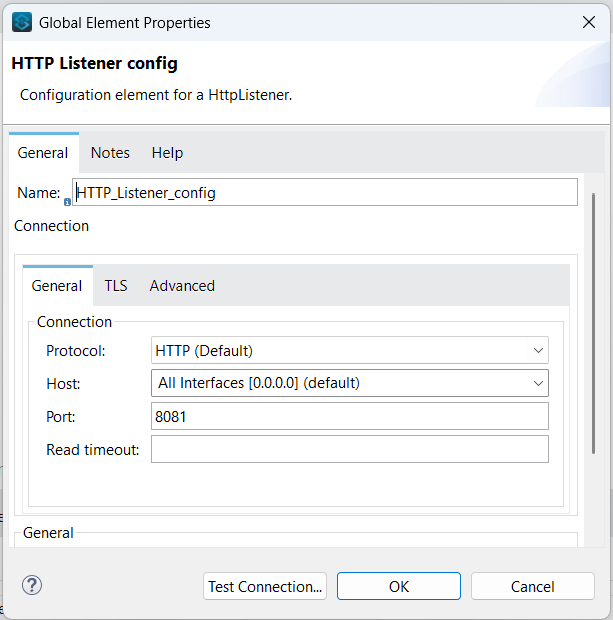
- Drag and drop the HTTP Listener Connector into the project from the HTTP module. Configure the listener, and select protocol as HTTP, set the host to All interface (0.0.0.0), port number as 8081 by clicking on the (+) in Connector configuration.
- Set path for the listener component as ‘/jira/issue’
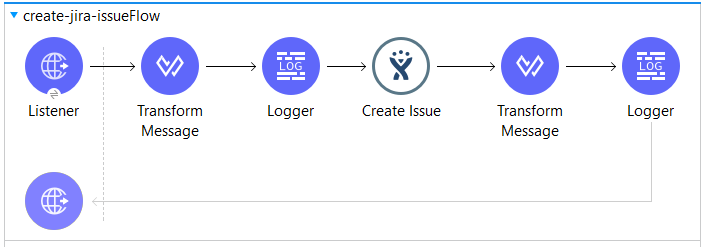
- Drag and drop the Transform message from the code module, transform the payload to JSON with below, and add a logger to log the payload.
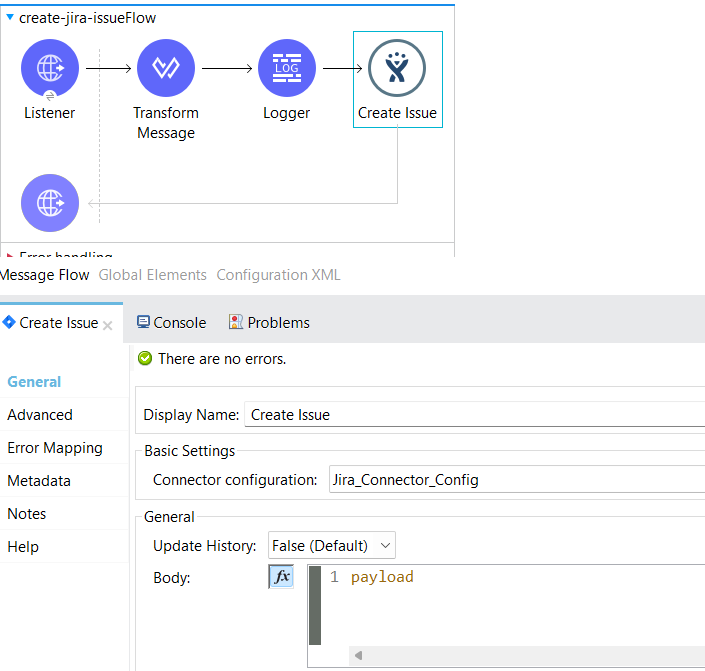
- Drag and drop Create Issues from the Jira Connector module then select connector configuration that we created before.
- Drag and drop the Transform message from the code module, transform the payload to JSON with below, and add a logger to log the payload.
- Deploy the application, to deploy the application we have right click on the project, go to Run As-> Mule Application
- After deploying the application, open any testing tool like postman
- select method as post, and add URL:
Use the Jira issue endpoint below (replace with your actual Jira domain):
https://your-jira-domain.com/issue
Sample Request Body:
{
“fields”: {
“project”: {
“key”: “MP”
},
“summary”: “Creating From Collection”,
“description”: {
“type”: “doc”,
“version”: 1,
“content”: [
{
“type”: “paragraph”,
“content”: [
{
“type”: “text”,
“text”: “This is an autogenerated issue from a demo.”
}
]
}
]
},
“issuetype”: {
“name”: “Task”
}
}
}
Required Fields:
- Project Key: Enter the unique ID of the project where the issue will be created.
- Summary: Add a short title that describes the issue.
- Issue Type: Choose the type of issue (like Bug, Task, or Story).
- Description: Write details about the issue or requirement.
Sample Response:
Here, the key represents the Jira ticket number (e.g., MP-1), while the self-field provides the API URL to access detailed metadata of the Jira ticket in the response.
Since the ticket is being created from MuleSoft, you can view the newly created ticket in the Jira project’s backlog.
Ready to streamline your workflows with smart integrations? Connect with TGH’s MuleSoft experts to automate JIRA processes and accelerate your digital operations. Get in touch with us today!


