SYNCHRONIZING DATA BETWEEN SALESFORCE AND SNOWFLAKE
In this document, we are going to see how to Integrate between Salesforce and Snowflake through Celigo.
What is Salesforce?
Salesforce is a cloud computing service as a software (SaaS) company that specializes in customer relationship management (CRM)
What is Snowflake?
Snowflake is a cloud computing-based data cloud that provides a data warehouse-as-a-service designed for the cloud
Here we will see how to synchronize data from Salesforce to Snowflake by using Celigo.
Steps to establish connectivity between Salesforce, Snowflake and Celigo.
Step 1: –
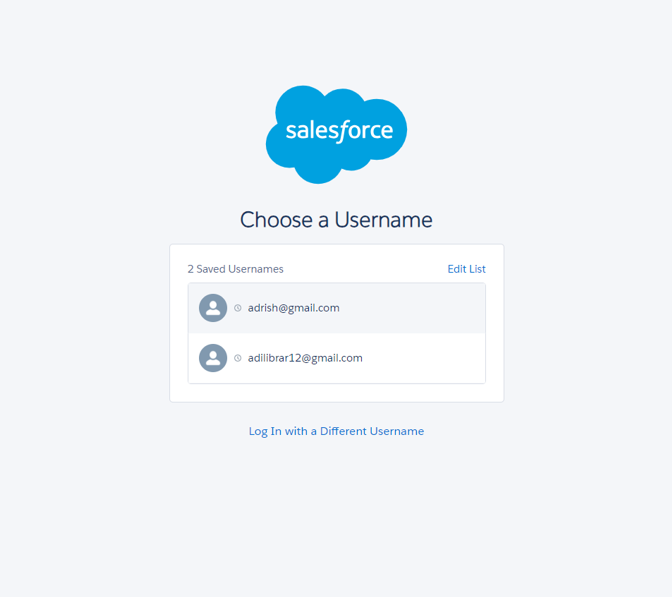
Navigate to the salesforce portal using the URL https://login.salesforce.com. If you already have Salesforce login details, use those details for login otherwise you need to sign up for Salesforce.
Step 2: –
Once we login into Salesforce we need to generate a security token which we will use as a password.
• If you have a regular Salesforce account go to setup>My personal Information > Reset
Security Token.
• If you have a salesforce developer account from the home page, go to Manage
Users> Click your name > Change Password > Reset Security Token.
• We will Receive security tokens in the mail.

Step 3: –
Navigate to the Snowflake portal using the URL https://www.snowflake.com. If you already have Snowflake login details, use those details for login otherwise you need to sign up for Snowflake.
Step 4: –
Start a free trial and fill in the required credentials.
Step 5: –
Select the Snowflake Editon as Enterprise and the cloud provider as AWS as per the below image.
Step 6: –
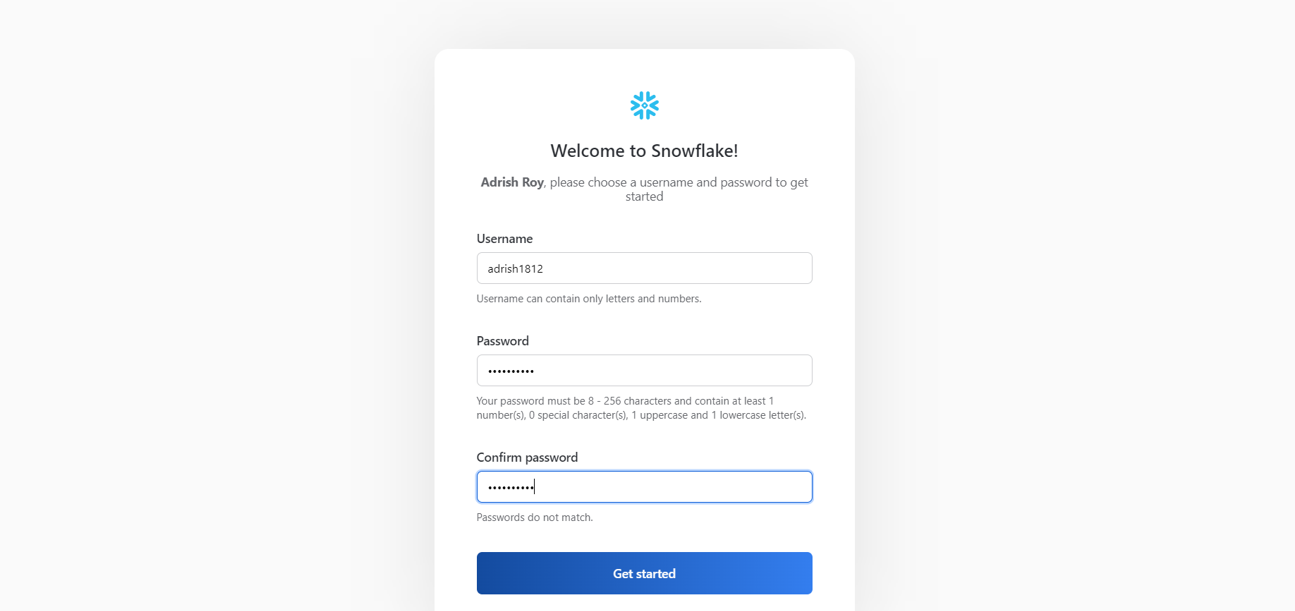
Activate link will be sent to your mail and activate the account by cling the link provided in the mail after that, you need to provide a password. and hit get started.
Step 7: –
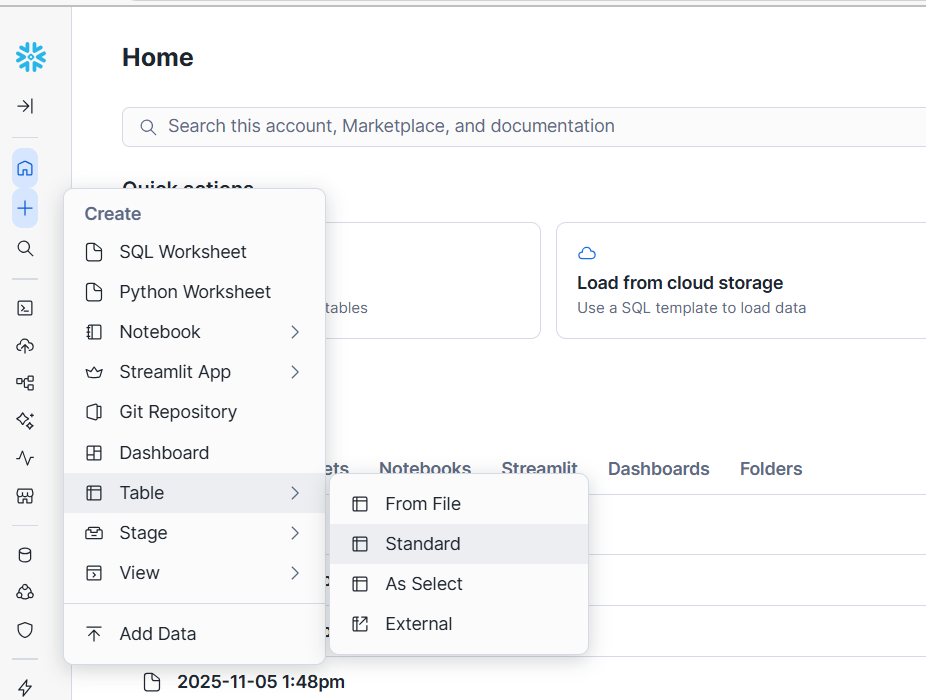
Clicking on + and Table and select Standard.
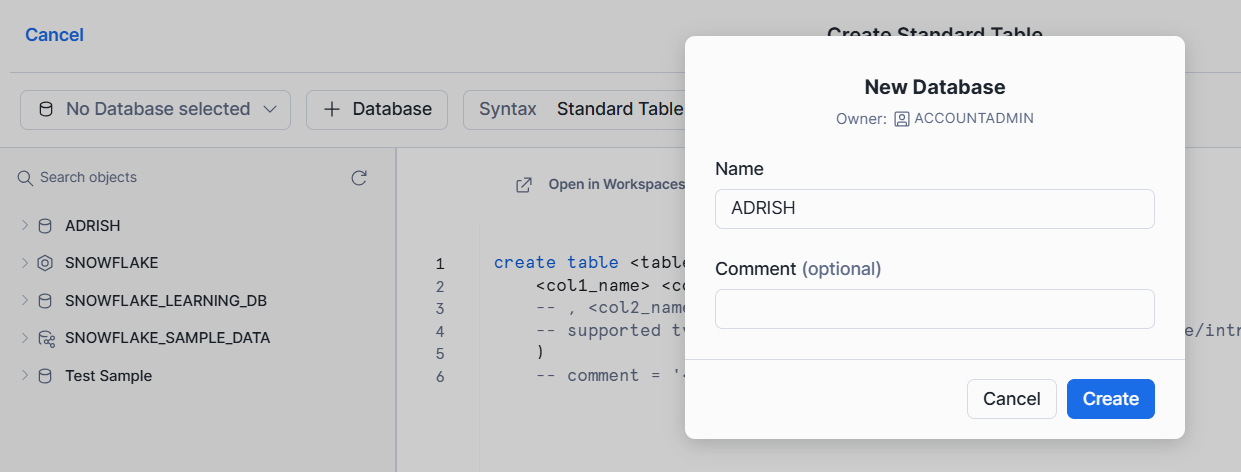
Step 8: –
Now, by clicking on +Database and providing the name of the Database and hitting create.
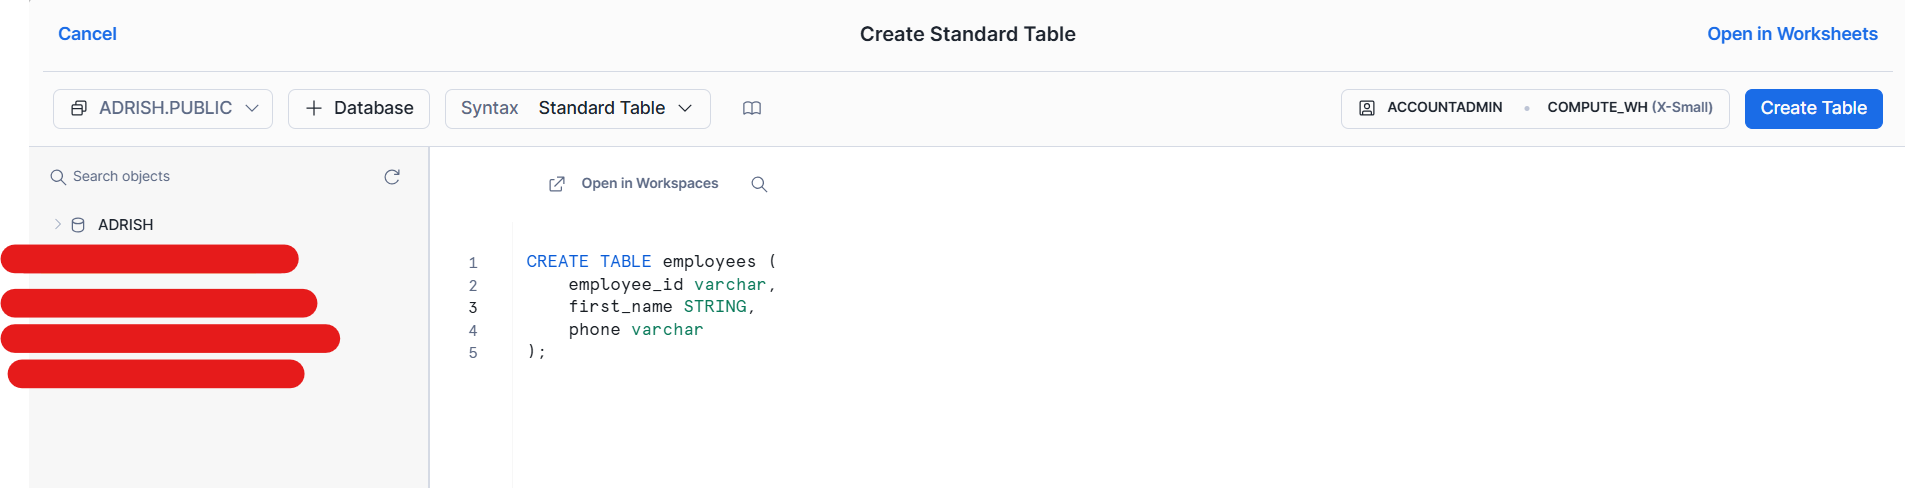
Step 9: –
Select the database and create a Table with the following syntax. Write the syntax of creating a Table. Add the column name and type of Column (Number / Varchar /Boolean / Date &Time) and click Create Table
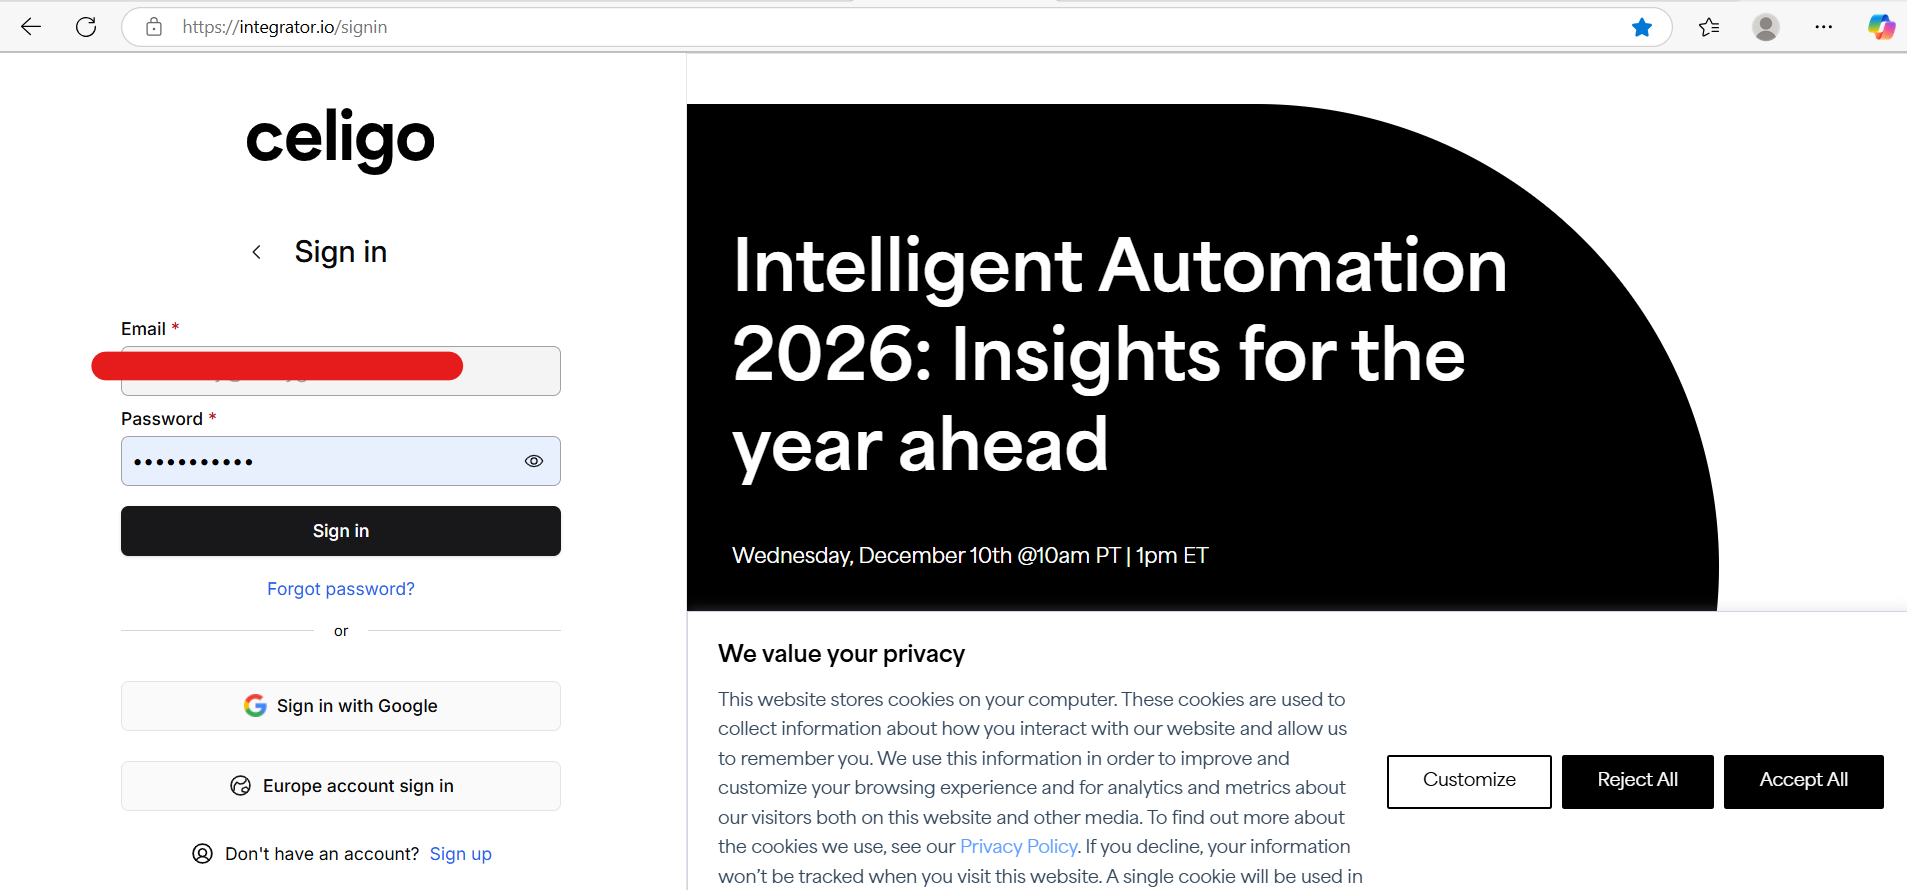
Step 10: –
Now, log onto the Celigo platform https://integrator.io/signin with the required credentials i.e. Email Address and Password.
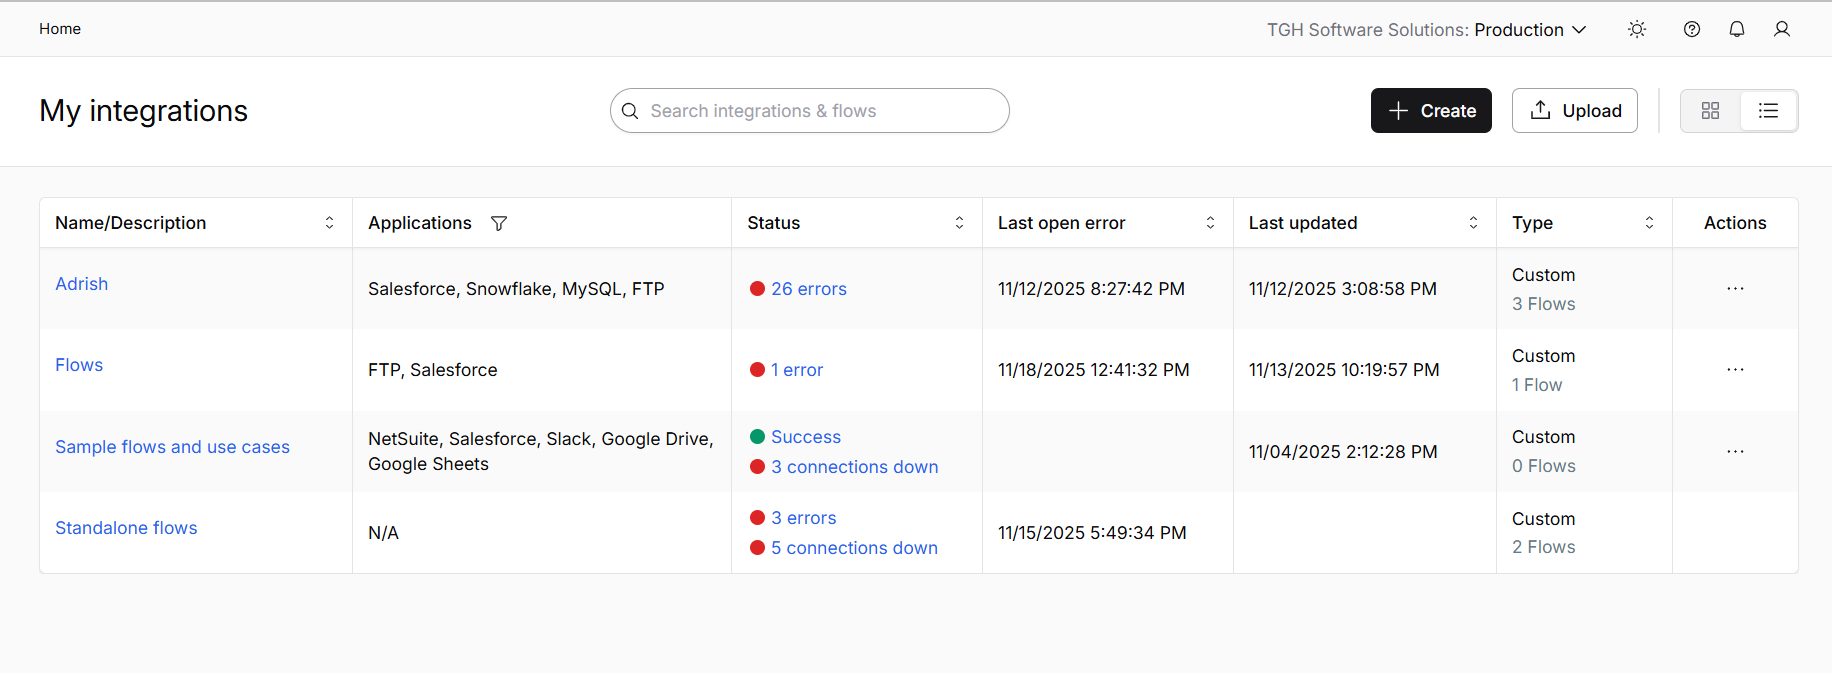
Step 11: –
Once you have logged into the Celigo platform, you will be able to view the Home page.

Step 12: –
Now, click on +Create (Top Right).
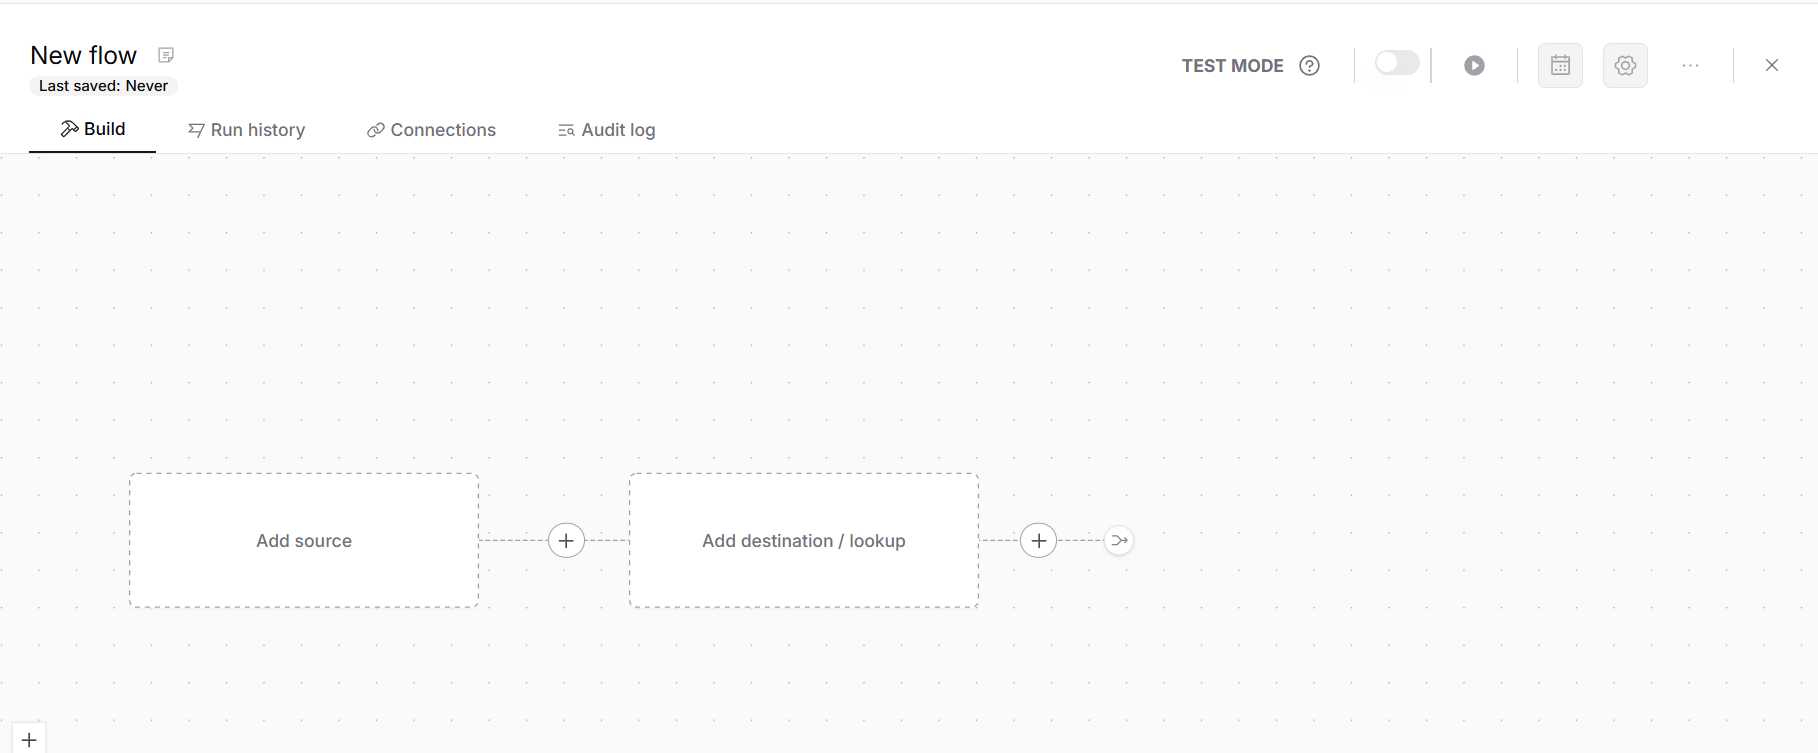
Step 13: –
Once you clicked create, you will be able to create a flow.
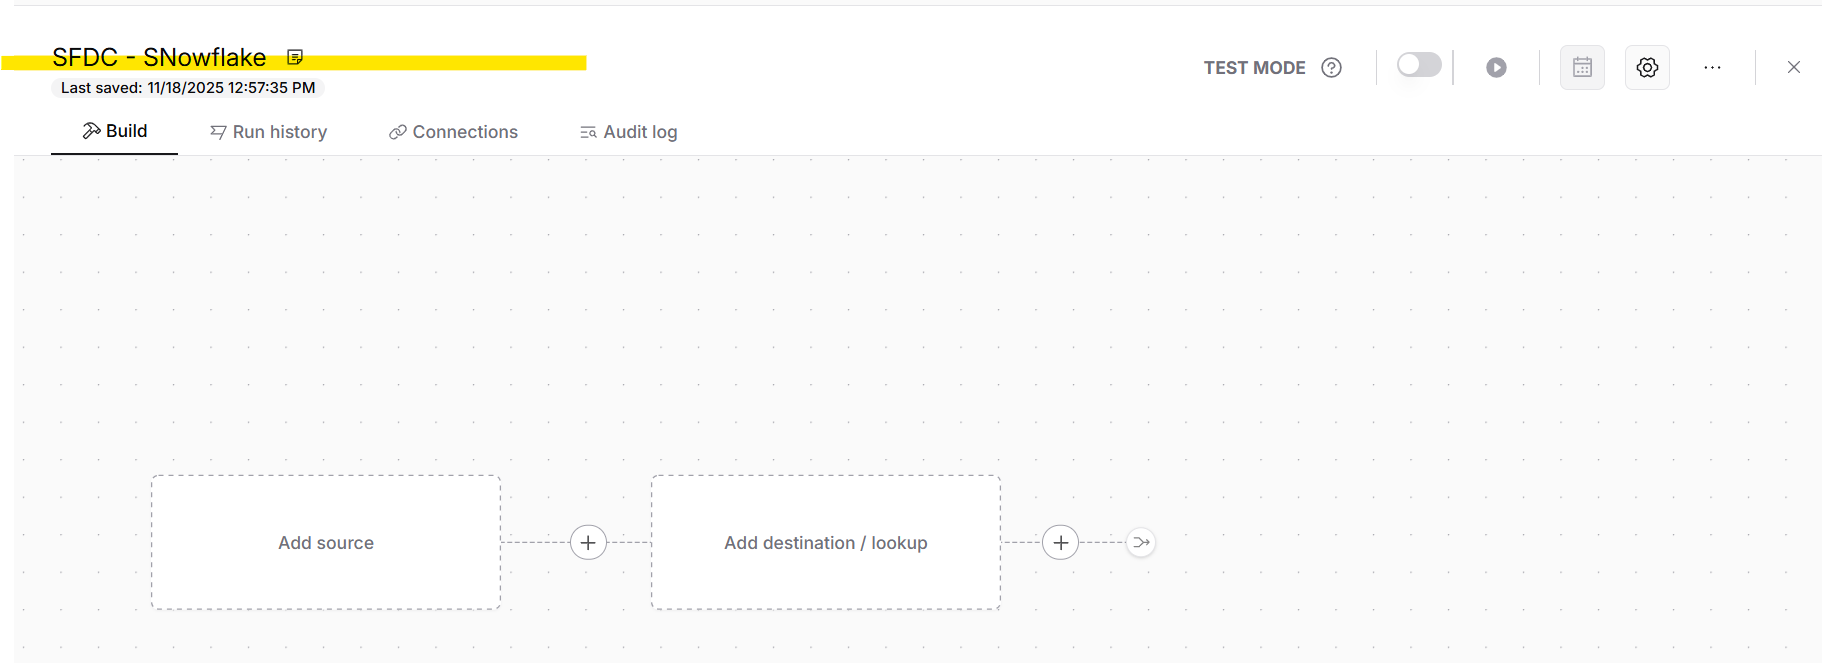
Step 14: –
Rename the flow name for easy identification
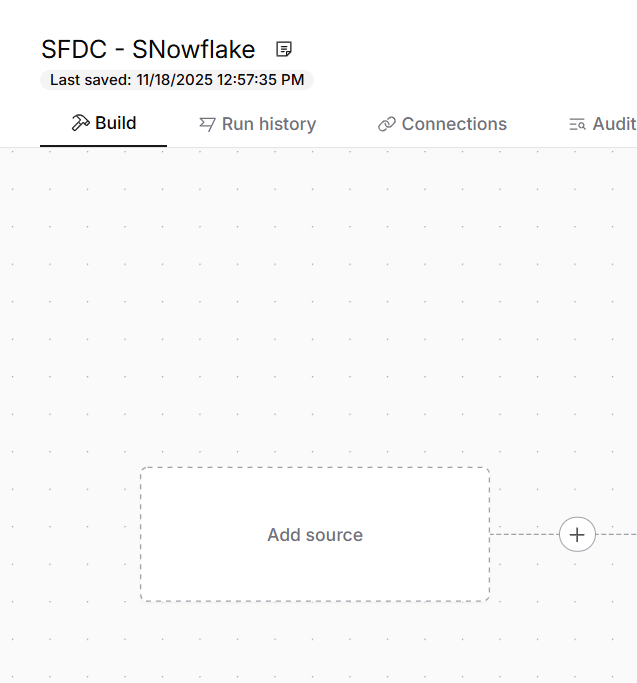
Step 15: –
Now we have to add Source (In this case Salesforce is Source). Click on top of “Add Source”.
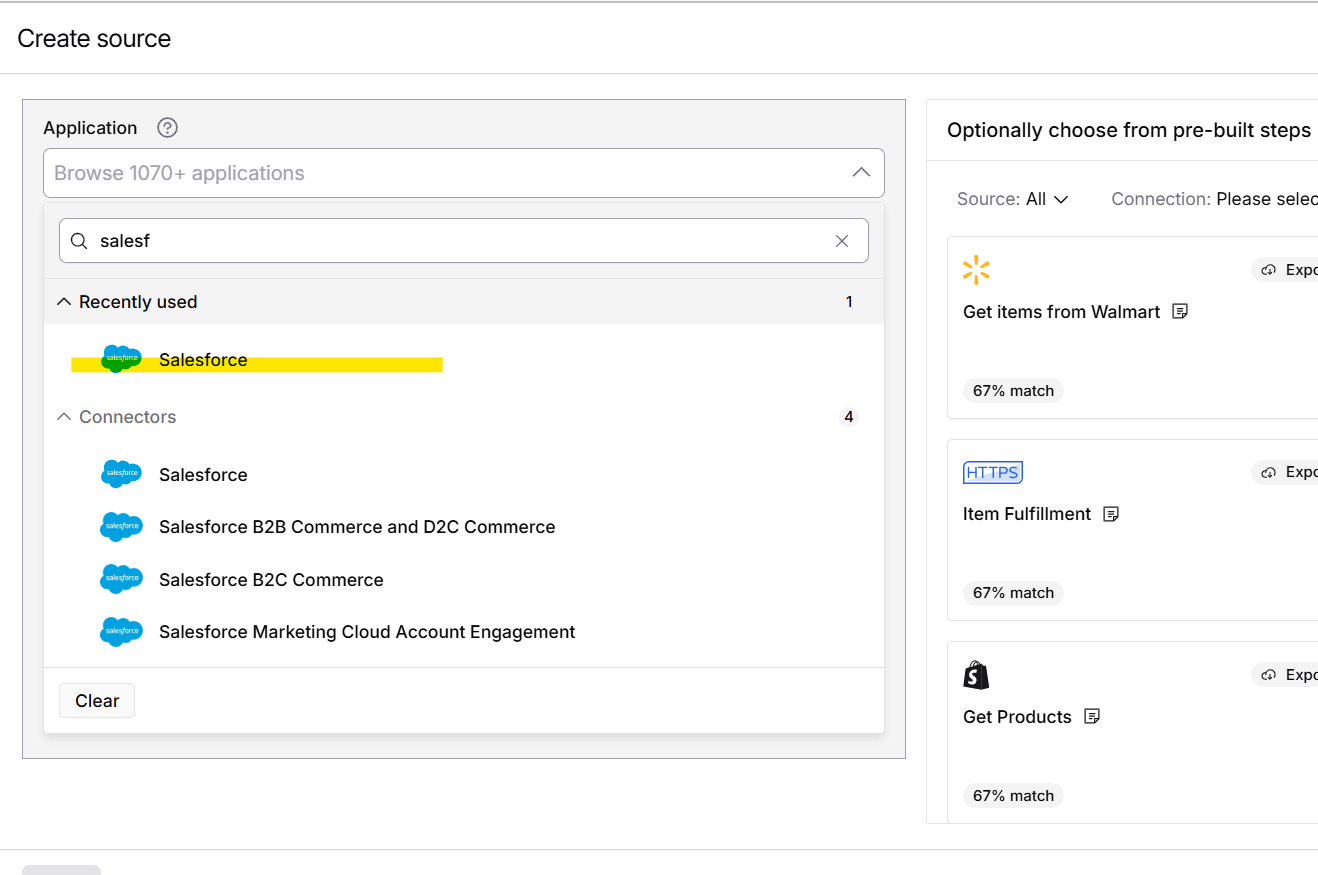
Step 16: –
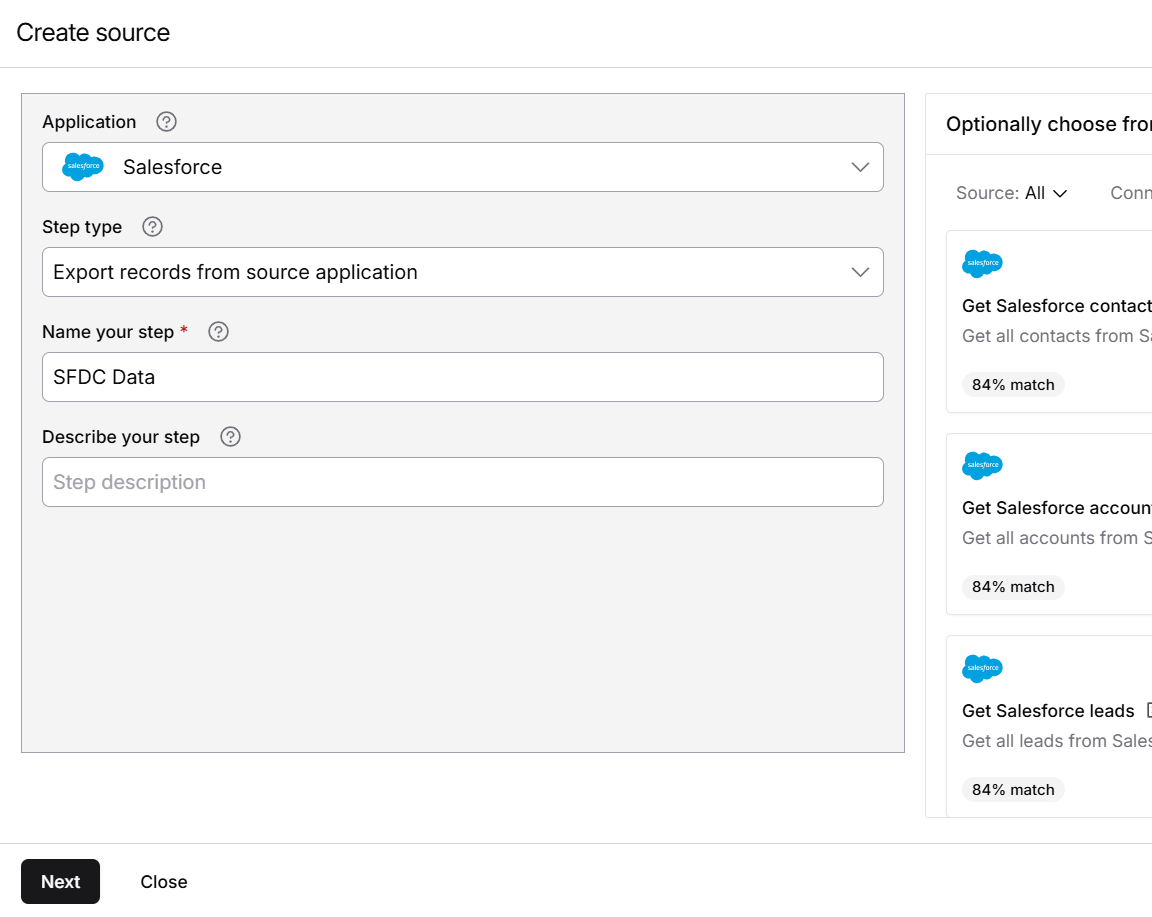
Select the Salesforce option from the listing
Step 17: –
Select the Step Type
- Export Record from Source application – Used when running manually or scheduled.
- Listen for Realtime Data from Source application – Used to listen real time data
Here we will go with Export record from source application

Step 18: –
After selecting “Step Type” We are required to “Name your step” and click on “Next”
Step 19: –
After clicking “Next” Salesforce configuration page will open like below

Step 20: –
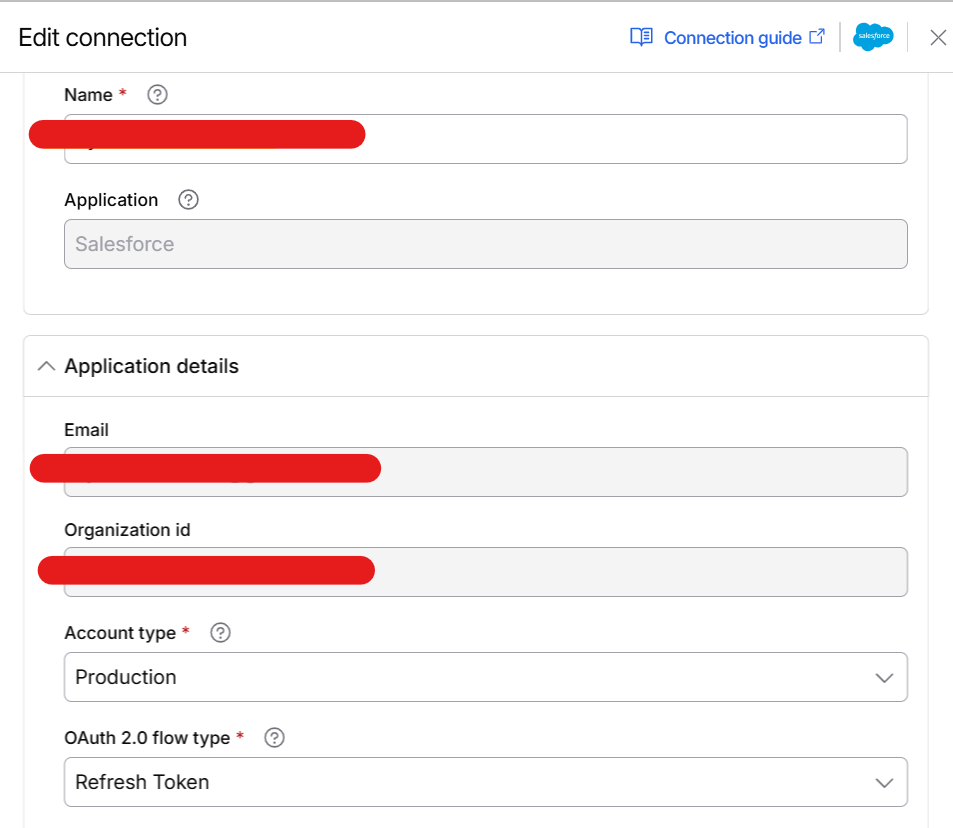
Click on “Connection” and click on “Create Connection”

Step 21: –
Configure the connection of Salesforce Connector
To set up a connection we need to follow the below steps.
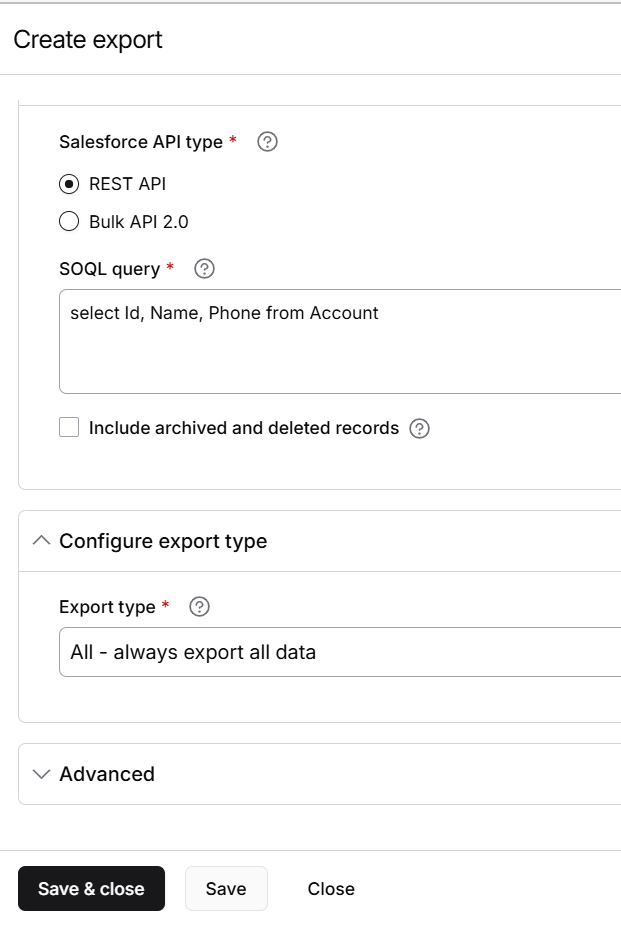
Step 22: –
We have to provide SOQL query like shown below
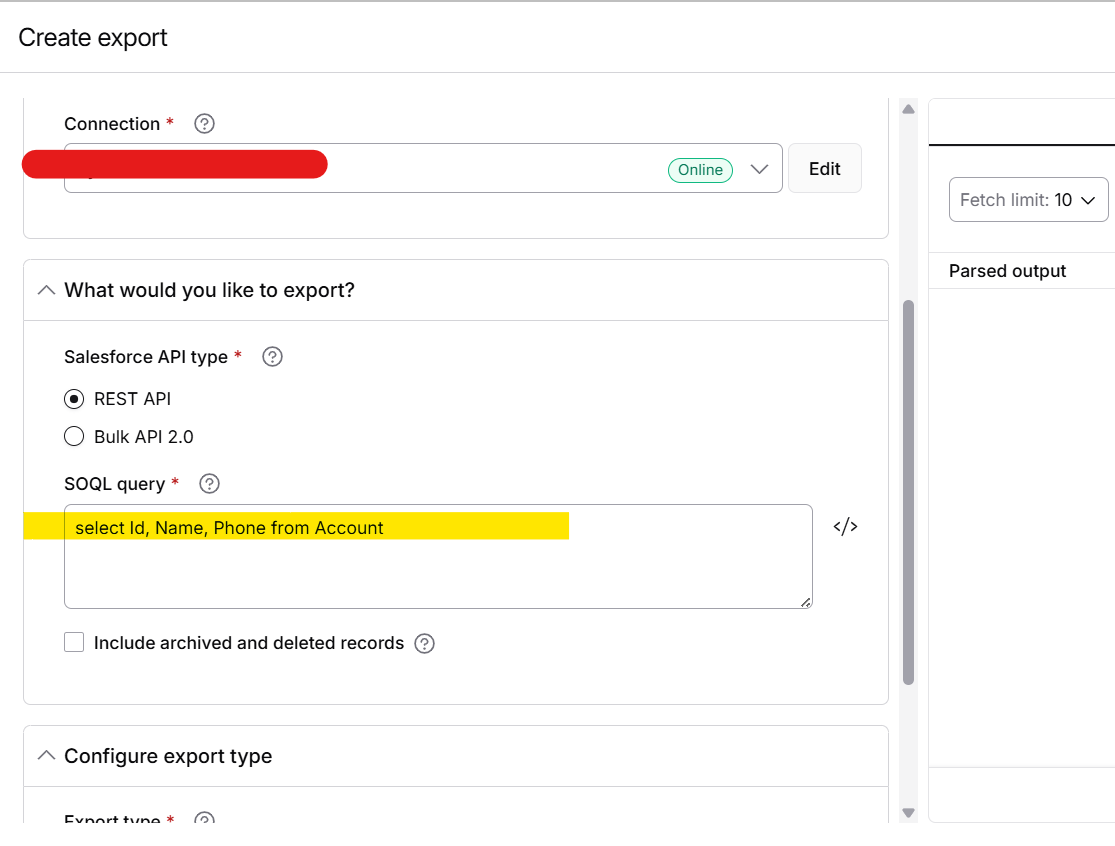
Step 23: –
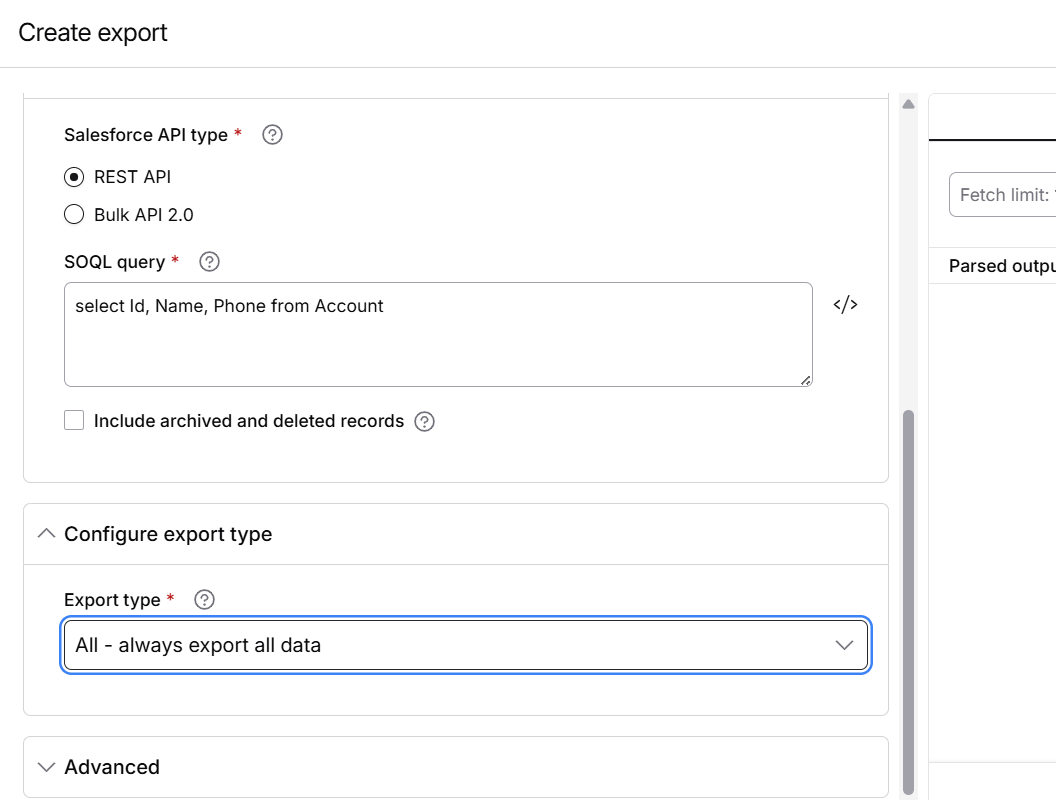
Select “Export Type”
Step 24: –
Click on “Save & Close”
Step 25: –
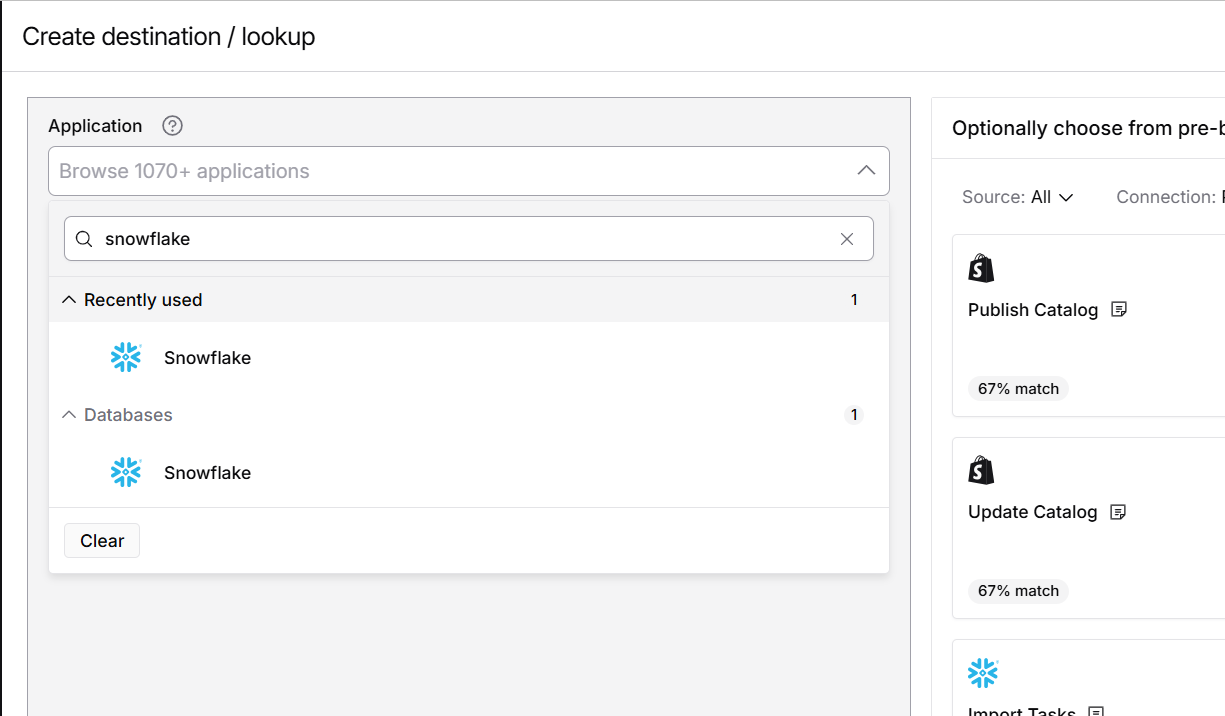
Now we have to add destination (In this case Snowflake is Destination). Click on top of “Add Destination”.

Step 26: –
Select the Snowflake option from the listing
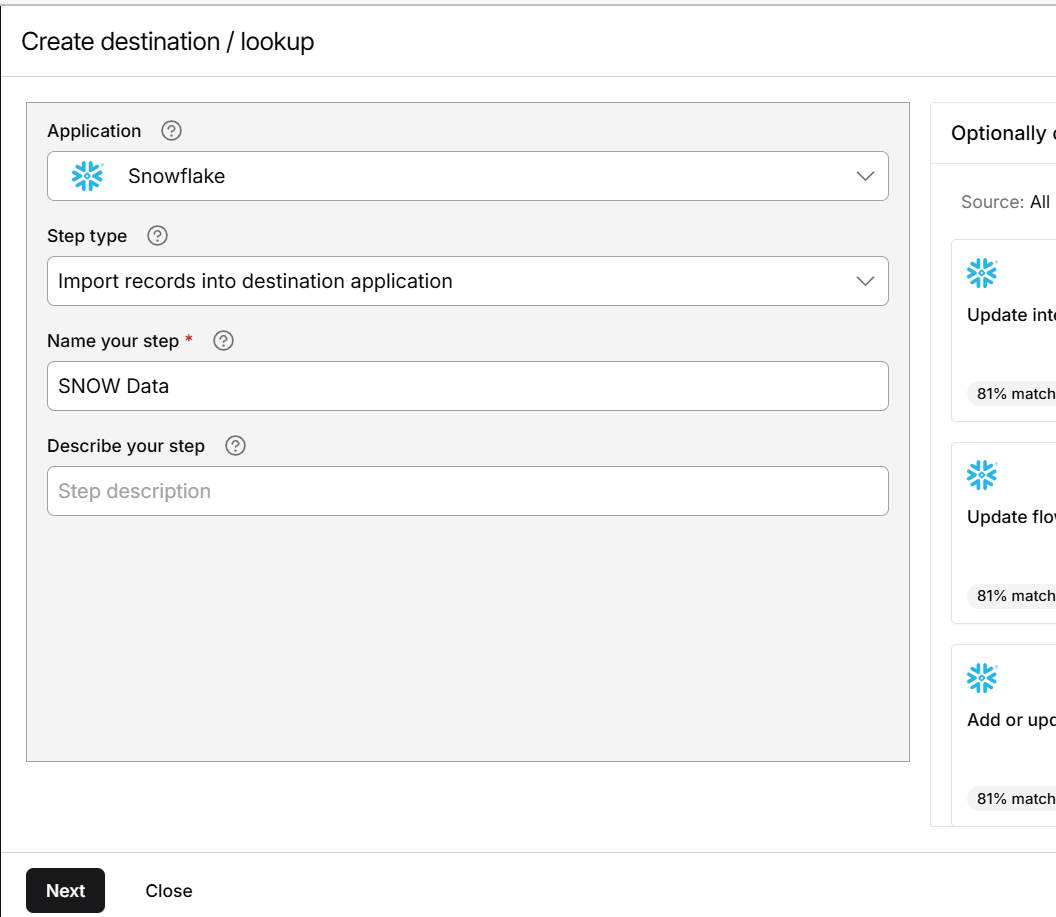
Step 27: –
Select the Step Type
- Import records into destination application – Used when we are sending data directly
- Look up additional records (per record)
Here we will go with Import records into destination element

Step 28: –
After selecting “Step Type” We are required to “Name your step” and click on “Next”
Step 29: –
After clicking “Next” Snowflake configuration page will open like below

Step 30: –
Click on “Connection” and click on “Create Connection”
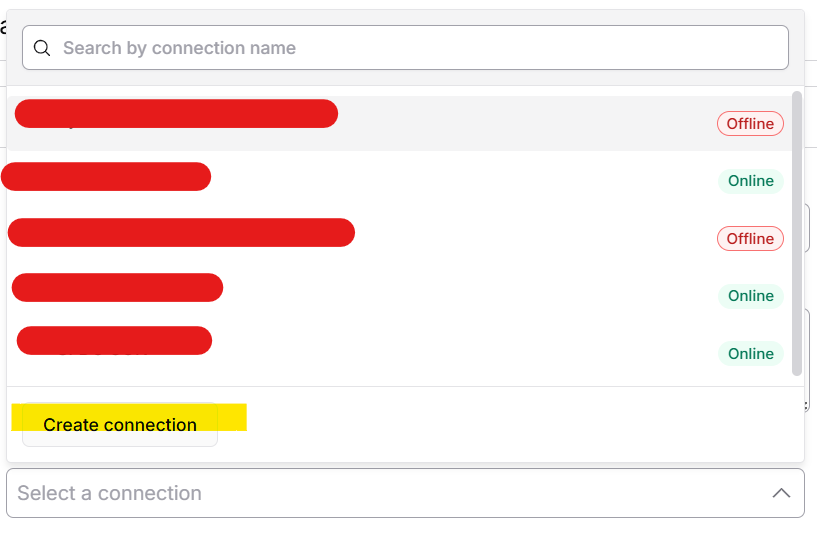
Step 31: –
Configure the connection of Snowflake Connector
To set up a connection we need to follow the below steps.
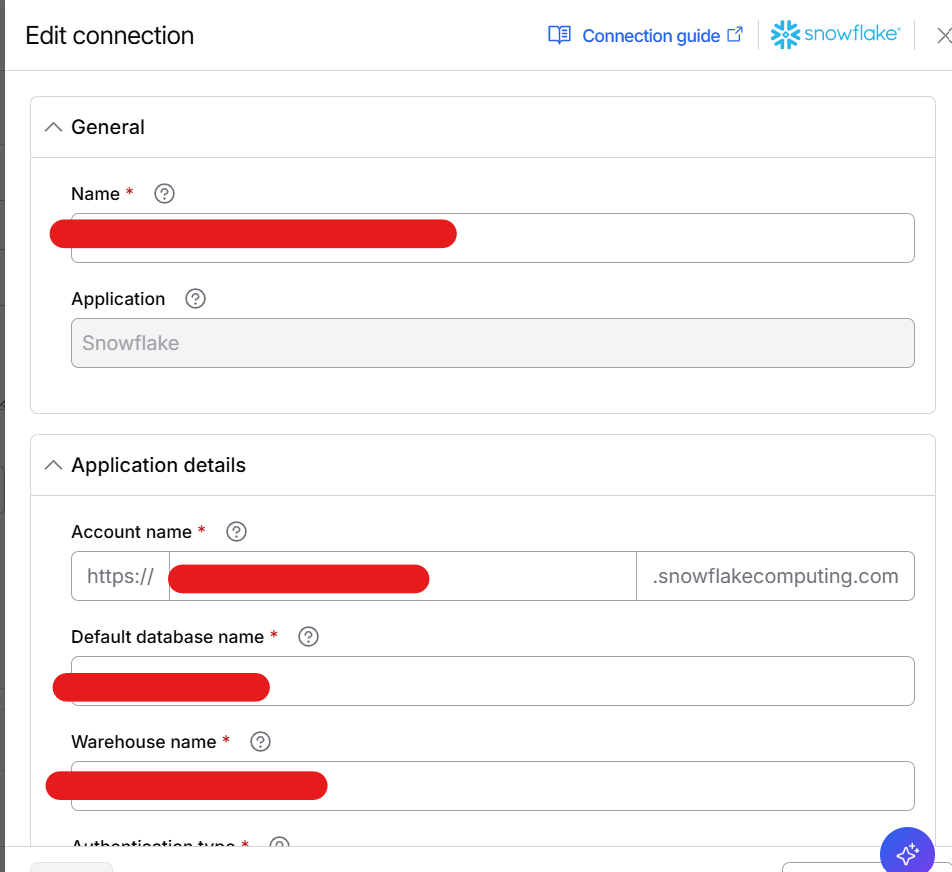
Step 32: –
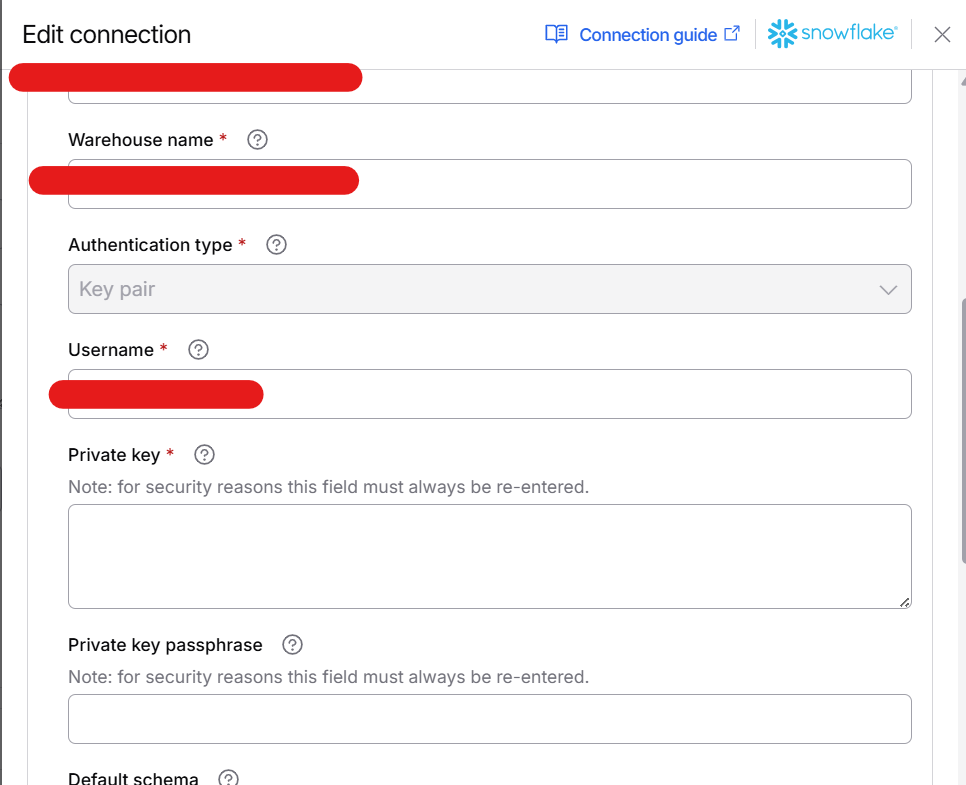
Configure the rest of the connection like below
Step 33: –
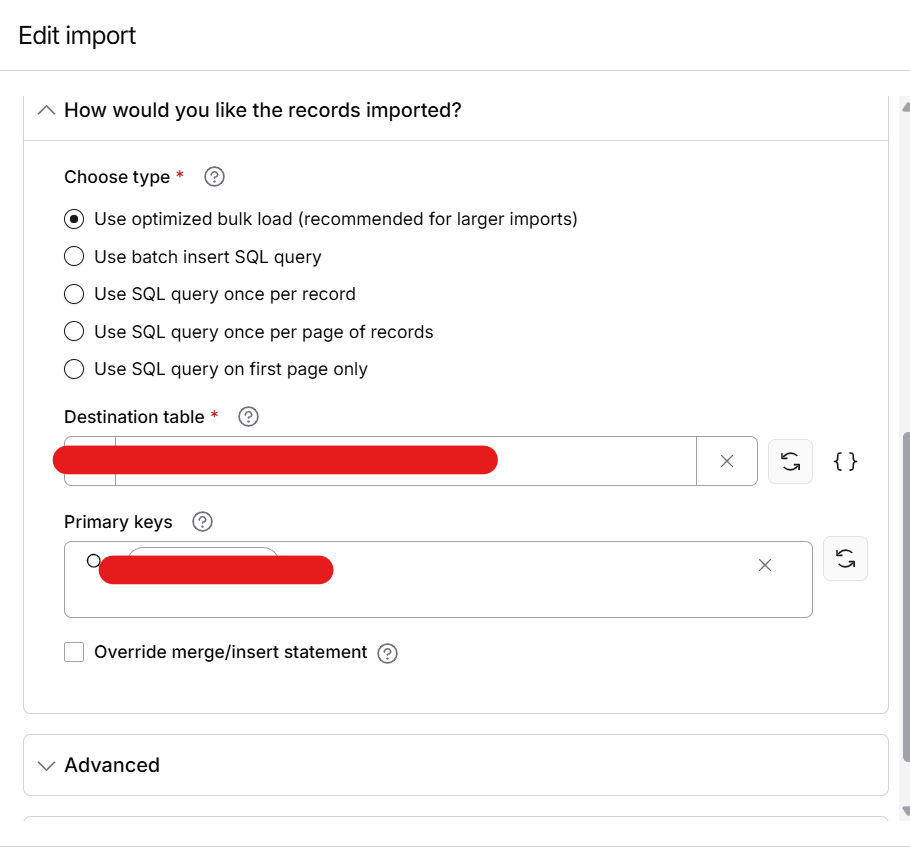
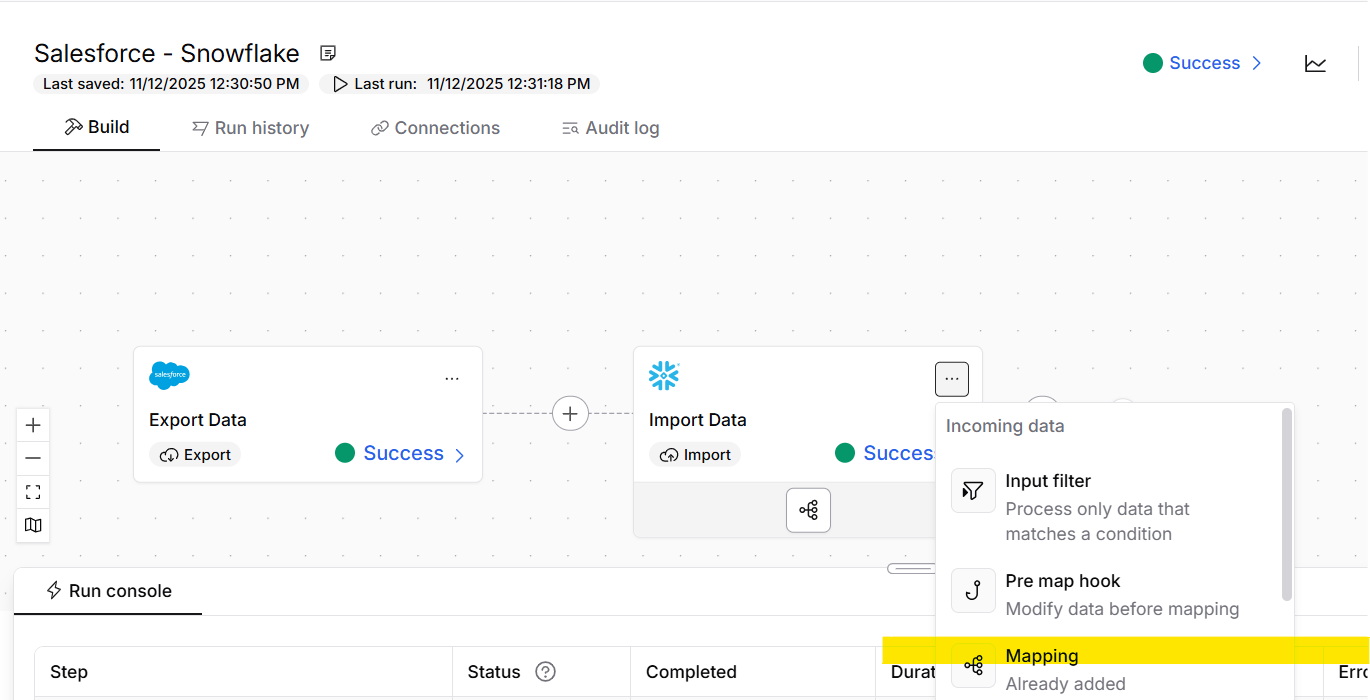
Click on the 3 dots and select “Mapping”
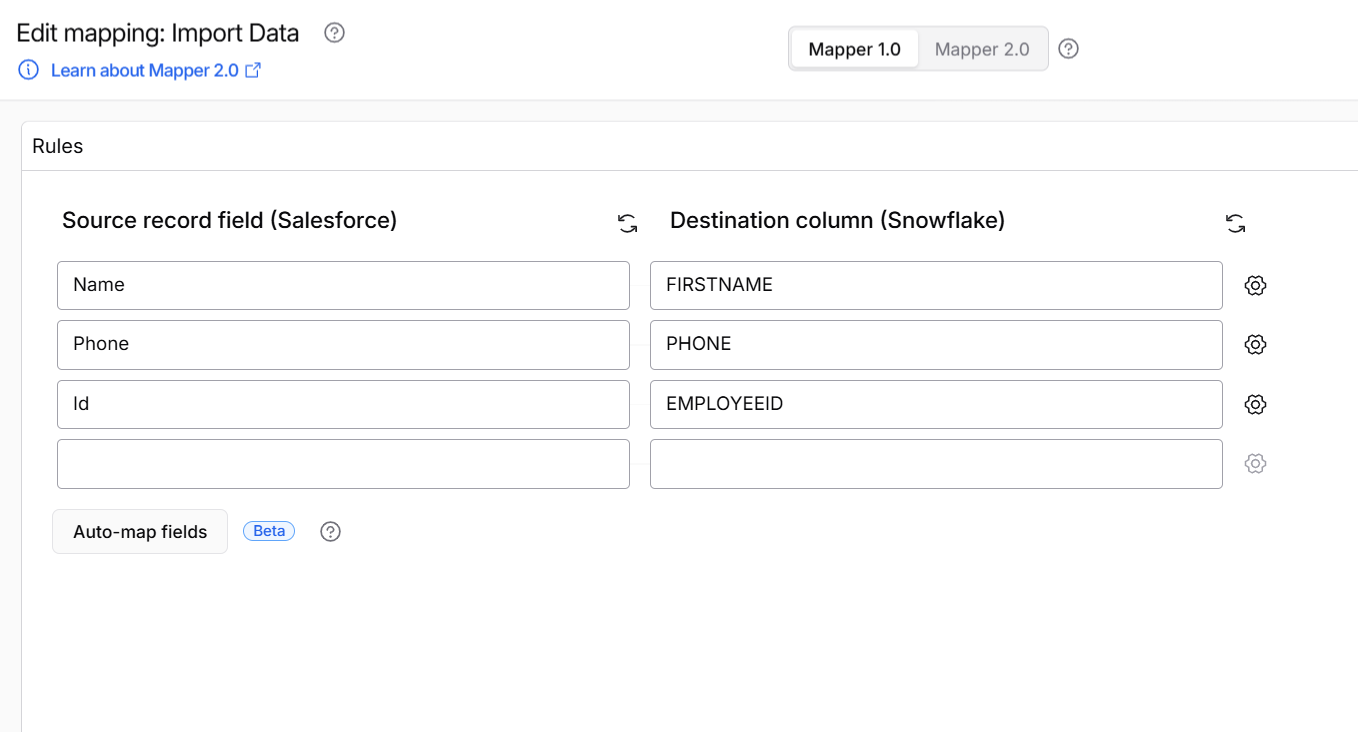
Step 34: –
Complete the mapping as required and as shown in below image and click on “Save”
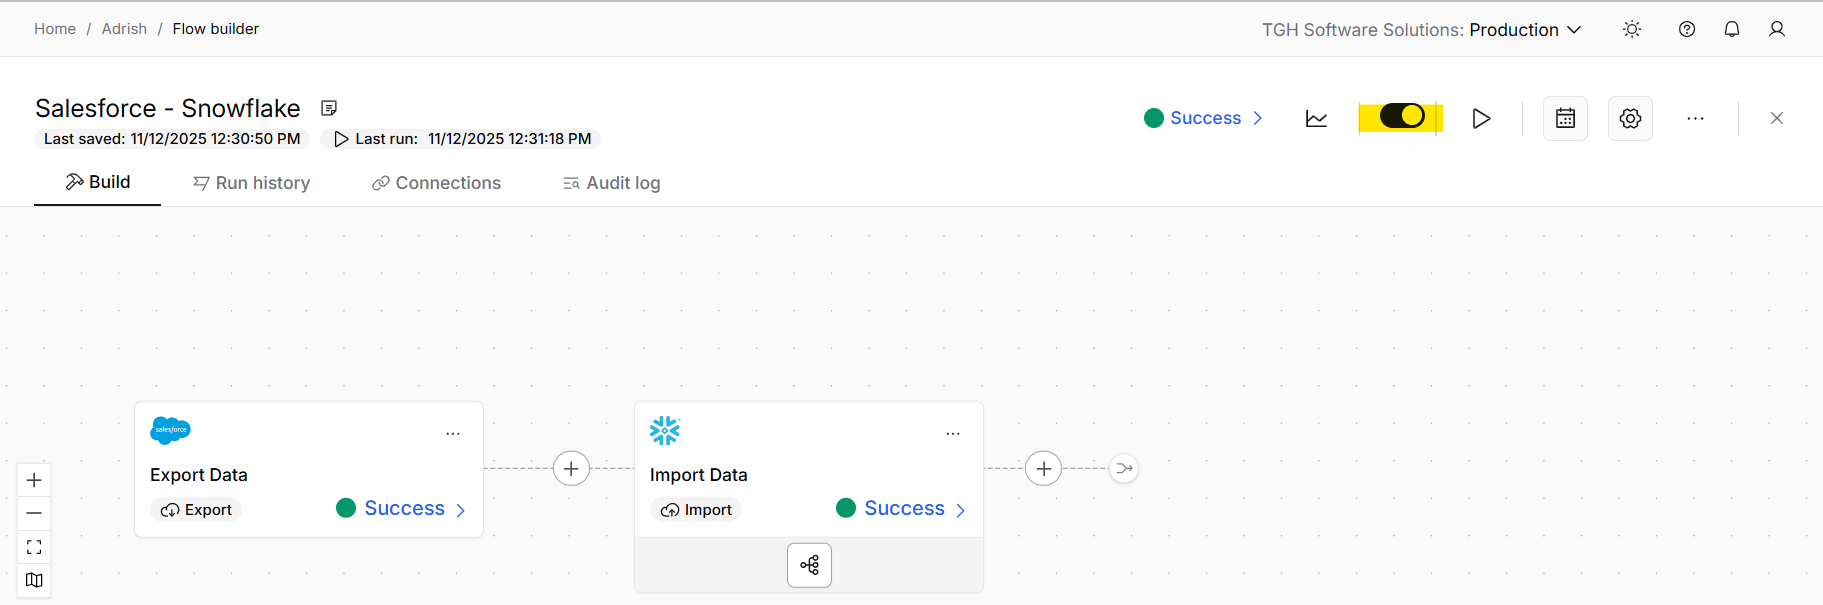
Step 35: –
We have to enable the flow in order to execute. Click on the option like shown in below image
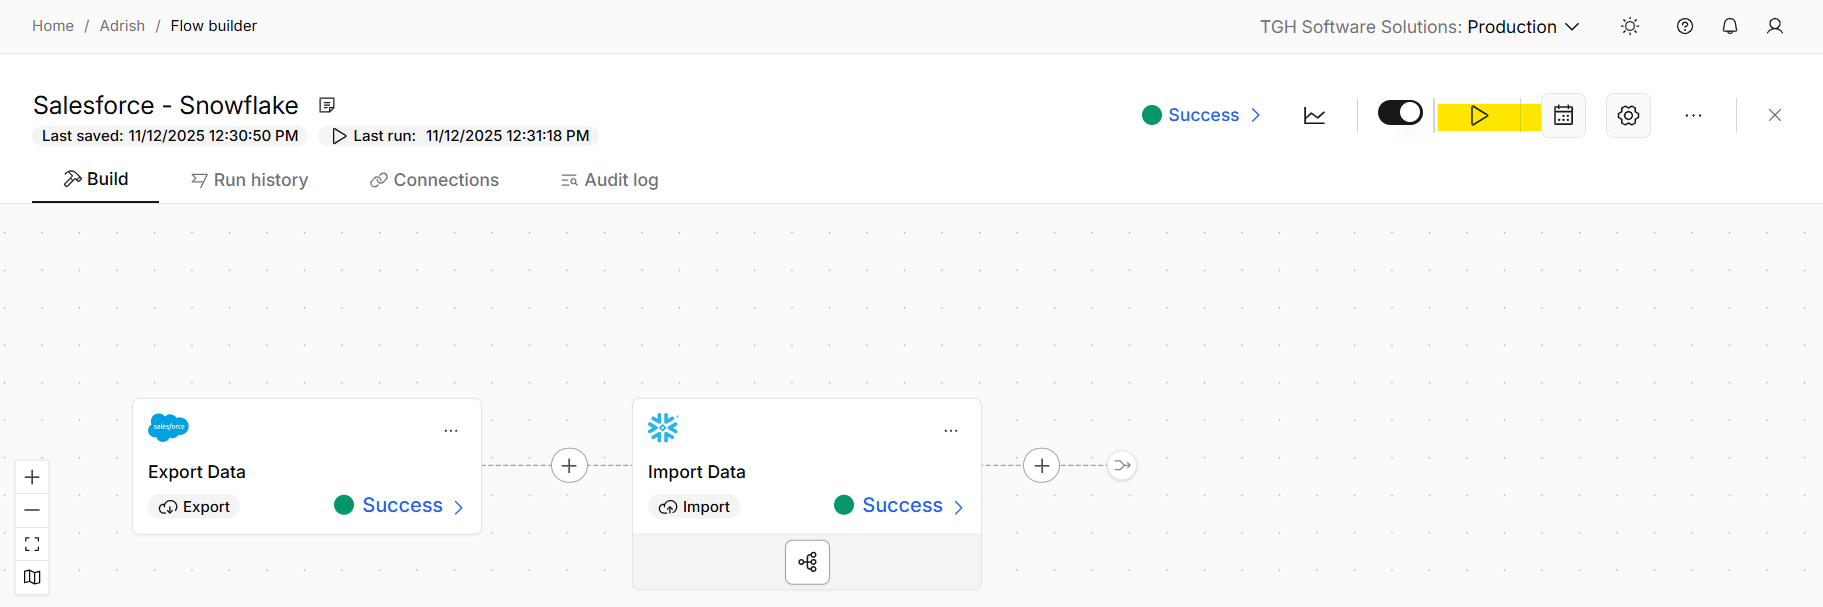
Step 36: –
Run the process.
Step 37: –
Successful processing of data from Salesforce to Snowflake.

Step 38: –
Result in Snowflake.
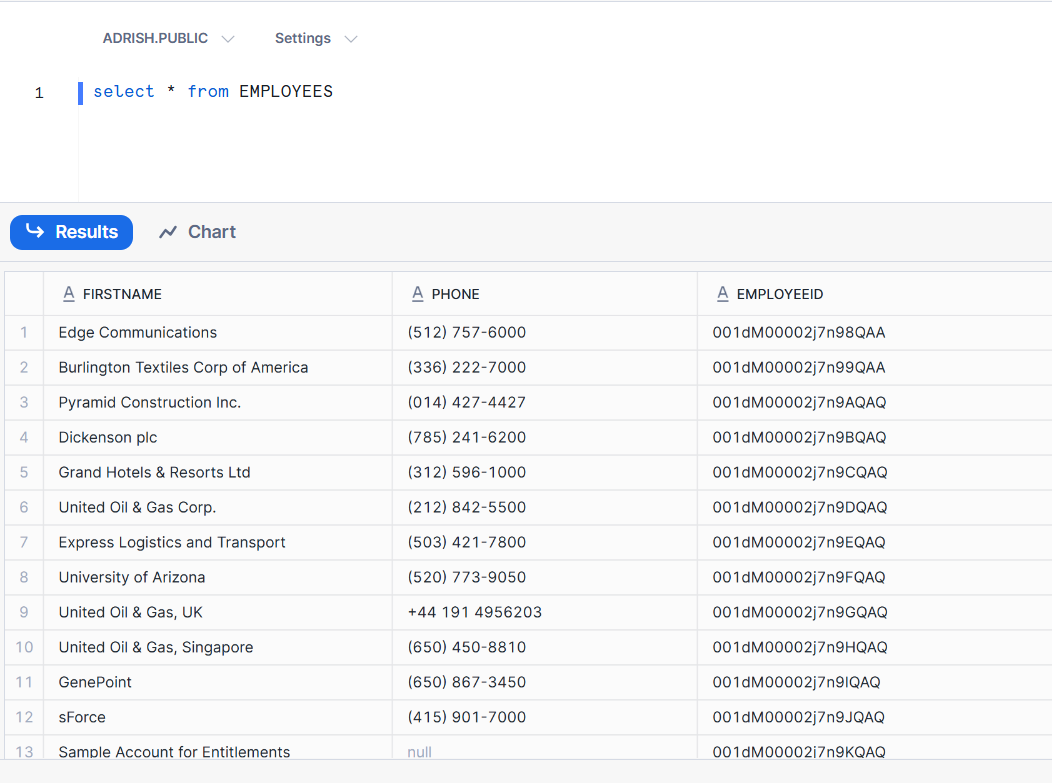
Data will be inserted successfully into the snowflake table.
With Salesforce data now in Snowflake, your teams can access real-time insights, reduce errors, and make smarter, data-driven decisions effortlessly.
Ready to unlock the full potential of your data? Partner with TGH experts to streamline your Salesforce-to-Snowflake workflows and transform your data into actionable intelligence for growth.