Storing Data in the MongoDB Cloud Database
In this blog, let us discuss how to store data in a MongoDB Cloud database using Boomi.
- For inserting records into MongoDB, we will use the MongoDB Connector, which enables direct integration with the cloud database.
About Connector:
The MongoDB connector in Boomi enables seamless integration with a MongoDB cloud database, allowing data to be inserted efficiently.
- MongoDB is a NoSQL database that stores data in flexible, JSON-like documents, making it highly scalable and efficient for handling large datasets.
- The MongoDB connector in Boomi facilitates communication between Boomi processes and the MongoDB database, enabling users to insert, update, upsert, get, delete, and query data efficiently.
Connector Configuration:
To configure the connector to communicate with MongoDB Cloud, set up the following components:
- MongoDB Connection: This connector establishes a connection with the MongoDB Cloud database using the specified host, port, and authentication details.
- MongoDB Operation: Defines the read or write actions performed on the MongoDB database.
Before setting up the connection, ensure that the MongoDB Atlas cluster is properly configured, and necessary authentication details (such as username, password, and access permissions) are available.
Setting Up a MongoDB Atlas cluster:
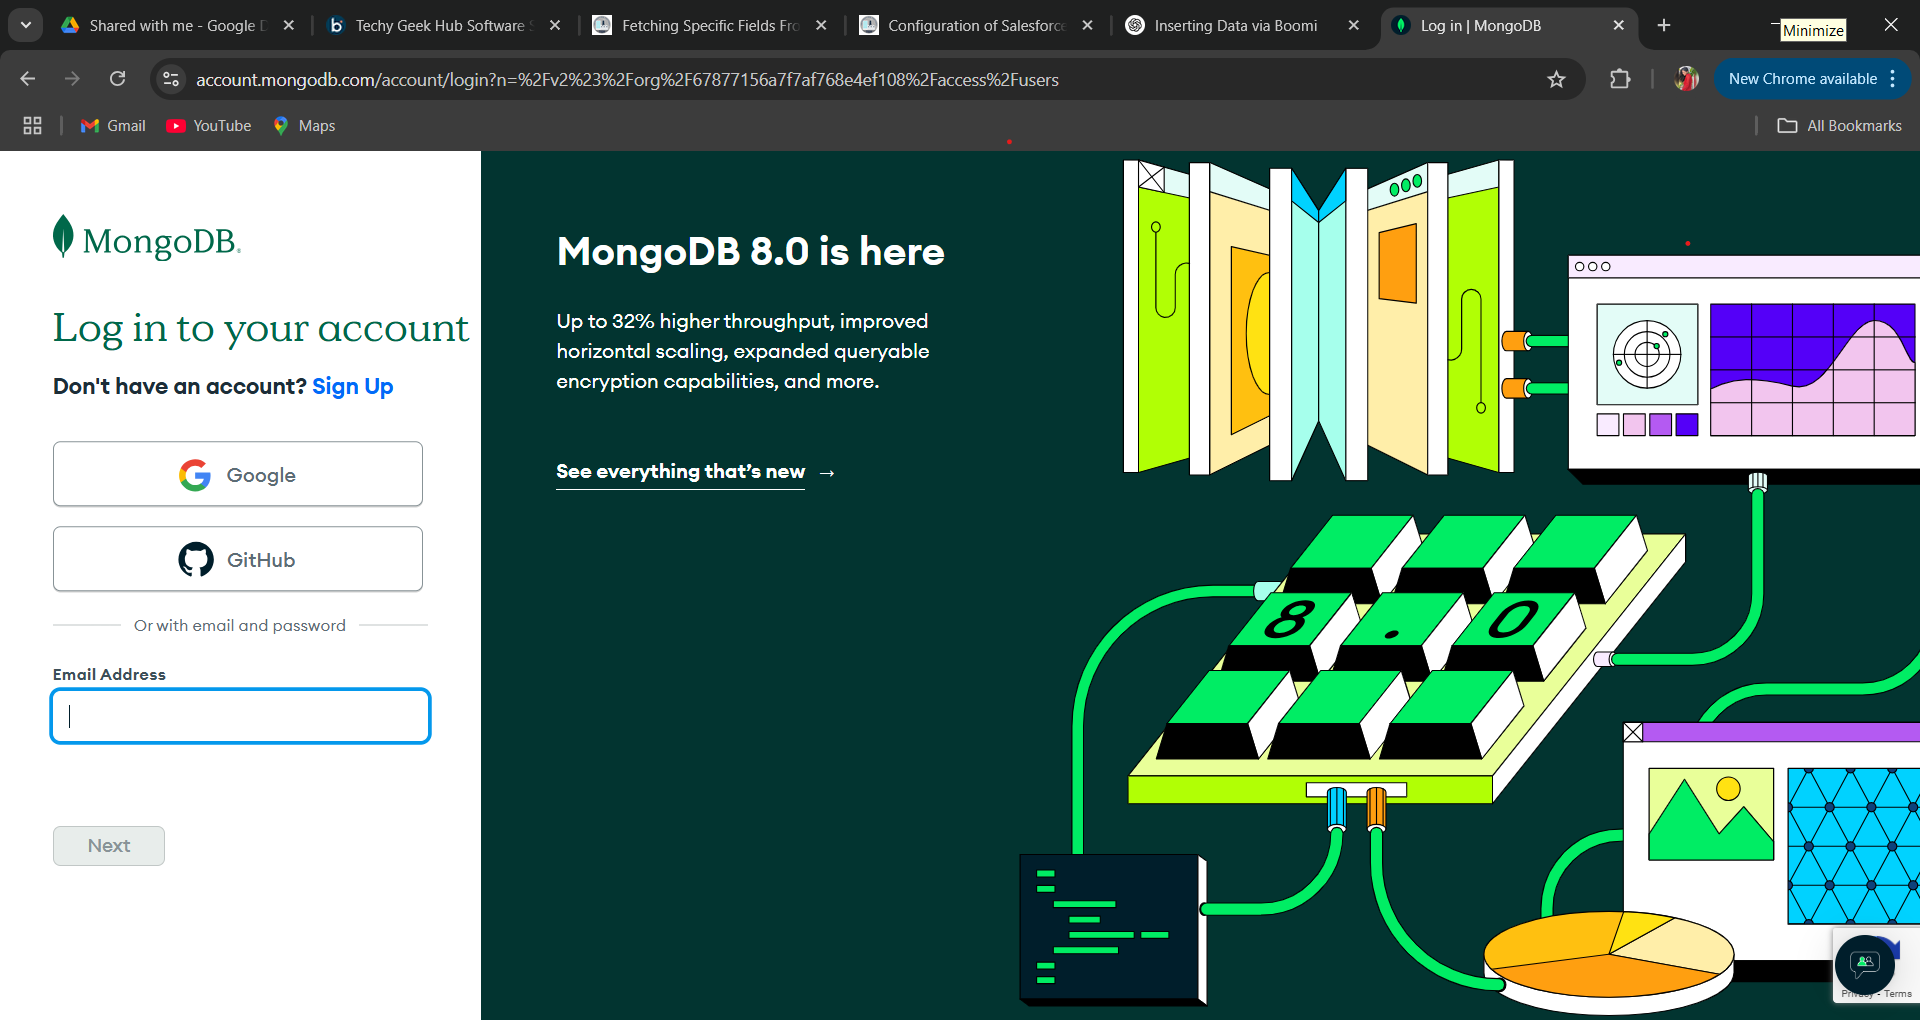
Step 1.1: Login to the MongoDB platform (https://account.mongodb.com/account/login ) with the required credentials (Email Address and Password).
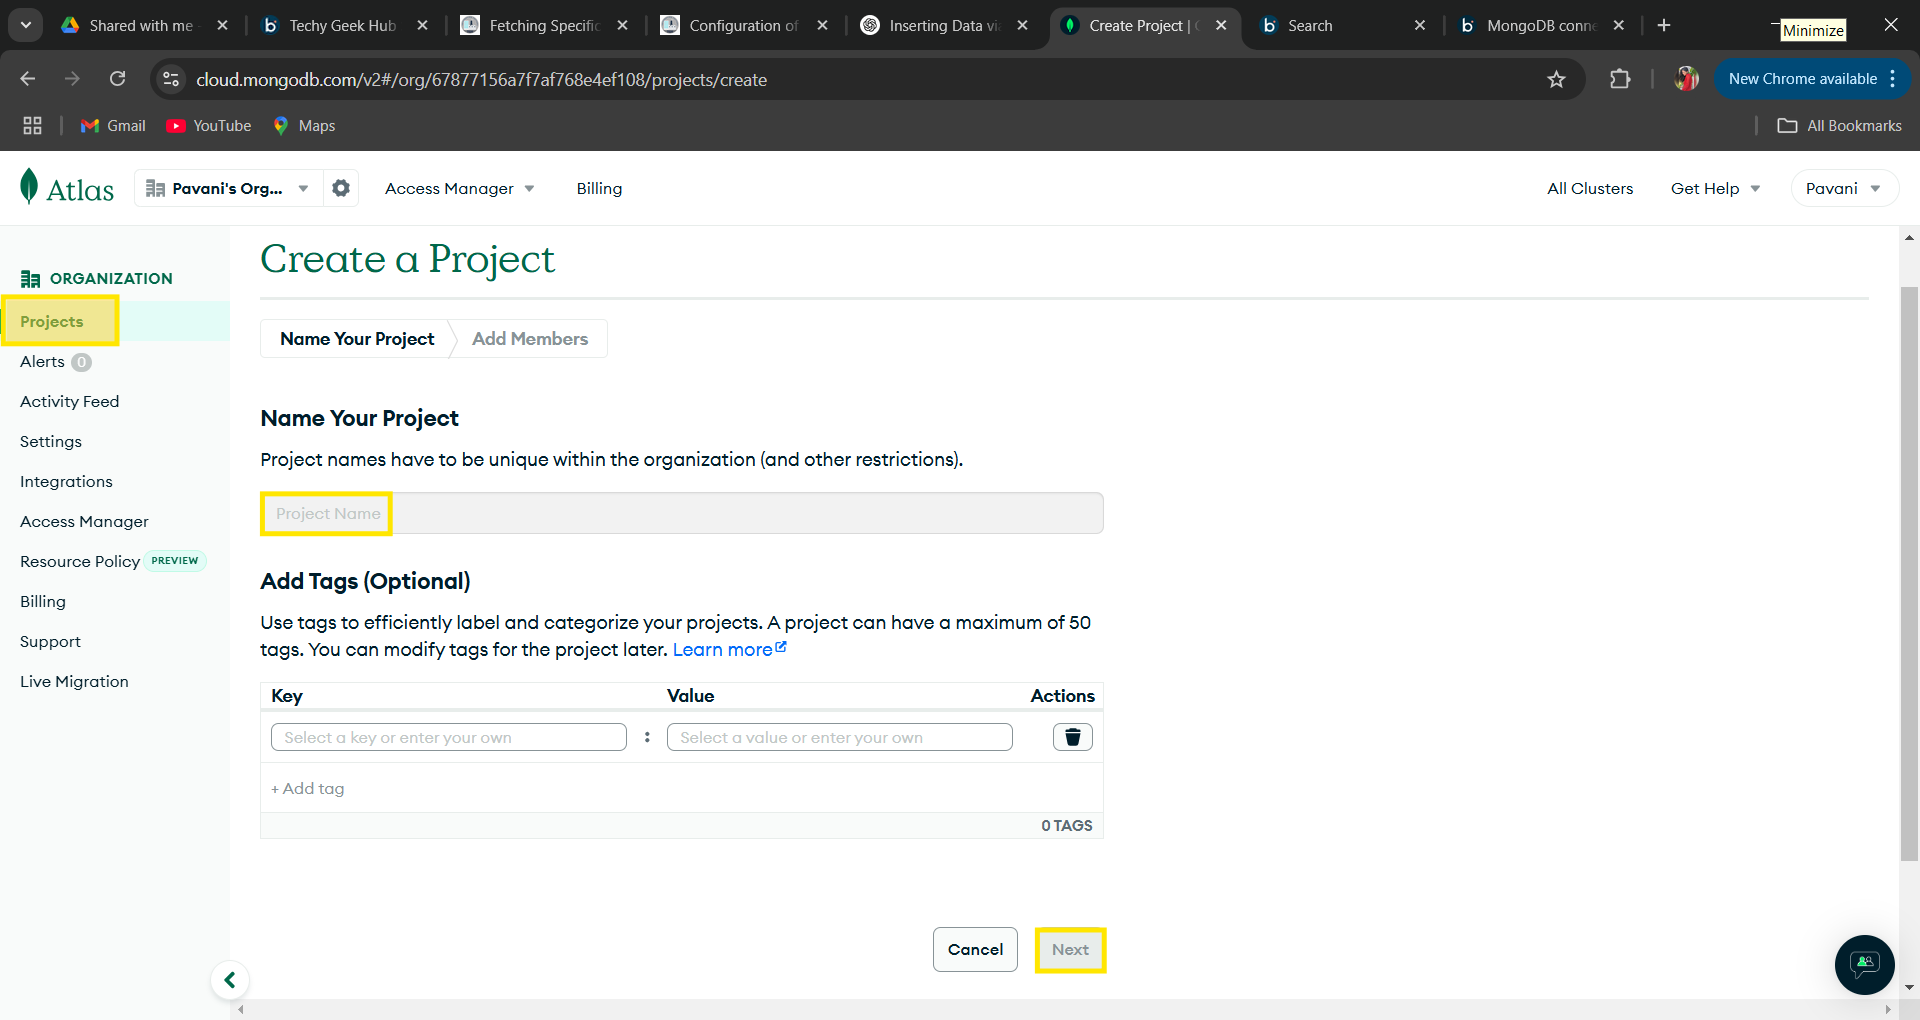
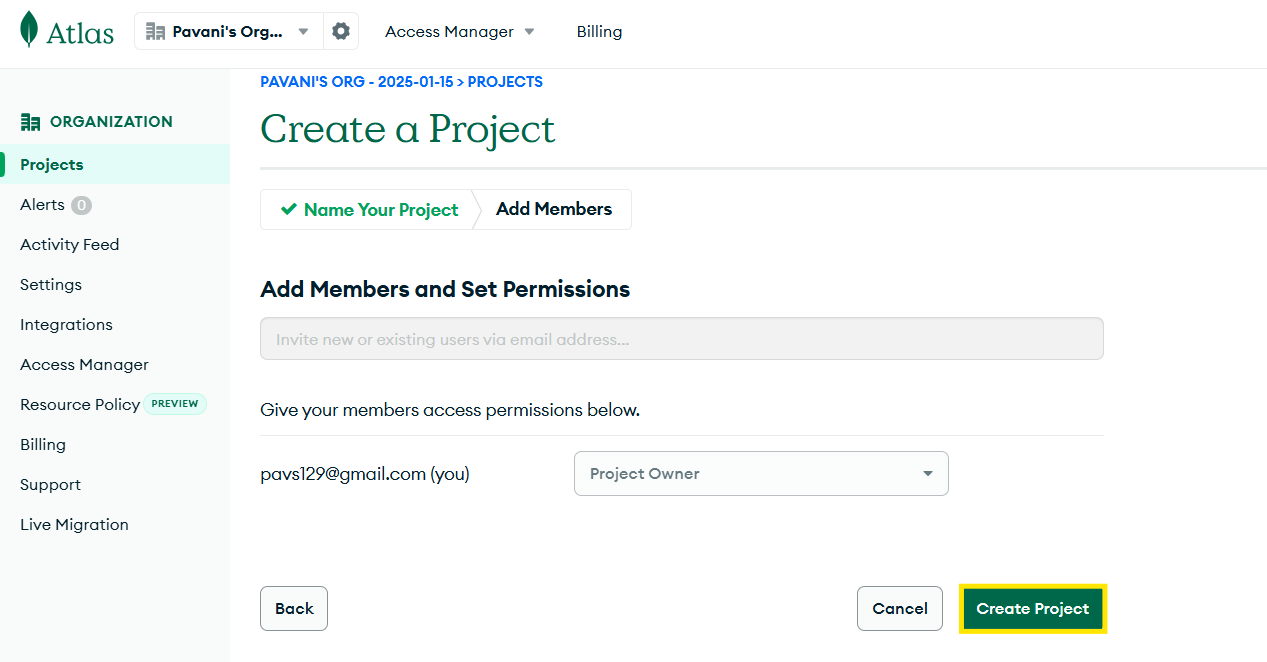
Step 1.2: Create a Project by providing an appropriate name and click next, then keep the default configuration and create the project.
Step 1.3: Create a cluster within the previously created database, ensuring it aligns with the MongoDB account subscription details. When connecting to the cluster, provide the connection IP address and user credentials for the database and save them for future reference.
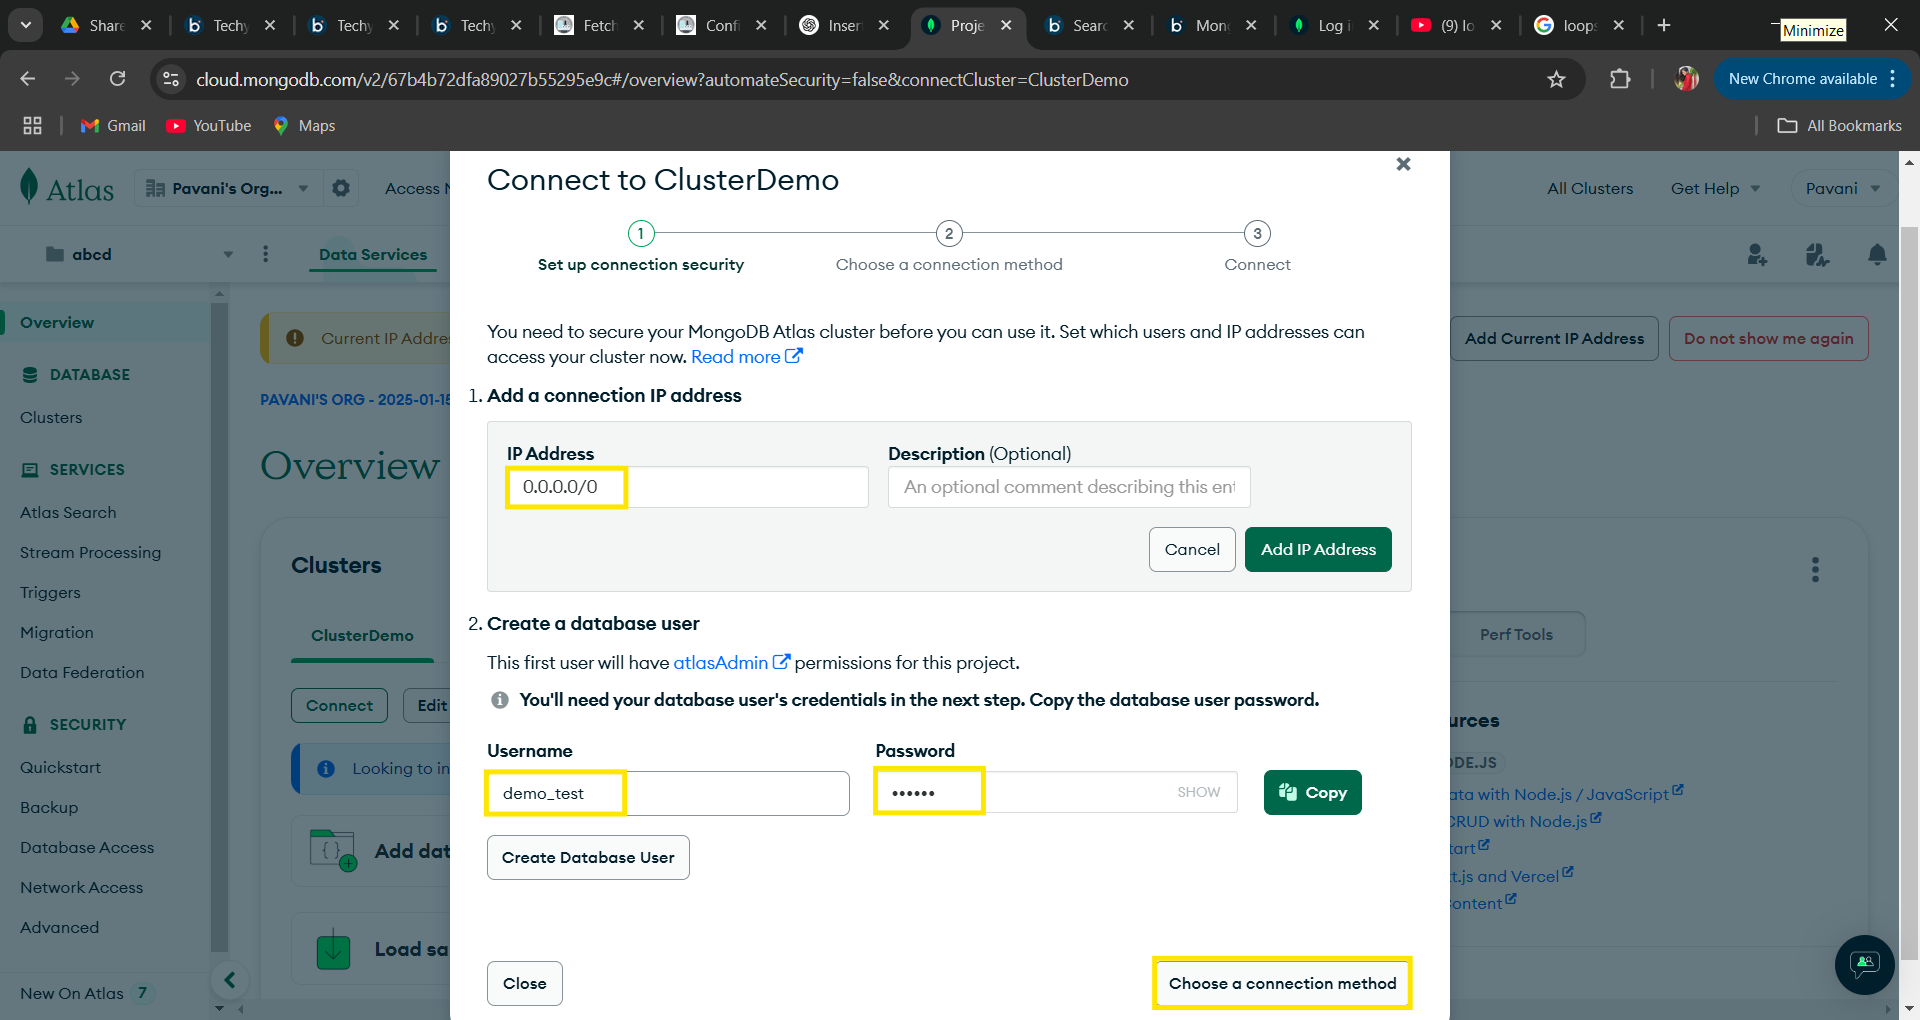
Step 1.4: After creating a database user, select a connection method. Then, navigate to “Connect to Your Application” and click on “Drivers.” Finally, to connect with the MongoDB driver, copy the provided connection string.
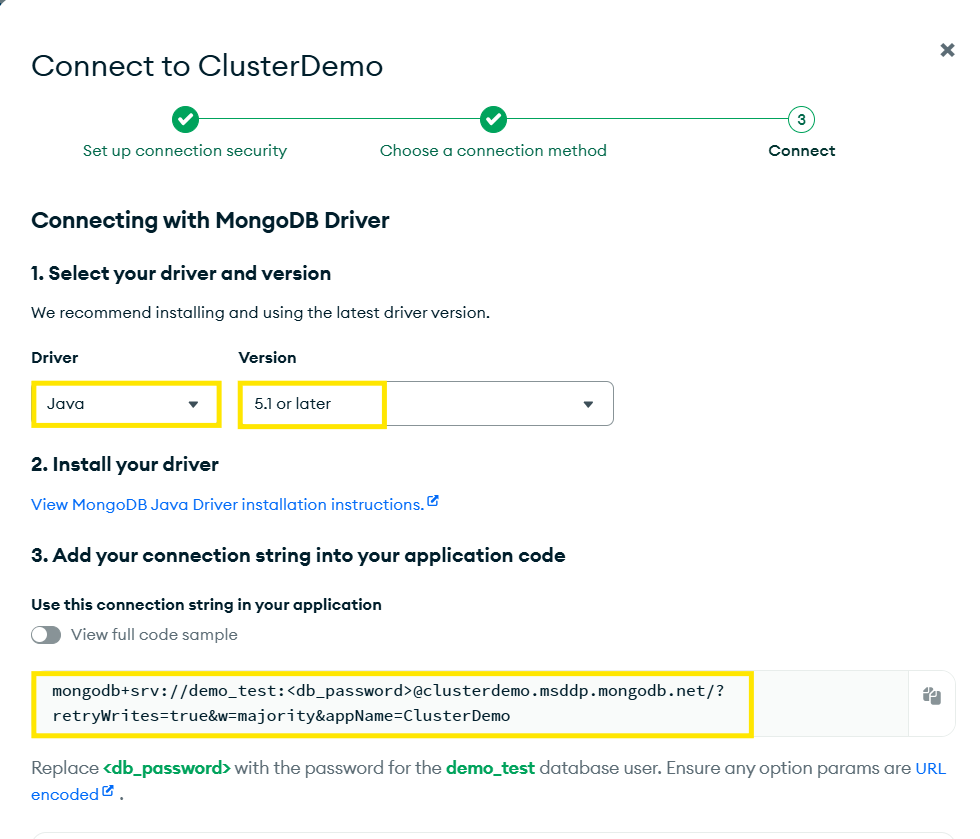
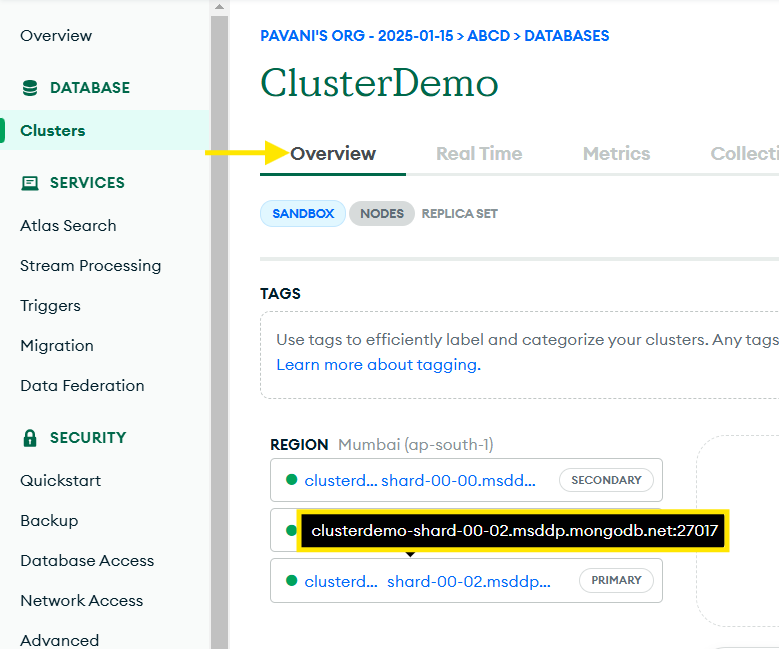
Step 1.5: Click on the created cluster and in the overview, tab copy the region URL for connecting it with Boomi.
Step 1.6: In the left-side overview section, navigate to Clusters. Above the cluster we created earlier, you’ll find the “Browse Collections” option. Click on it, then configure the database by specifying the Database Name and Collection Name (table name), and proceed to create it.
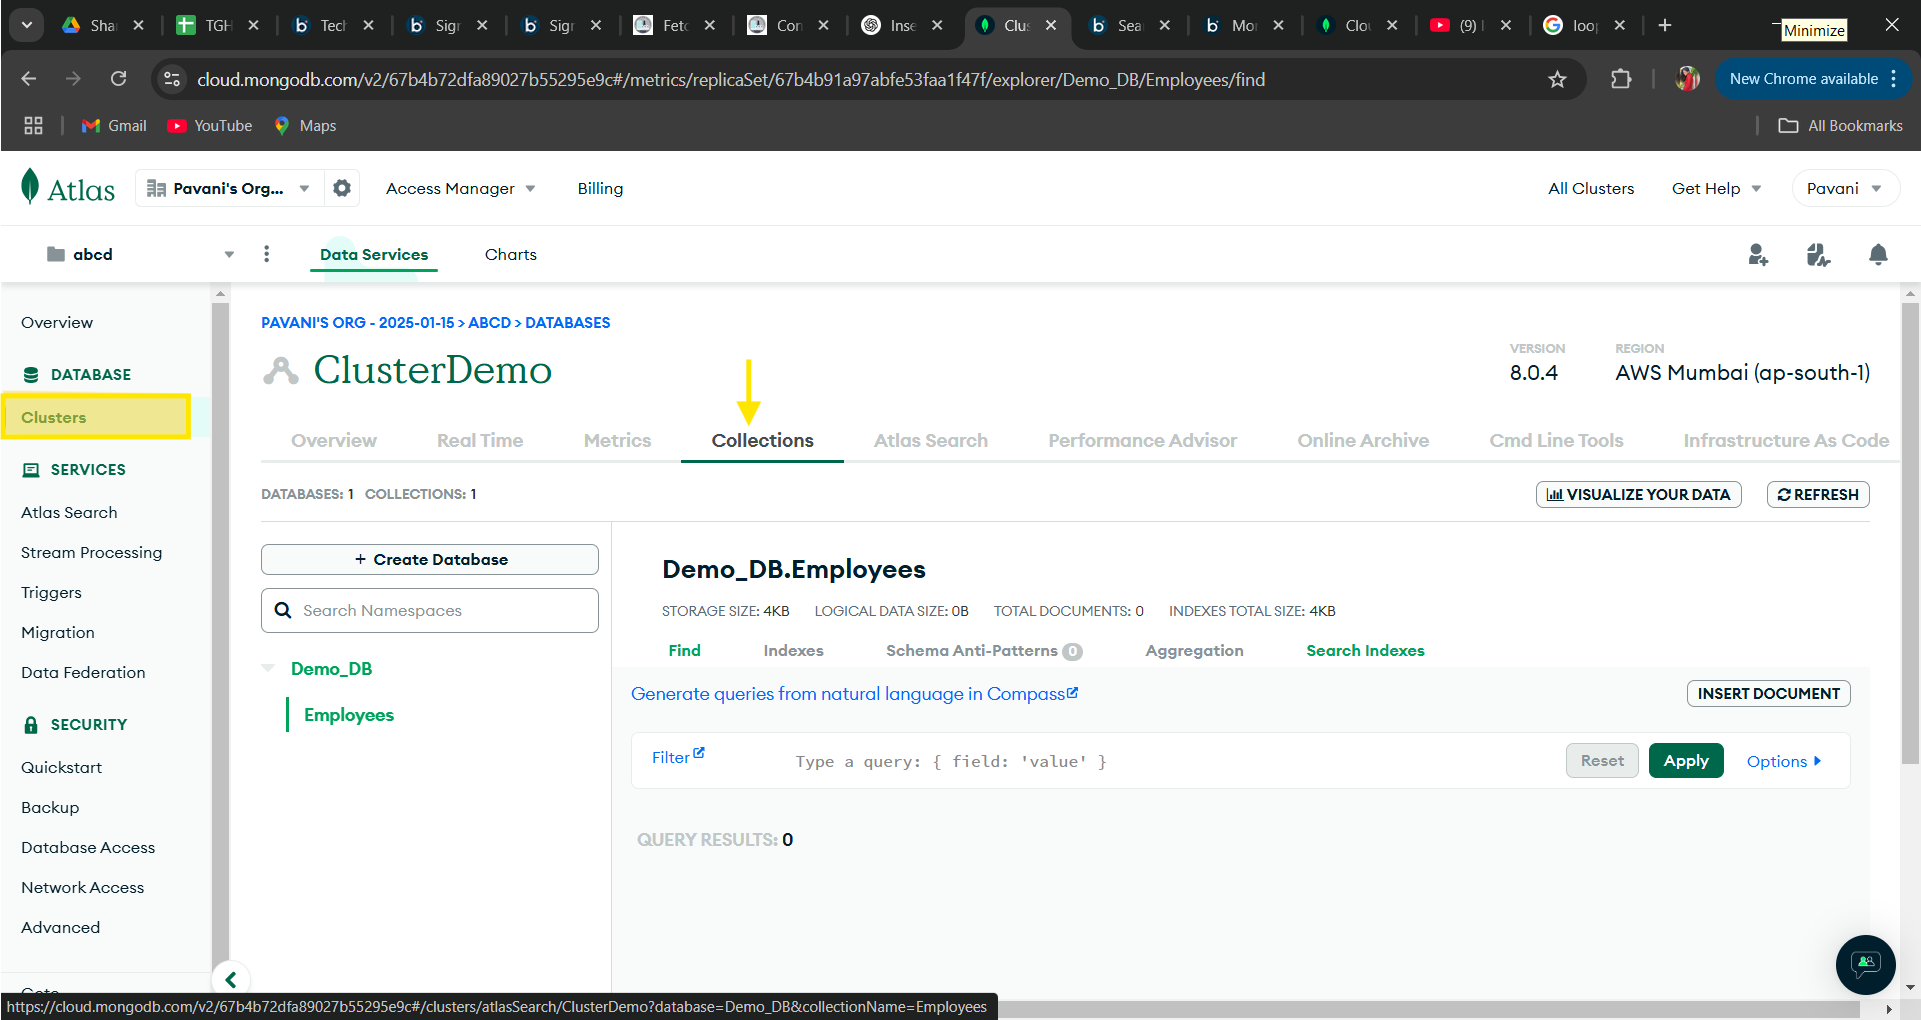
Based on the image above, the database and collection have been created. Now, let’s explore how to insert a document (record) in JSON format using Boomi.
Configuring MongoDB Connector in Boomi:
Now, open the Boomi platform to configure the salesforce platform events connector.
Step 2.1: Log onto the Boomi platform (https://platform.boomi.com/) with the required credentials (Email Address and Password)

Step 2.2: Under Services, choose Integration.

Step 2.3: First, configure the connection component choosing type as connector and connector as MongoDB.
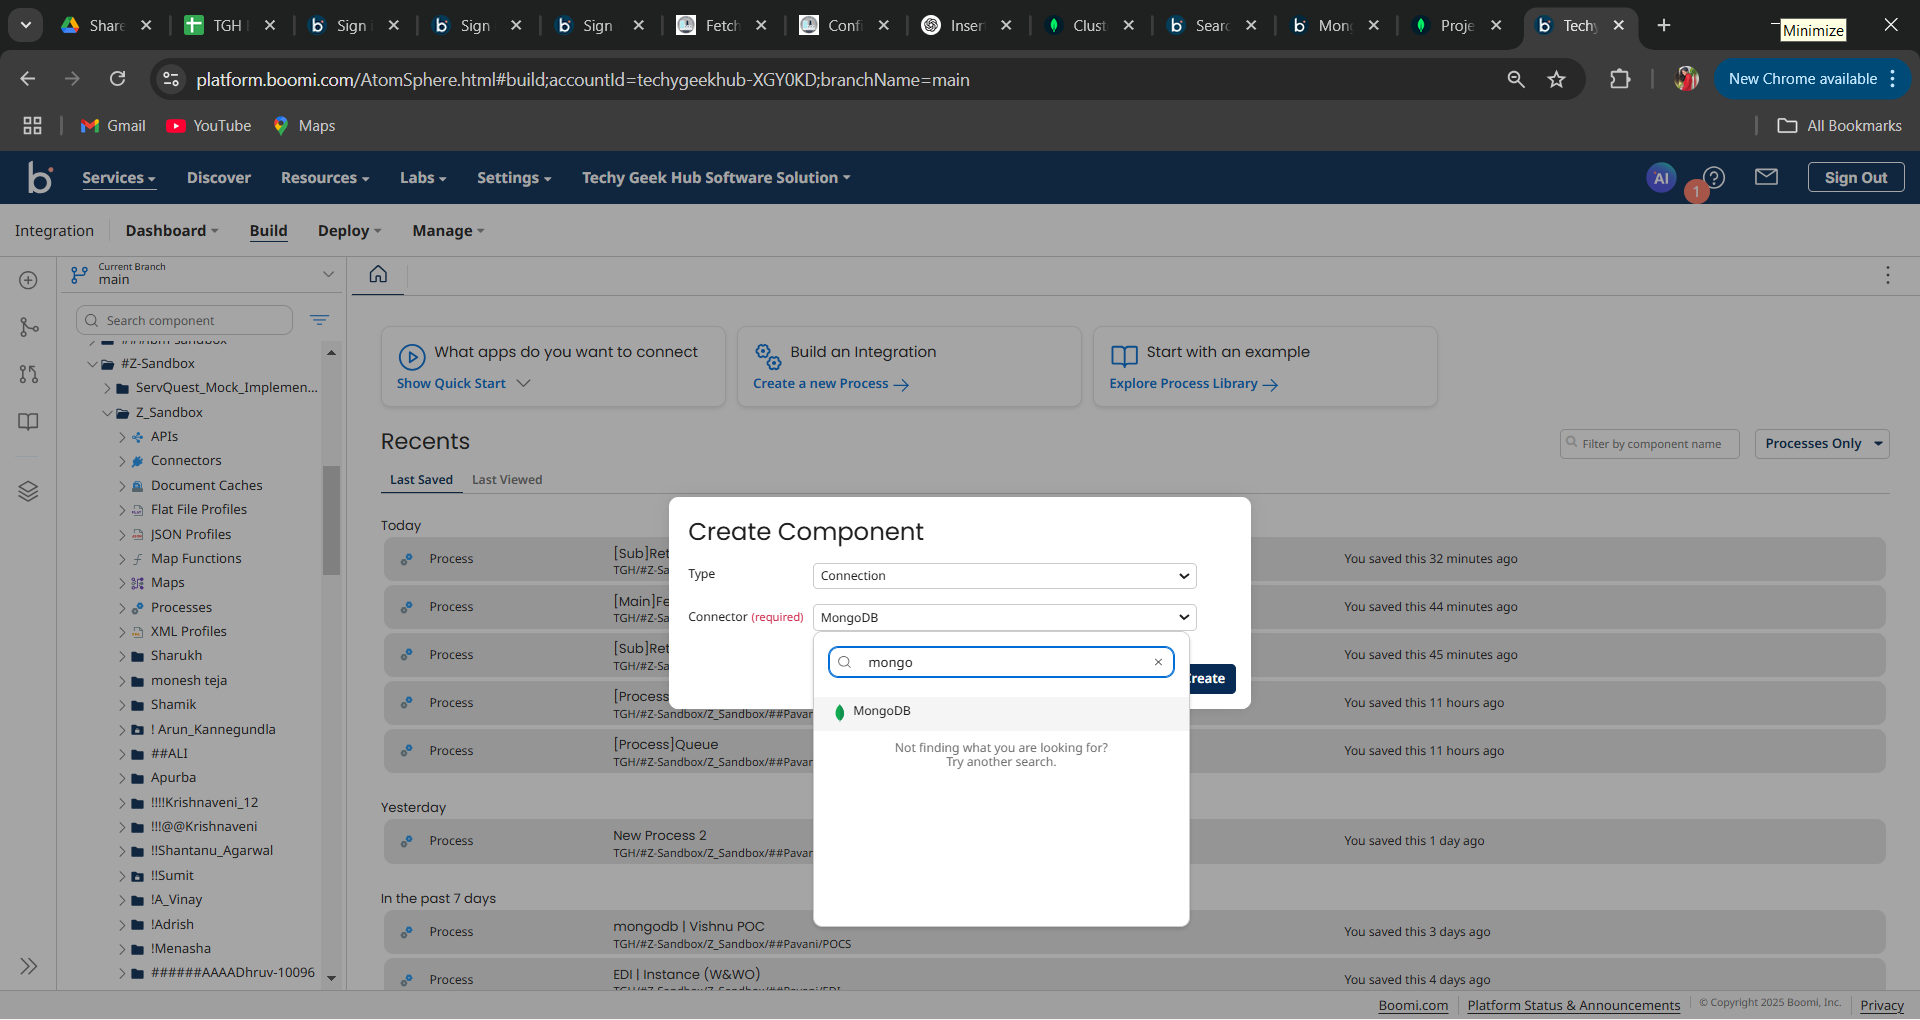
Step 2.4: Configure a proper name for the connection component.
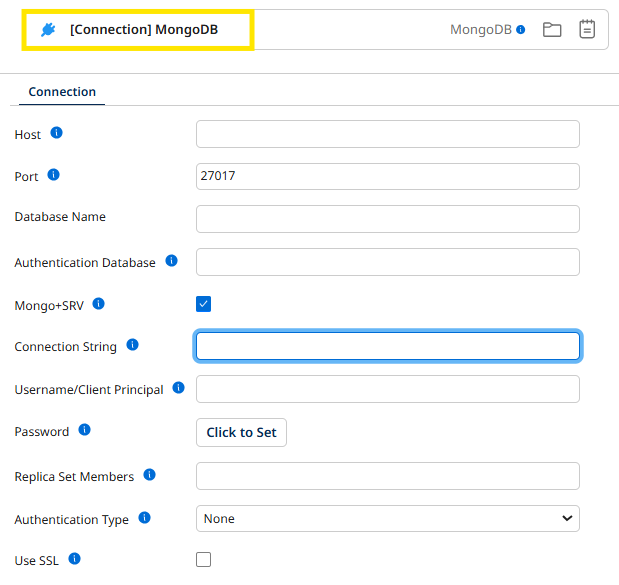
Fill the connection component fields as mentioned below-
- Host: Enter the Region URL provided by your MongoDB cluster.
- Port: The default port for MongoDB connections is 27017, as shown in the image.
- Database Name: Specify the name of the database you created in MongoDB.
- Connection String: If the Mongo + SRV checkbox is enabled, this field will be available. Copy the value from the cluster setup, but ensure you replace placeholders like <db_username> and <db_password> with the actual database credentials.
Once configured, test the connection to confirm it is successful. If it fails, review and verify the setup following the steps above.
Steps to develop a Process in Boomi Platform:
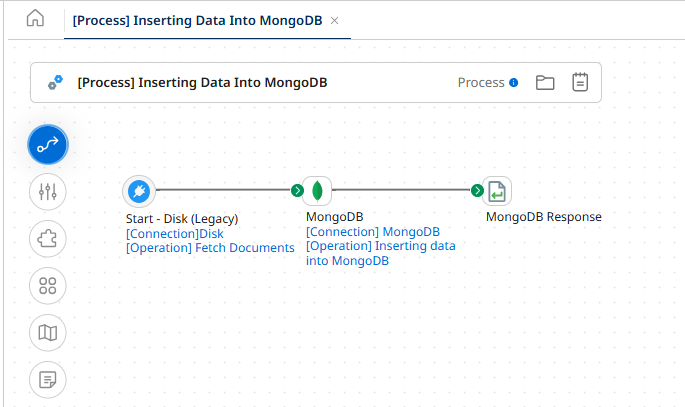
Step 3.1: Configure a new process with proper name and configure the start shape with connector to retrieve the data.
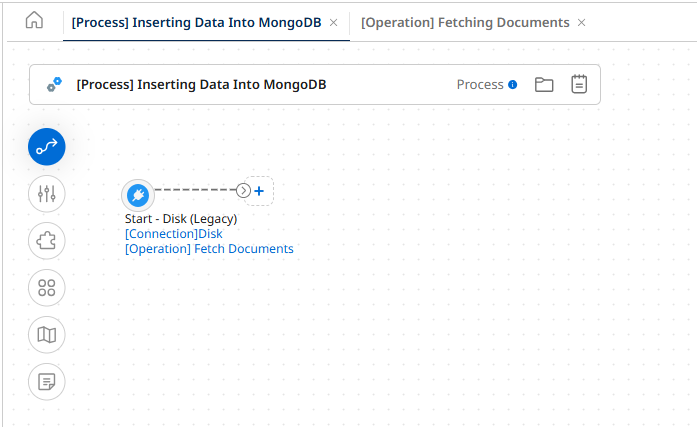
Step 3.2: Then, configure another shape with a connector, selecting the previously created connection component. Finally, set the action to “Create.”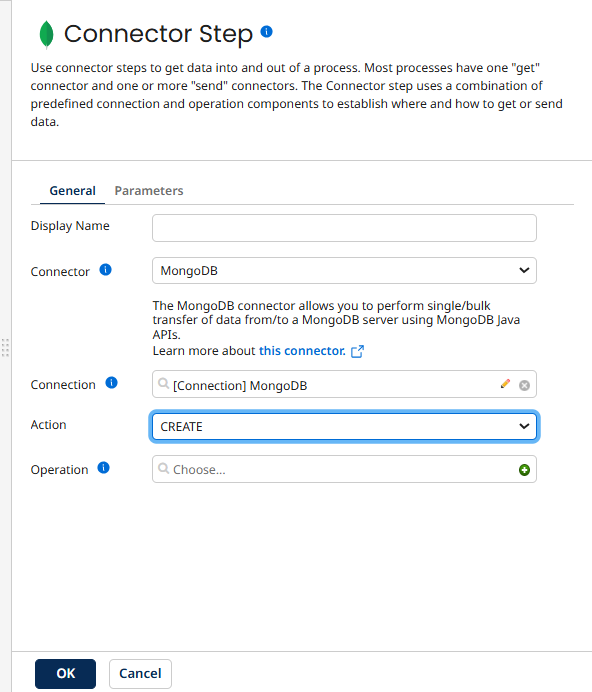
Step 3.3: For operation click on + icon for creating and give proper name then import operation by providing valid details.
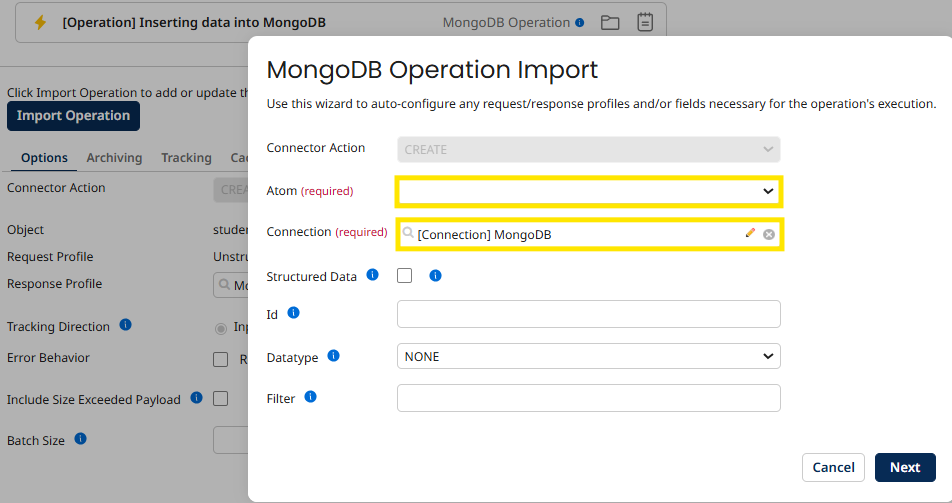
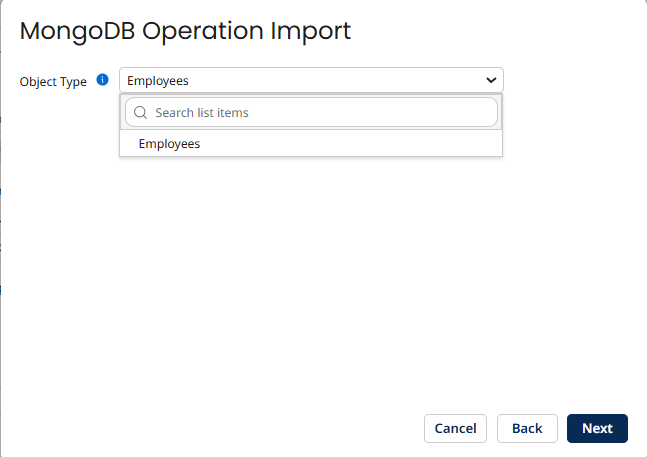
Step 3.4: Choose the Object (table/collection name) from the dropdown and click on Next.
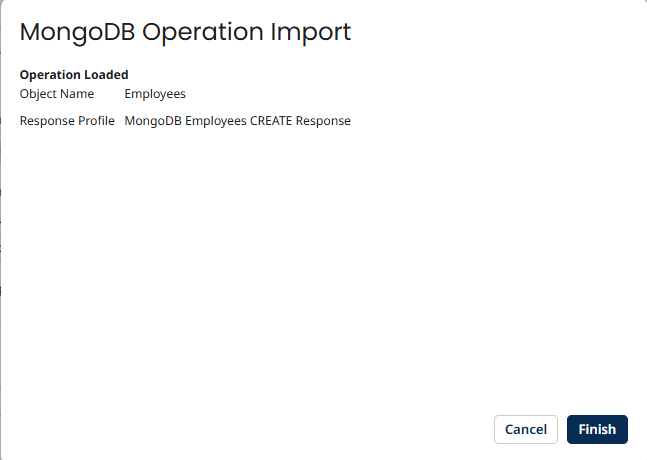
Step 3.5: Click on Finish.
Step 3.6: Complete Process looks as shown below.
Step 3.7: Now, the process is done and you need test. Then the document will be loaded in MongoDB is shown as below.
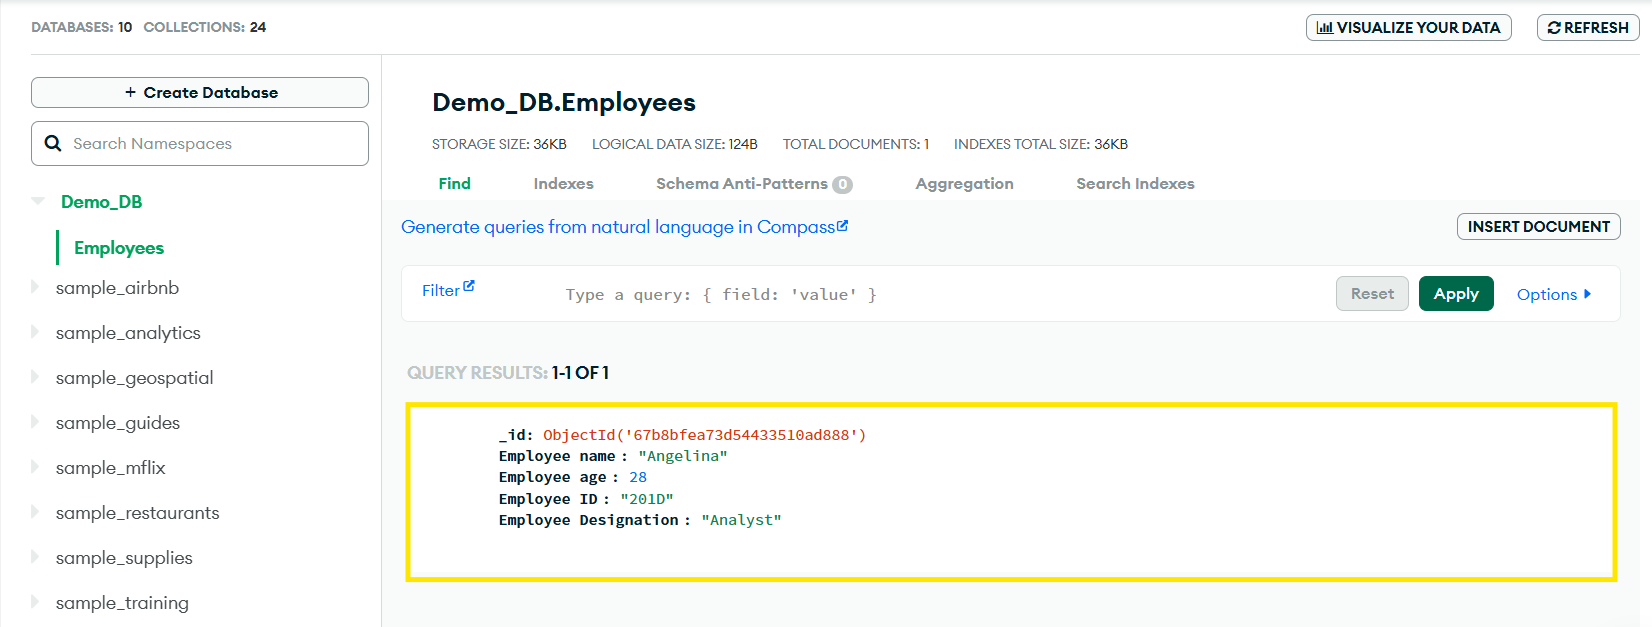
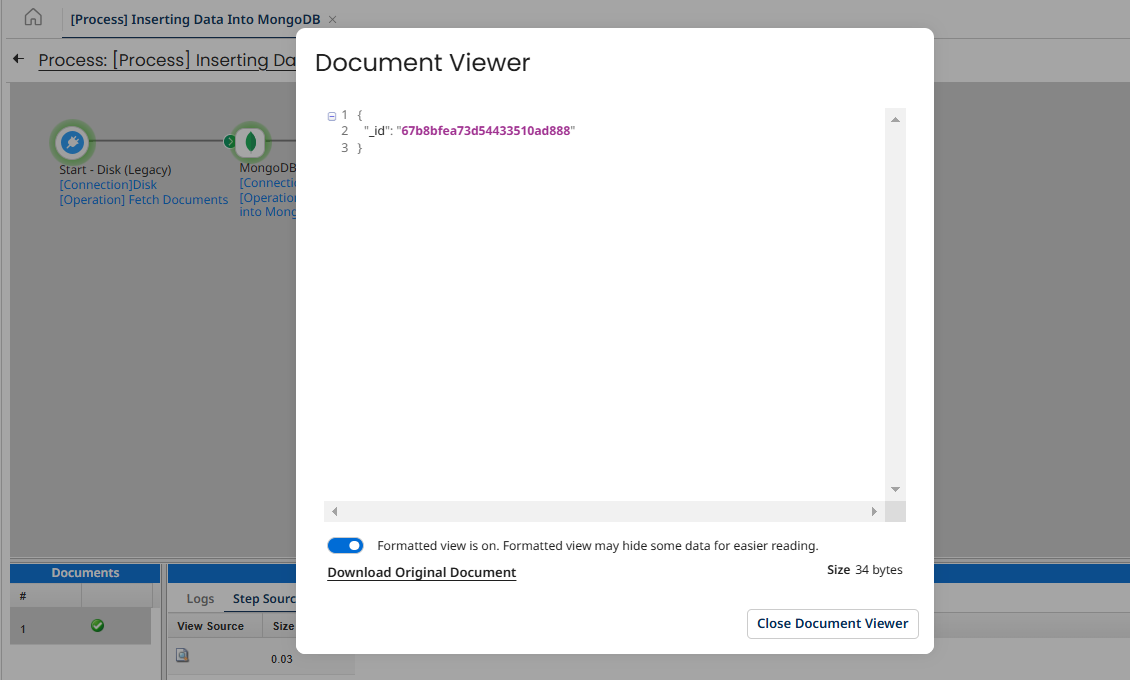
Step 3.8: We can see this is how the MongoDB response will look like, which will be having a unique id for each and every document that has been inserted.
In this way we can use MongoDB connector to transmit data from any endpoint and create interfaces that facilitate data synchronization.

