Implementation of XML to JSON Transformation and JSON to XML Transformation API Policies in Boomi
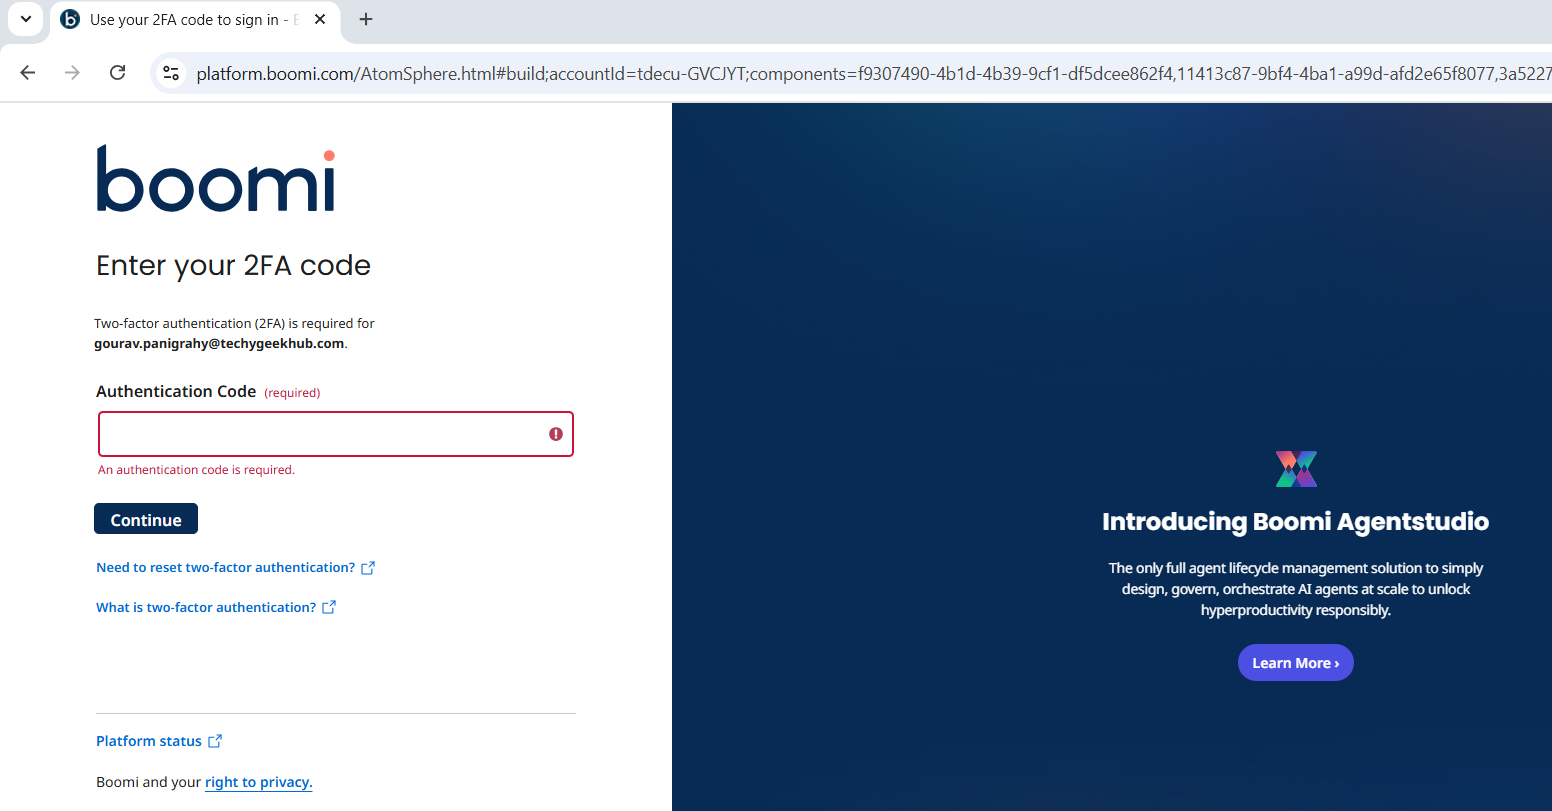
Step 1 – log onto the Boomi platform (https://platform.boomi.com/) with the required credentials i.e. Email Address and Password.

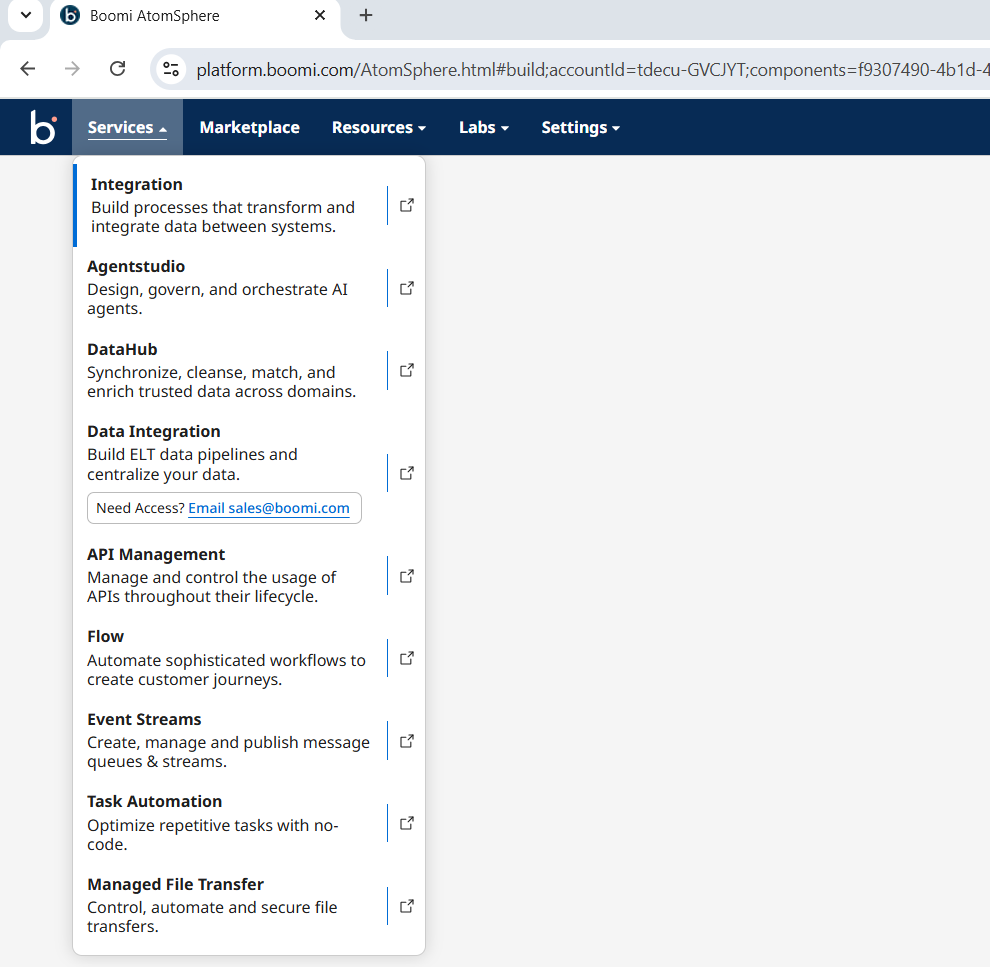
Step 2 – Provide the 2-factor authentication code & click on services and choose Integration.
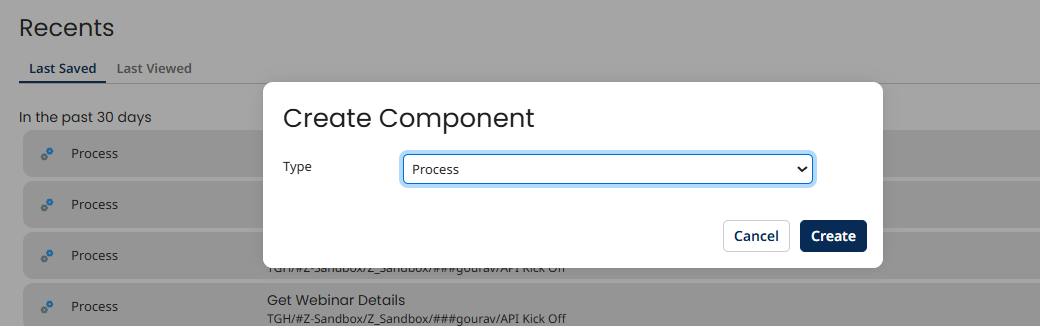
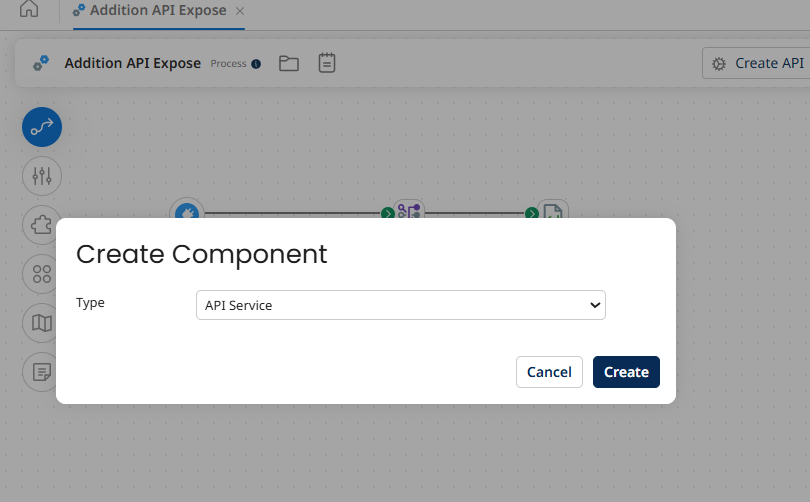
Step 3 – Create a Component.
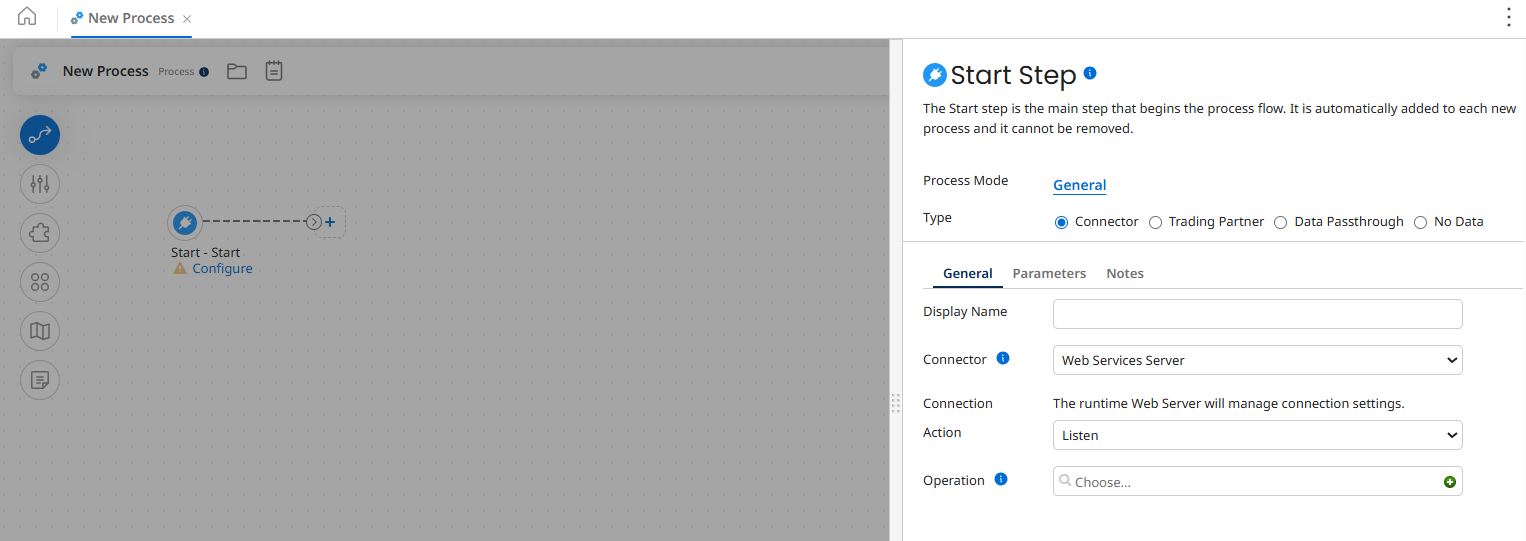
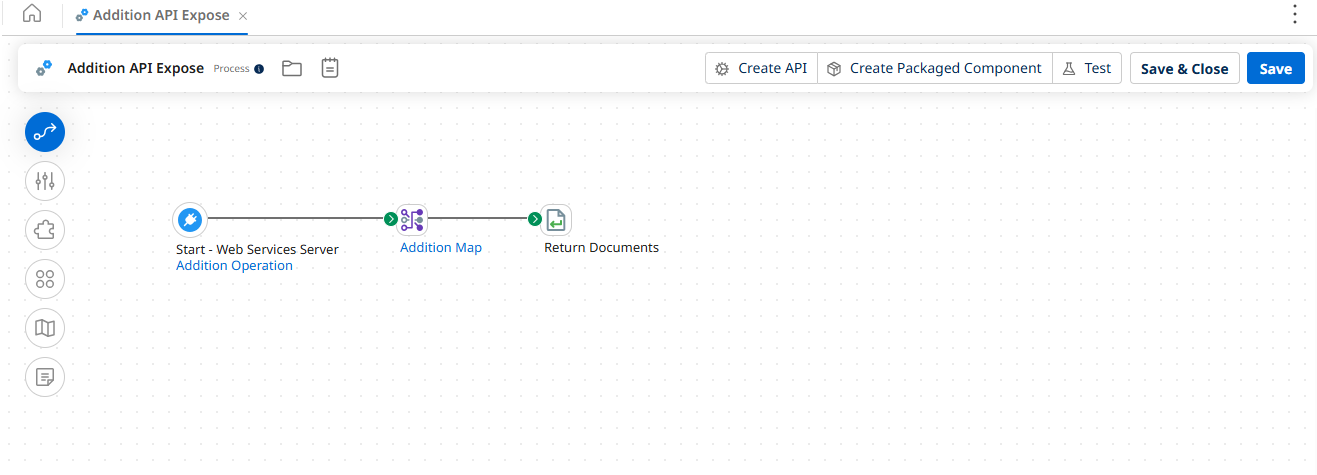
Step 4 – Choose a start shape of connecter type, and choose web services server connector, because we are exposing an API where we will be applying the API Policies.
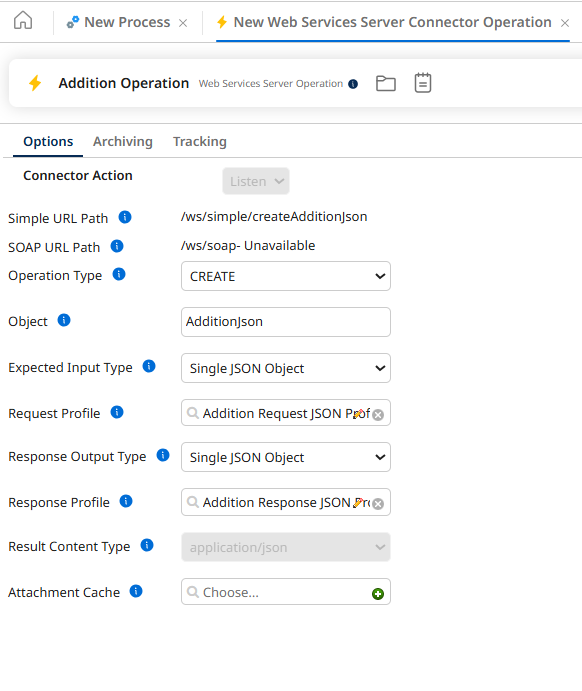
Step 5 – Click on + Operations to create a new operation, Give Operation a name, choose operation type, give a value to object and we are choosing the request and response as single json object and we are attaching the corresponding json profiles accordingly, and then save and close the component.
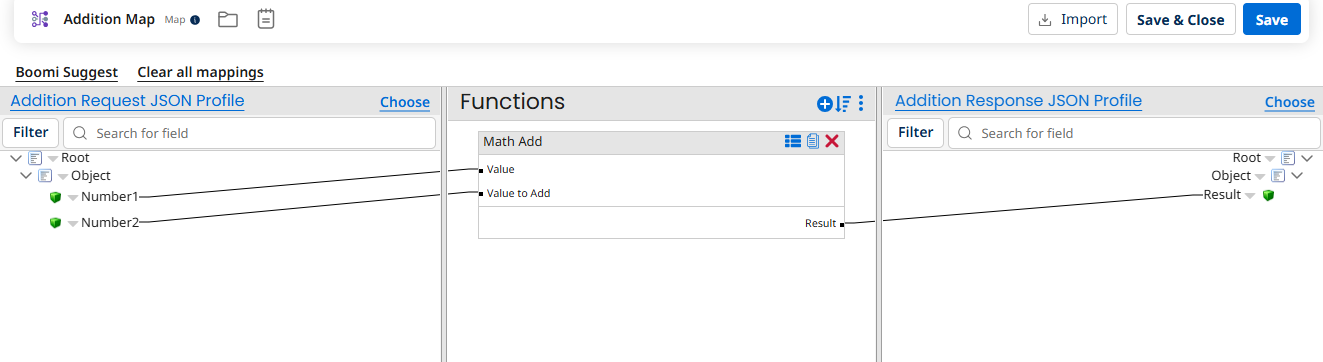
Step 6 – Here, take a map shape from the shape pallet to do the addition of numbers. Configure the source and the target JSON profiles in the map component. From the map functions choose category as Numeric and function as Math Add, click ok on the configure defaults dialog box.
Map the inputs from the request profile to the function, and also map the result out from the function to the response profile.
Give a name to the map component and then save and close.
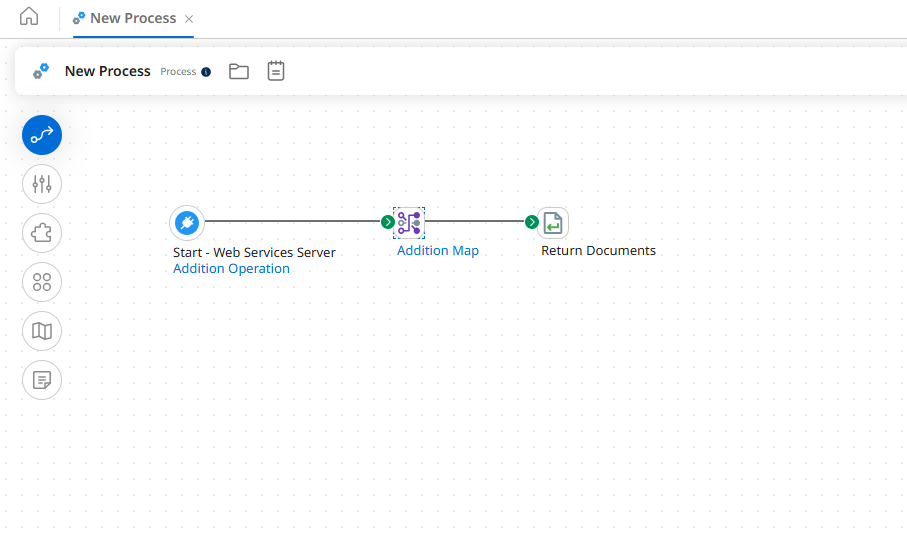
Step 7 – After configuring the map shape, we will attach a return document shape with it to get the response.
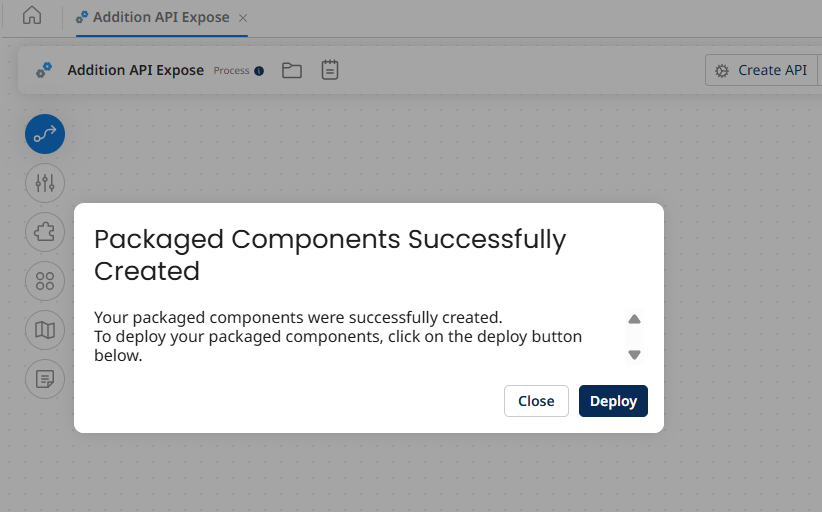
Step 8 – Will give a name to our process and save, later will proceed to create a packaged component by clicking on the create packaged component and click on add details followed by providing a version number and packaged notes.


Step 9 – After packaging we get a Pop-up to deploy the Process and we have to click on deploy.
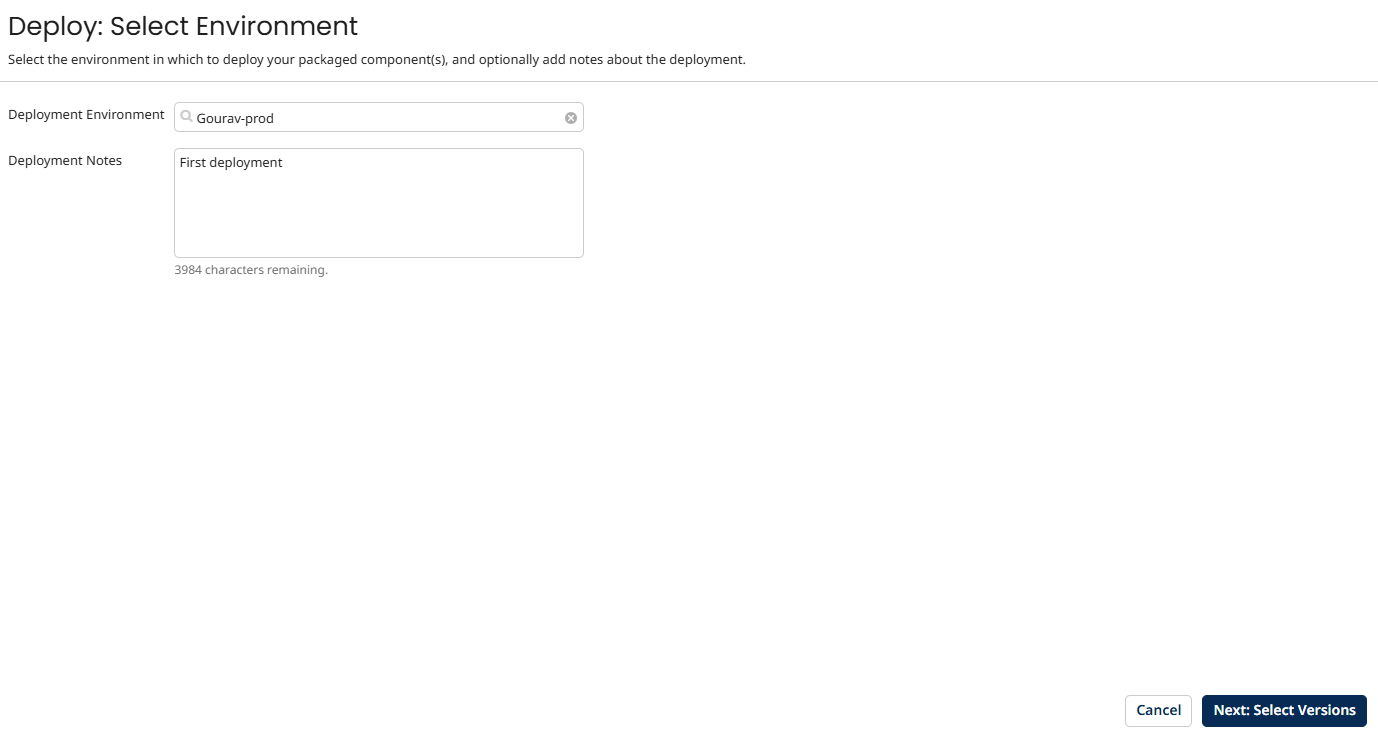
Step 10 – we have to select an environment where our atom is attached and give deployment notes & click on next select version.
Step 11 – After that we have to click on next review and then deploy.


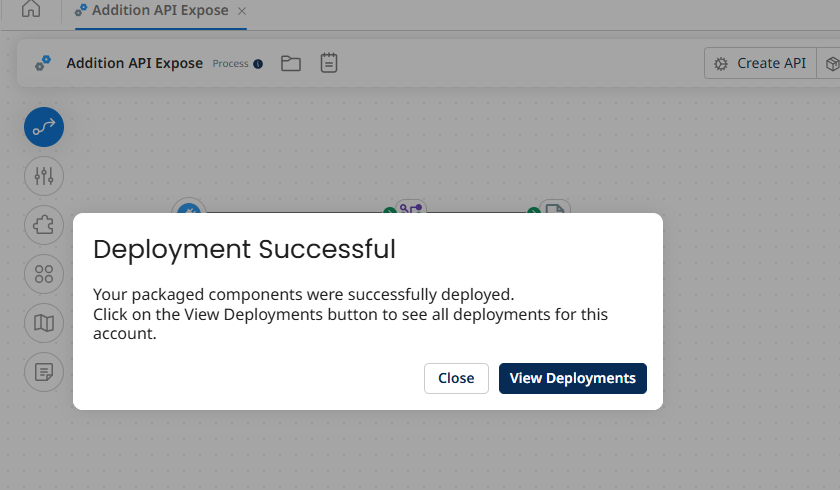
Step 12 – After that a pop-up of view deployment will come by clicking on it, we can see our deployed component.
Step 13 – Now that our API has been exposed, we have to use API Service Component and Gateways to apply a API Policy. In this step, we will configure the API Service Component, in component type we will choose API Service and click on create.
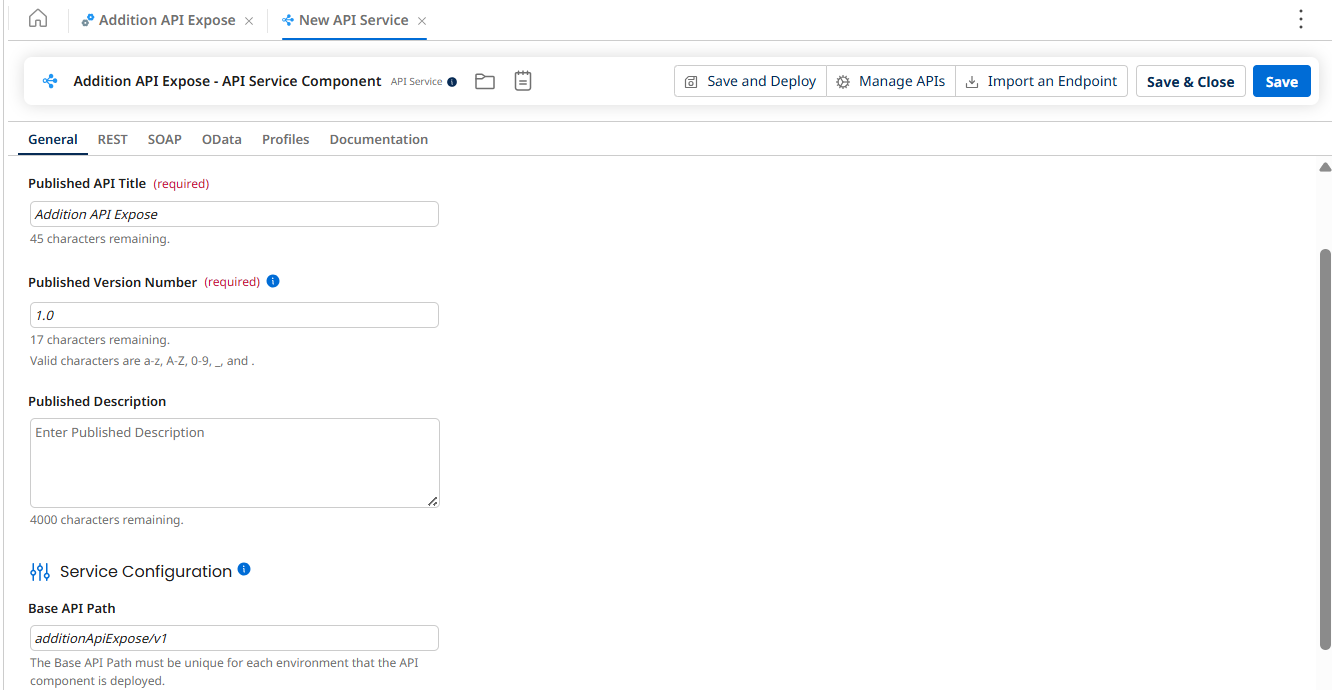
Step 14 – We have to give a name to our API Service component and provide details in the Published API title, version number and base API path and then click on Import an Endpoint.
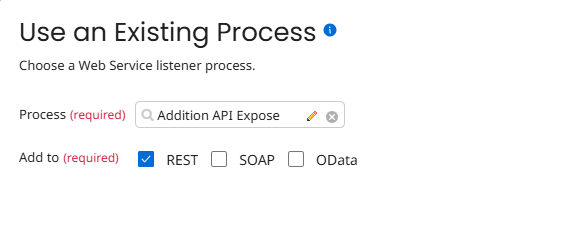
Step 15 – Choose use an existing process and click on next.

Step 16 – Choose your process, check the Rest API and then click on Finish.
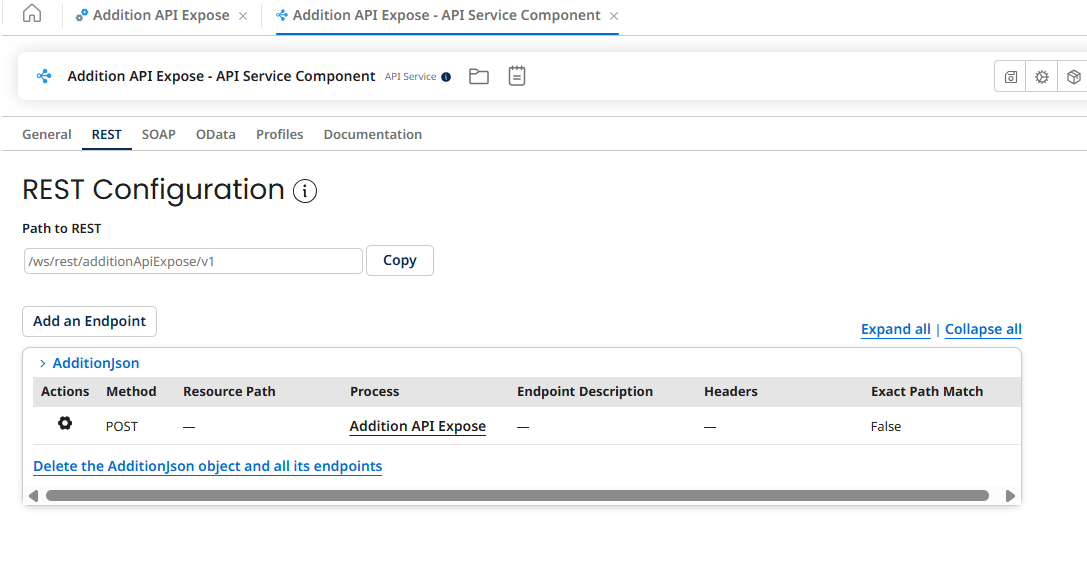
Step 17 – Now click on Rest tab and we can see our end point here and click on save.
Step 18 – We have to create package component and deploy API Service Component too to the same environment we deployed our process.
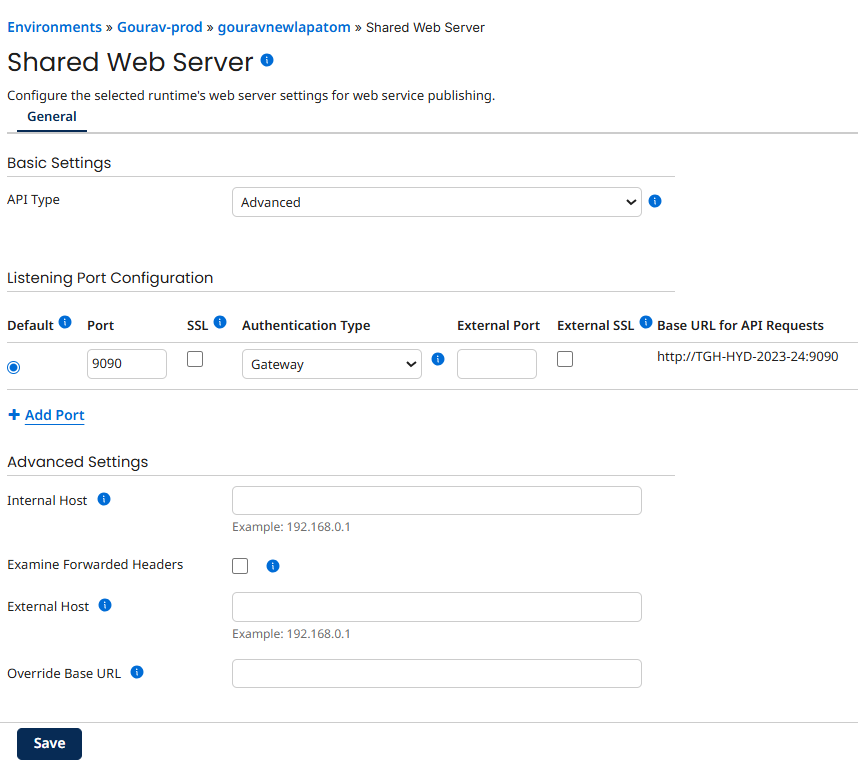
Step 19 – Now for Gateway, we need to make the API type as advanced and the Authentication type as Gateway in the shared web server and click on save & yes, restart plugin.
For this, Go to Manage>Runtime Management>Shared Web Server.
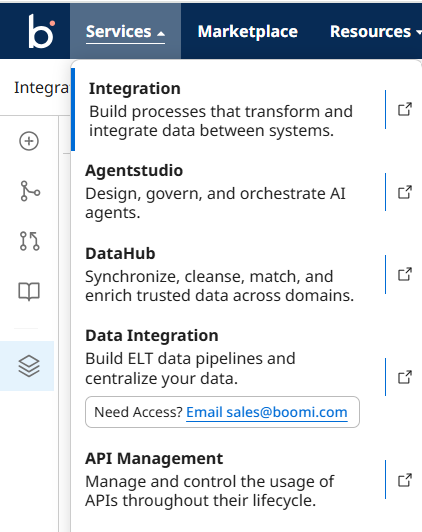
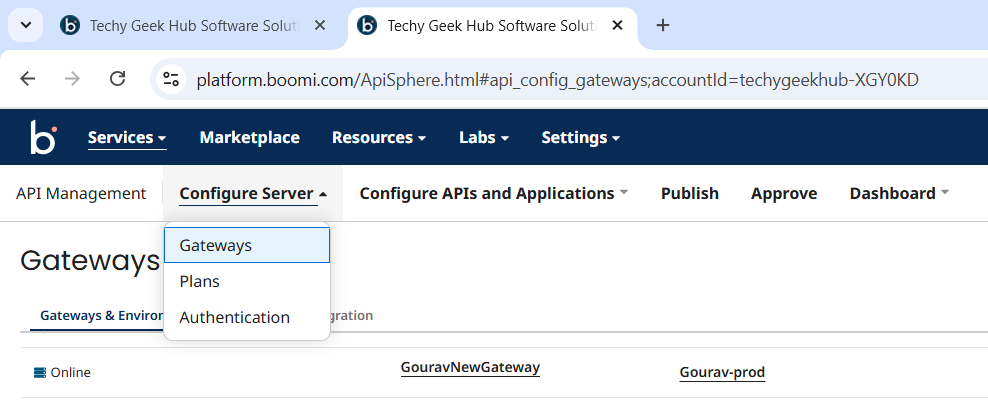
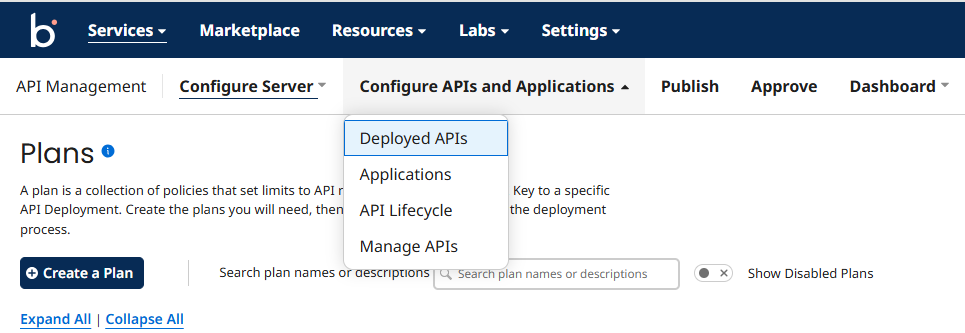
Step 20 – Now click on Services and choose API Management for configuring Gateway.
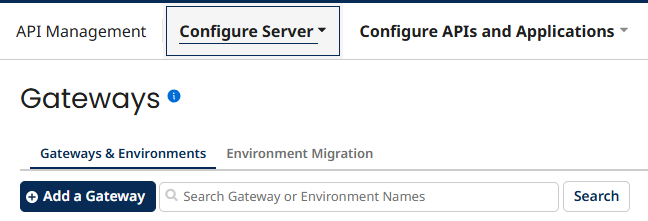
Step 21 – Now click on Configure Server and click on Gateways > Click on Add a Gateway.
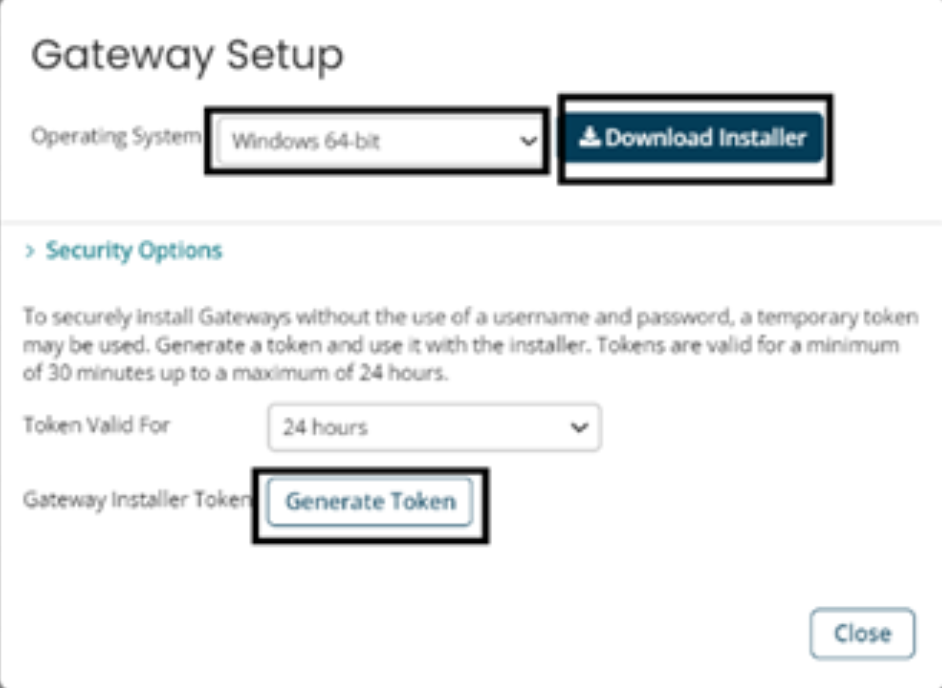
Step 22 – Choose your operating system and click on Generate token – a token will be generated, copy that token and paste it in a notepad to reuse it and click on Download Installer.
Step 23 – Gateway will be downloaded. From downloads in PC, Right click and choose Run as Administration, click on next.
Step 24 – Choose token and paste the token and then click on Next.
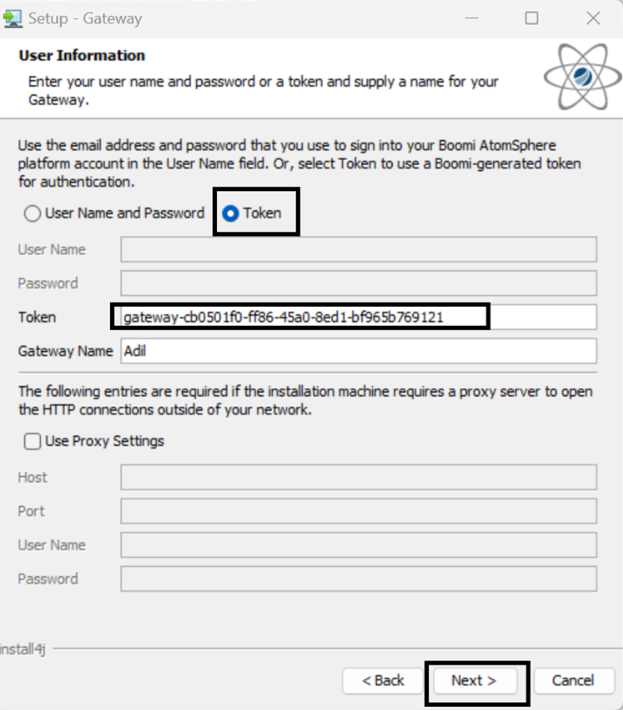
Step 25 – Click on next, next, next and finish. And we will be able to see our gateway in Boomi now.
Step 26 – Now we have to migrate our Gateway to our environment.
Click on Environment Migration.

Step 27 – Click on Create a new migration, choose your Environment and Click on Create Migration.
Step 28 – Choose your Gateway and click on Save and Continue.
Step 29 – End Points can be edited here then again click on Save and Continue, again click on Save and Continue.
Step 30 – Gateway status can now be seen and then click on Save and Continue, again click on Save and Continue.
Step 31 – Now our deployed APIs can be seen here, and now click on Save and Continue.
Step 32 – Click on Migrate and our Gateway will be migrated to our environment.
Step 33 – Click on Configure Server>Gateways and then choose your gateway from the list and click on the gateway to see more details of it.

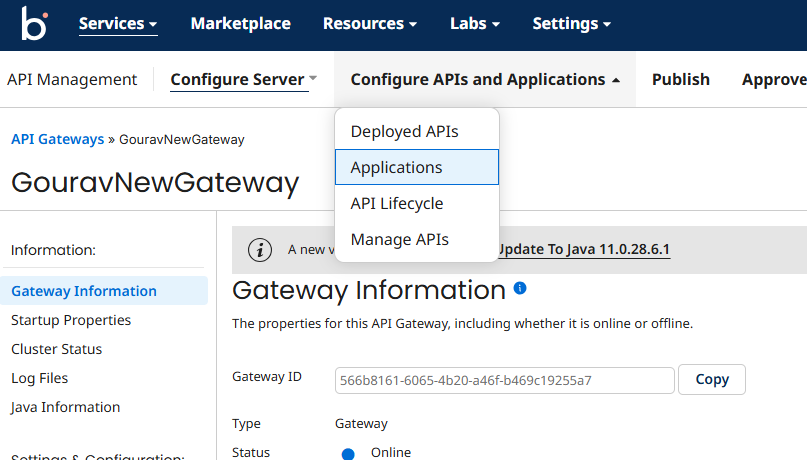
Step 34 – Now in order to use gateway, we need to create an application, a plan and a subscription.
To create an application, click on Configure APIs and Applications>Applications.
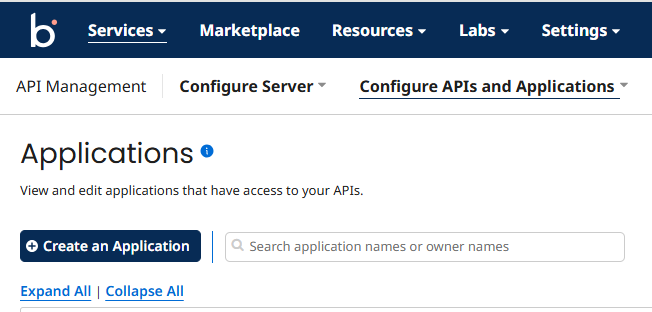
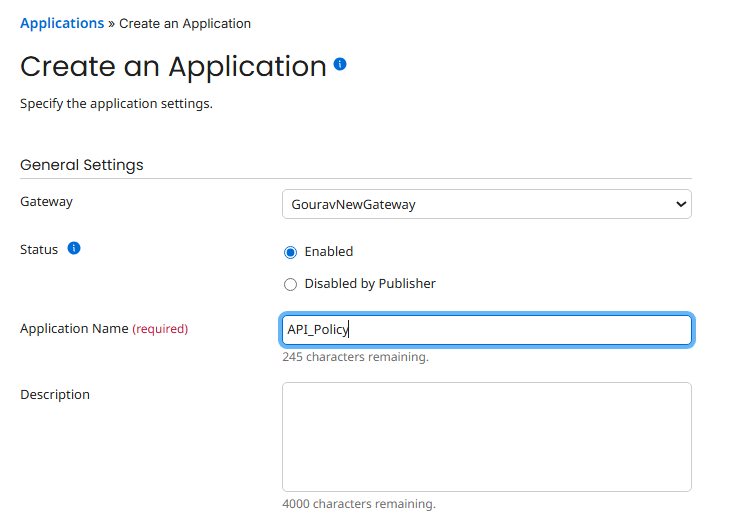
Step 35 – Click on Create an Application, to create a new.
Step 36 – Choose your gateway from the list in the gateway section & give a name to the application and save the application.
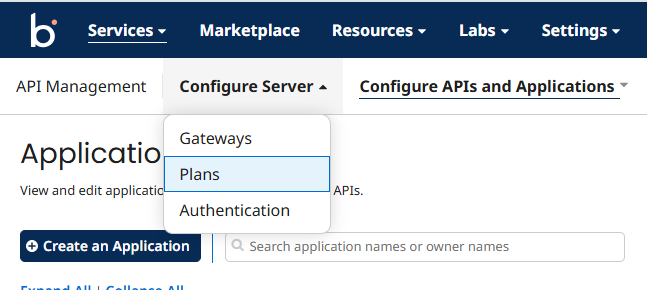
Step 37 – Will proceed to create a plan, in order to do so we need to click on Configure Server>Plan
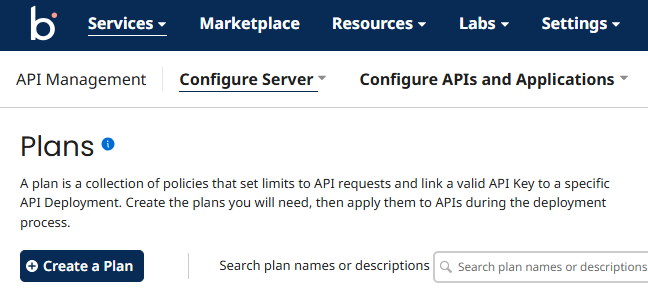
Step 38 – Click on Create a Plan
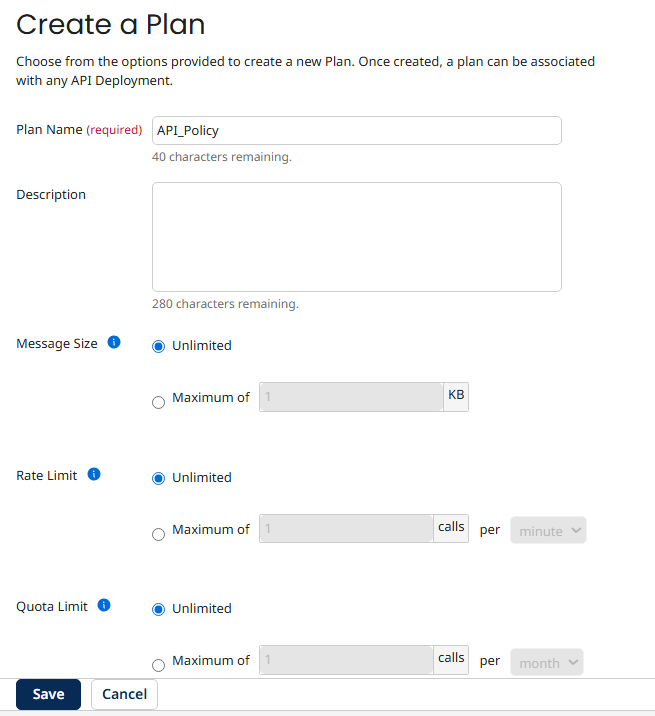
Step 39 – Give a name to the plan and save the plan.
Step 40 – Now click on Configure APIs and Applications>Deployed APIs
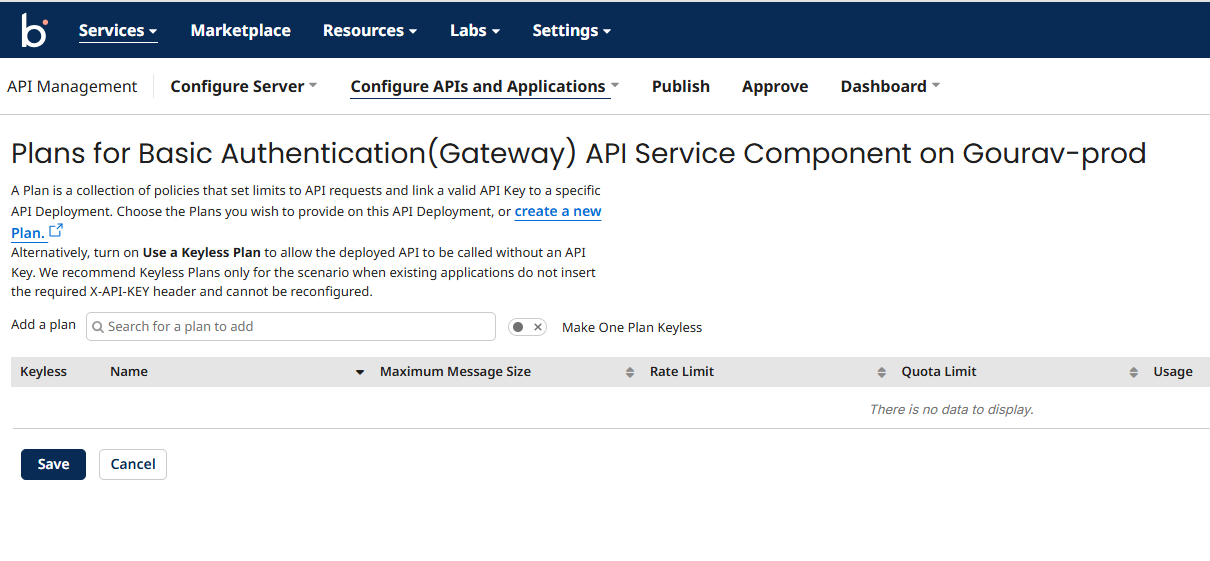
Step 41 – Here we see the list of Api service components deployed, click on the plan which shows incomplete, to attach the plan (just created) to our Api service.

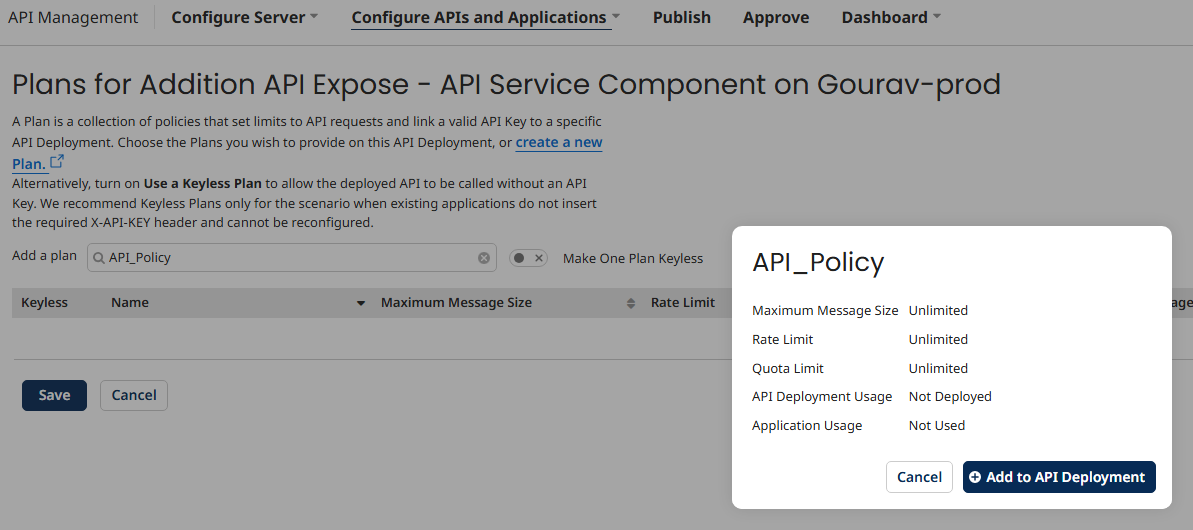
Step 42 – Search for the API_Policy(we created) to attach here in the Add a plan box
Step 43 – Click on Add to API Deployment
Step 44 – Make the plan keyless so we don’t need the key while consuming, click on save.
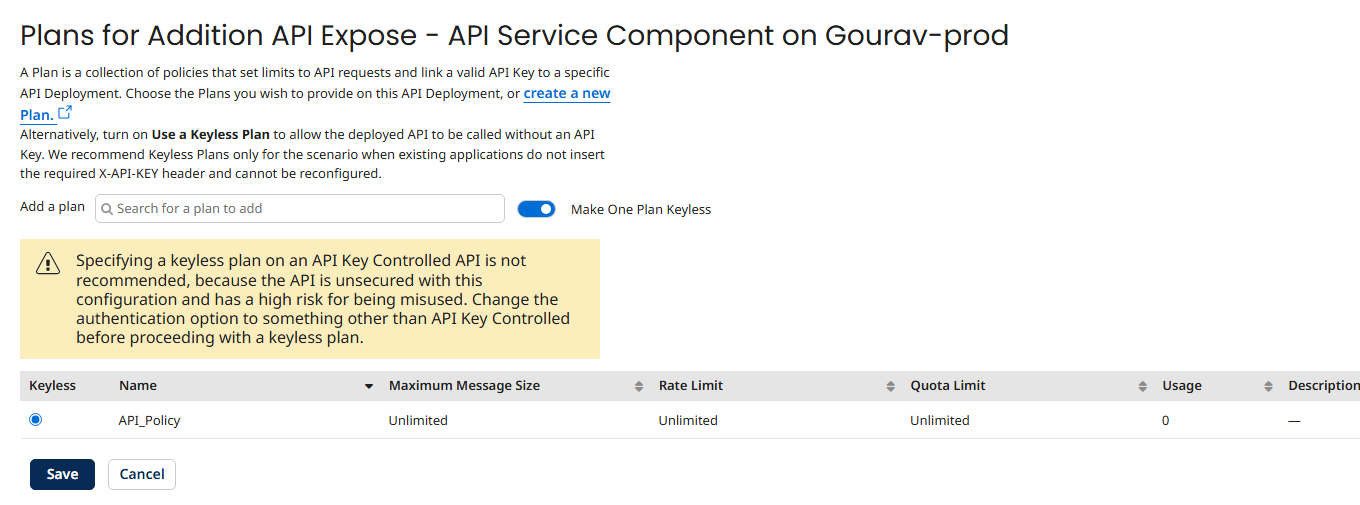
Step 45 – Now we can see the plan has been attached which is keyless.
Step 46 – We need to subscribe, for that we will go to Configure APIs and Applications>Applications, then scroll to our gateway, click on 0 subscription
Step 47 – Click on Subscribe to an API, select the Addition API Expose(Gateway) and click on Next.
Step 48 – Choose the plan(API_Policy), and click on Next.
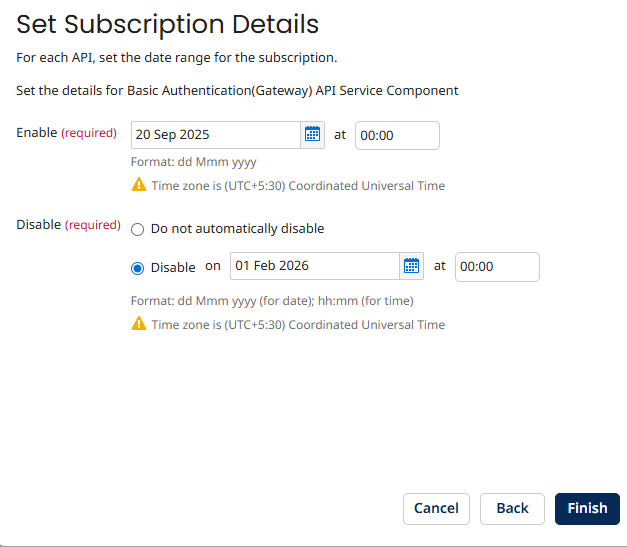
Step 49 – Set the subscription time period as required, and click on Finish.
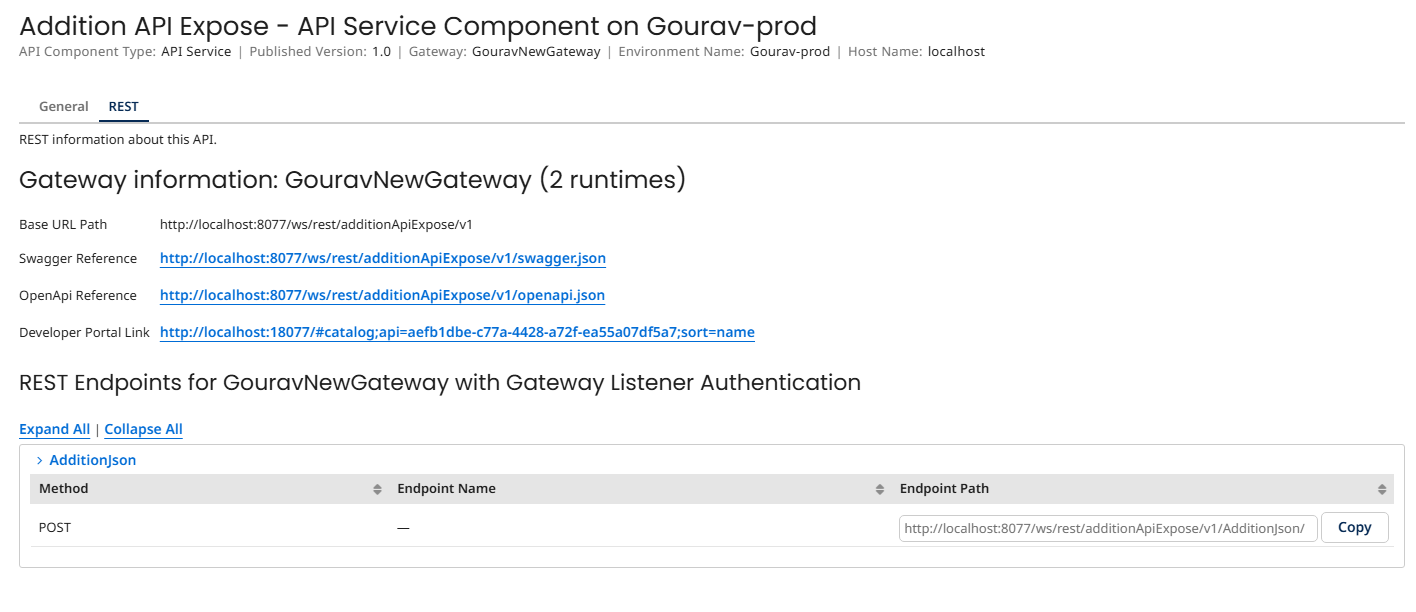
Step 50 – Click on Configure APIs and Applications>Deployed APIs, scroll to the gateway and click on the view hyperlink of our API.

Step 51 – Click on the Rest tab, and copy the Endpoint Path and paste it in a notepad.
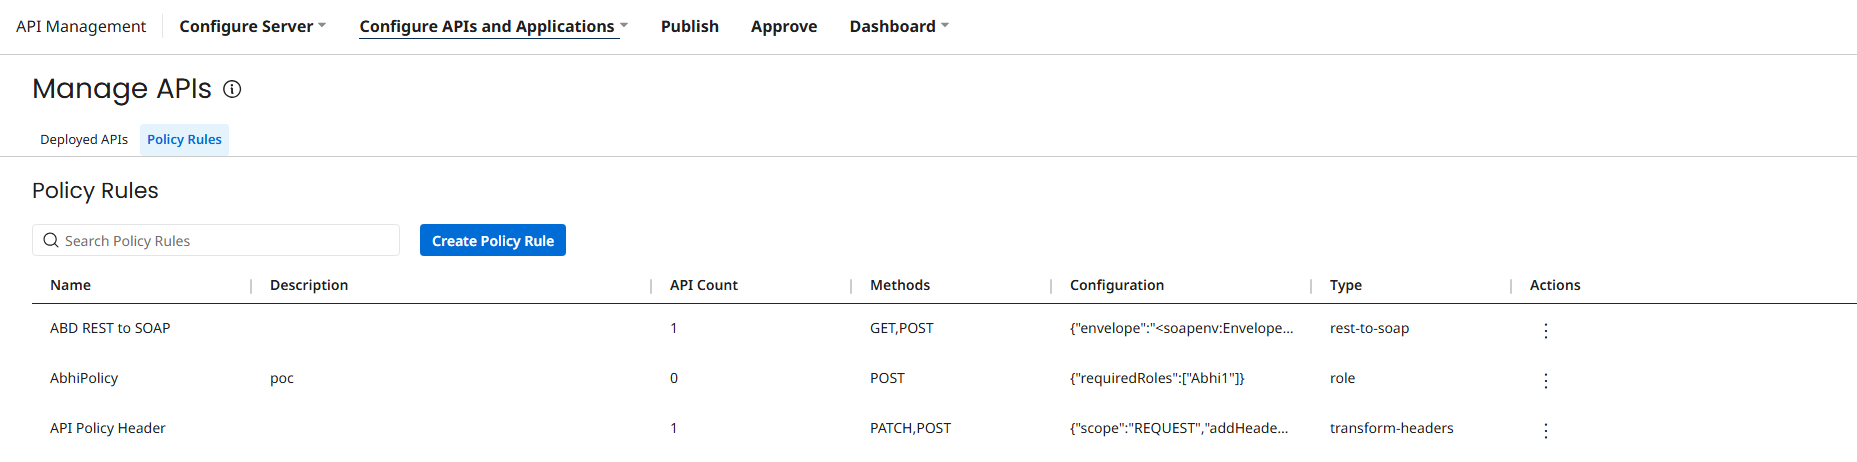
Step 52 – Click on Configure APIs and Applications>Manage APIs. Click on Policy Rules tab & click on create policy rule.
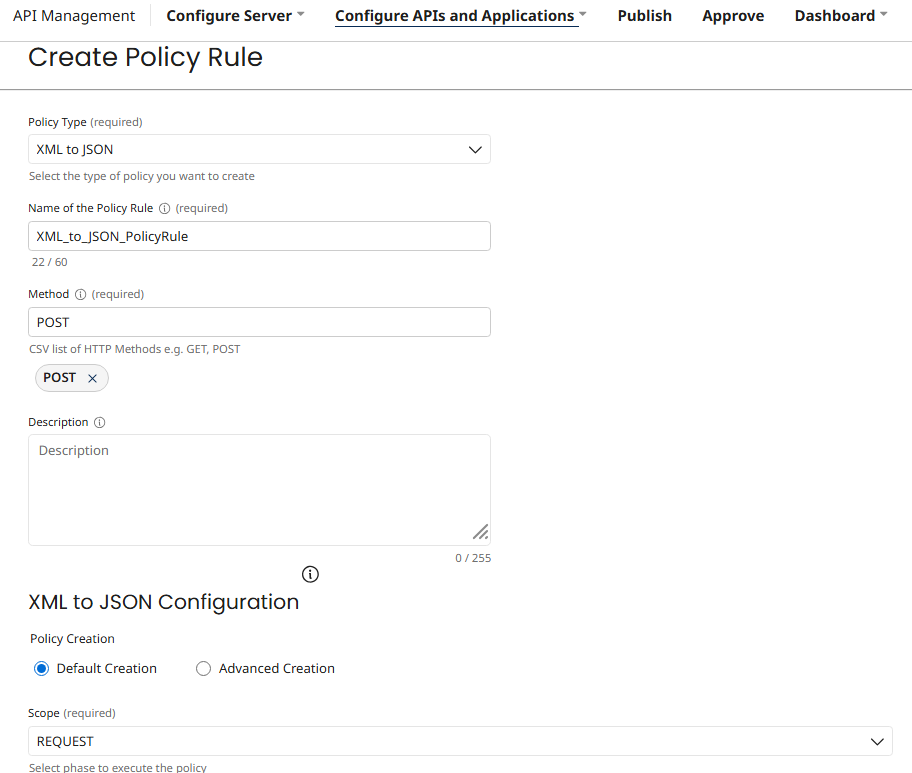
Step 53 – Select policy Type as XML to JSON. Give a proper name to the policy, provide the method as post since our API needs a body, give the scope as request. This policy will be applied to our requestof the API. Click on save.
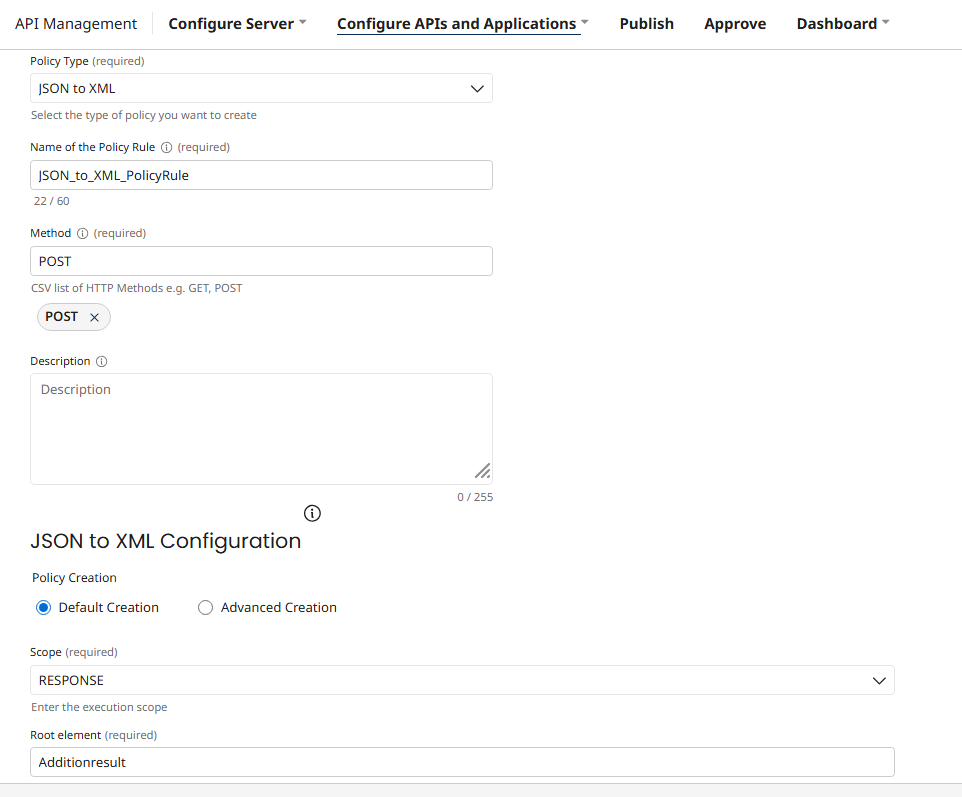
Step 54 – Now create another policy with same steps but this time the policy type should be JSON to XML, give a name to the policy, provide method, scope should be response as this policy will be applied to our response of the API, give Additionresult as the root element. Click on save.
Step 55 – Search for XML_to_JSON_PolicyRule, we created to attach to our request of the API. Click on the 3 dots.

Step 56 – Click on Add to API>Select our API name>and choose before request and before standard policies, then click on save.

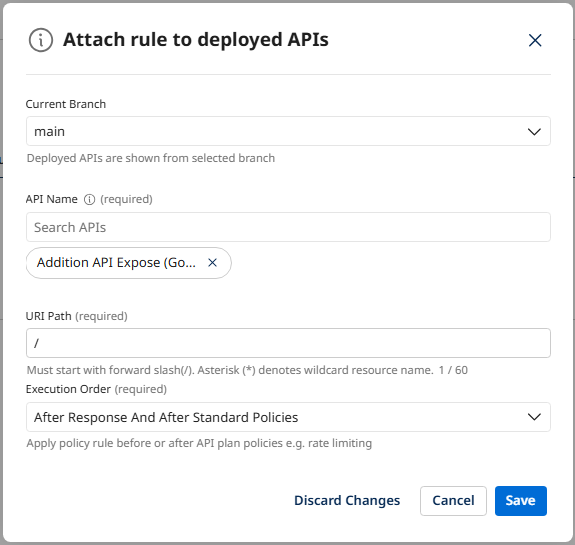
Step 57- Search for JSON_to_XML_PolicyRule, we created to attach to our response of the API. Click on the 3 dots. Click on Add to API>Select our API name>and choose after response and after standard policies, then click on save.
Step 58 – Open Postman, create a request and paste the copied endpoint path(step 51) in the URL and switch to Authorization tab, select No Auth in the Auth Type and try hitting the API.
sample Request –
<Number1>20</Number1>
<Number2>30</Number2>
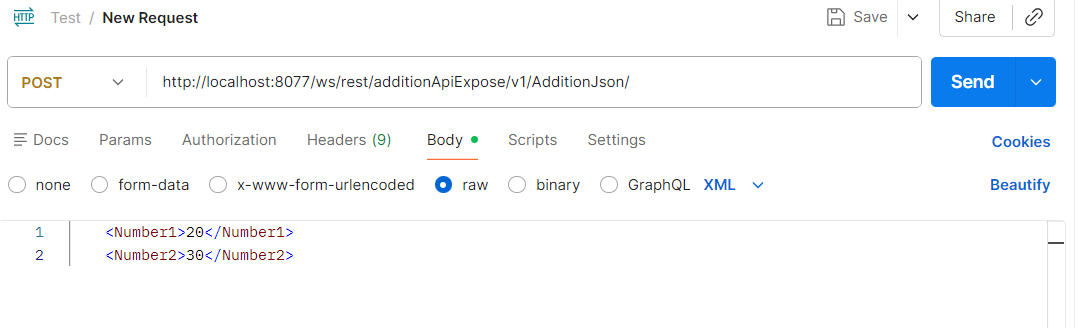
Step 59 – Click on send to see the response.
Our API needs JSON request but we are providing XML Payload, so the API Policy which we applied to our request converts the XML to JSON Payload.
Similarly our API’s response is supposed to be JSON too but the policy we applied to the response converts it from JSON to XML Data.
Also the XML root element is Additionresult which we configured while creating the policy.
Build Smarter APIs with Seamless Data Transformation
Struggling with XML to JSON conversions, API policy implementation, or Boomi API Management complexities? TGH helps you design, secure, and optimize APIs with advanced transformation capabilities and enterprise-grade governance.
👉 From API exposure to policy enforcement and real-time data transformation, we ensure your integrations are scalable, efficient, and future-ready.
📞 Call Us: +91 9310947352
🌐 Visit: www.techygeekhub.com
🔗 Get Expert Help: https://techygeekhub.com/contact-us/
Accelerate your API strategy with TGH — build powerful, transformation-ready integrations today.