

A Step-By-Step Guide To MuleSoft FTP Connector
Overview: –
- Transferring files between systems is a common task in many businesses. MuleSoft makes this easy with its FTP connector. This blog will guide you through using the FTP connector in MuleSoft, from setting it up to transferring files securely and efficiently.
- The FTP connector allows you to connect to FTP servers, including secure FTPS servers, to perform various file operations like uploading, downloading, listing, and deleting files. It’s a powerful tool for simplifying file transfers in your integration projects.
- In this blog, you will learn:
- What is FTP and How to create an FTP server using FileZilla.
- Instructions to set up the FTP connector in MuleSoft.
- An example showing how to write a file through an FTP server.
What is FTP: –
- File Transfer Protocol is a standard network protocol used for the transfer of files from one host to another over the Internet.
- FTP in MuleSoft is widely used for automating secure file transfers and integrating legacy systems with modern applications. It supports operations like data synchronization, batch processing, and scheduled transfers.
- One of the main reasons why modern businesses and individuals need FTP is its ability to perform large file-size transfers.
- FTP supports authentication mechanisms like Username and Password to verify the identity of the user who is accessing the files over the server.
- In a normal FTP, data is not encrypted. The data will be transmitted as plain text over the Internet.
- To configure the FTP Communication method, first, we need to set up an FTP server in the cloud or local system.
- In local systems, we can set up an FTP Server using FileZilla.
FileZilla: –
- FileZilla is a free, open-source file transfer protocol (FTP) software tool that allows users to set up FTP servers or connect to other FTP servers to exchange files.
- Now set up an FTP Server by installing the FileZilla server:
Steps to install and configure the FileZilla Server:
- Click on the below link to download the FTP server.
Download FileZilla Server for Windows - Click on Download FileZilla Server to download

Note: – If you are using other than Windows then you need to click on Show additional download options and there you can download.
3. A window will pop up and there we have to click on Download under FileZilla Server. Then FTP server exe file will download.

4. Click on the downloaded file and click on Yes.
5. Click on next

6. Click on next to continue
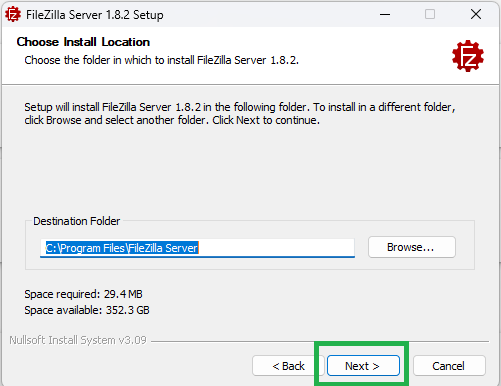
7. Click on next to continue

8. Click on next to continue

9. Now type a password in the box which is marked and click on Next

10. Now click on Install to install the server

11. After Installation, a new window will pop up. Click on OK

12. The FileZilla server will pop up by default. if not, open Administer FileZilla Server and click on Connect to Server

13. Enter your password and click on ok

14. Now go to the server tab, click on configure

15. A wizard opens as shown below. Now Click on Users and click on Add to add a user.

16. Configure the username and choose Require a password to log in under Authentication and type a password that is specific to the user

17. Click on Add to add the path. Configure the Virtual path and Native path.
Note: – Here Native path is the local directory path and the virtual path defines the directories the client will see after logging in FileZilla client.

18. Click on Apply and then OK

Now, we successfully created an FTP server, Let’s dive into Anypoint Studio and Create an application to write a JSON file in the FTP server location.
Make sure that you have noted down the points like: –
Host: – localhost
Port: – 21 (By default, it uses port 21)
Username: – mule
Password: – ********
Virtual Path: – /demo
Setting up the FTP Connector: –
- Steps: –
- Create a new project in Any point Studio. To create click on the “File” menu at the top left corner of the window. From the dropdown menu, select “New” and then choose “Mule Project”.

2. A dialog box will appear where you can enter details about your new Mule project. Provide a name for your project in the “Project name” field. And click on finish.

3. Drag and drop the HTTP Listener Connector into the project from the HTTP module. Configure the listener, and set the host to All interface (0.0.0.0), port number as 8081 by clicking on the (+) in Connector configuration. Set the path as /write.


4. Drag a Read component from the file module and drop it on the canvas

5. Configure the Read component by providing a file path from a local directory by clicking on “…” (here I am reading a CSV file)

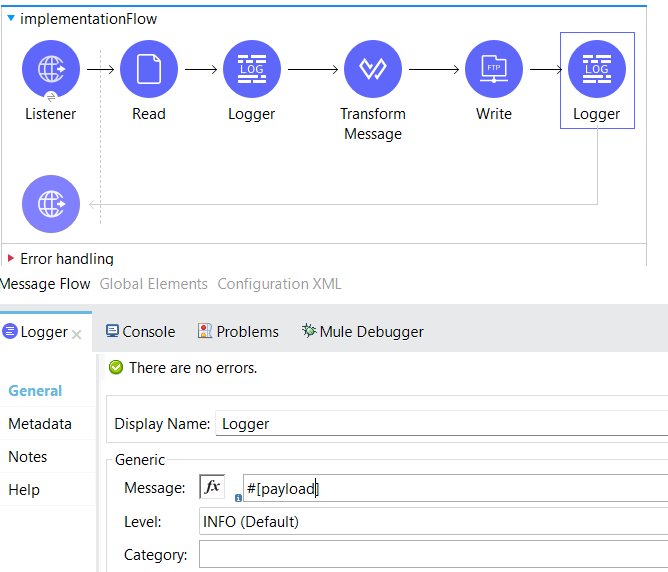
6. Drag and drop the logger from the core module and configure the message as #[payload] to log the payload from the Read component.

7. Drag and drop the transform message component to the canvas and Write a data weave code to convert CSV data to JSON


8. Add the FTP module to the project by clicking on the Add modules

9. Drag and drop the FTP module into the project

10. Drag a Write component from the FTP module and drop it on the canvas

11. Give path as /demo/Employees.json (/Virtual Path + /Filename) and click on (+) for the connector configuration

12. A new window will pop up and there provide the Host, Port, Username, and password as we noted before while creating the FTP server. Click on Test Connection and Check whether the connection is successful or not. Click on OK.

13. Drag and drop the logger from the core module and configure the message as #[payload] to log the payload
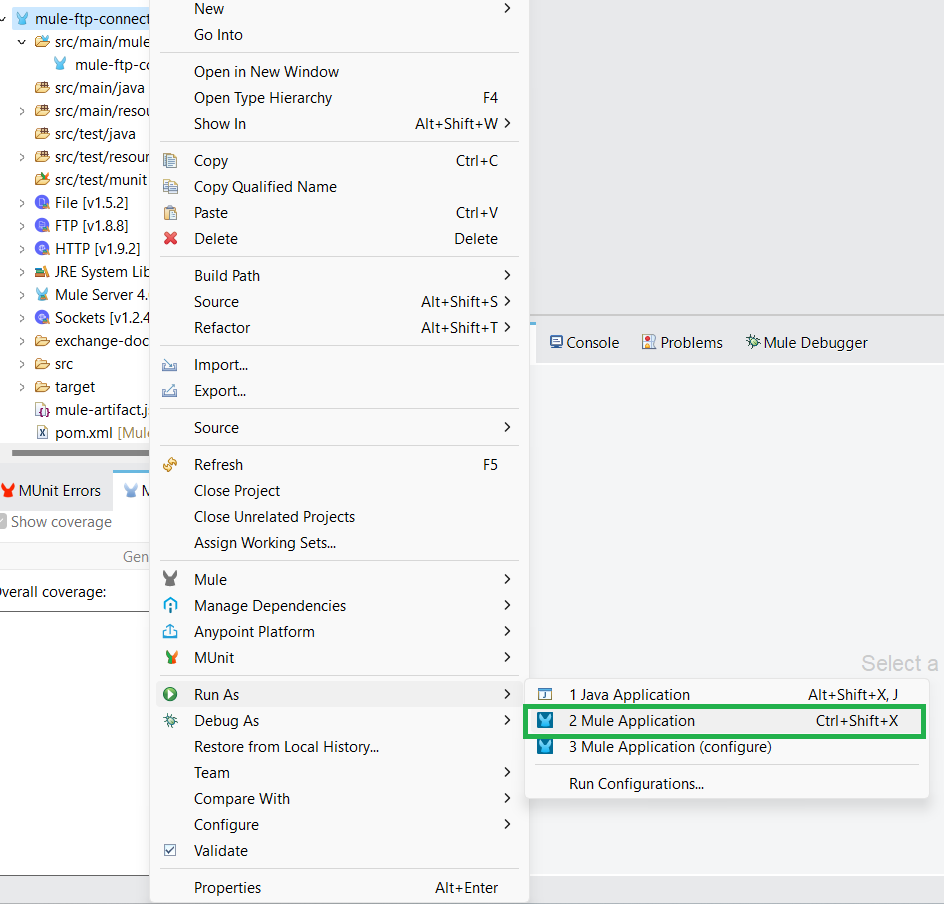
14. Deploy the application, to deploy the application we have right click on the project, go to Run As-> Mule Application
While the application deploying, Open the Native path you have given for the FTP server and check there are Employees.json files. If there is any move it to another folder.
15. After the application is deployed, Open Postman and hit our application, and the endpoint will be http://localhost:8081/write
Open the Native path you have given for the FTP server and check there is an Employees.json file created and the connection for the FTP server is Successful.