

JCE Cryptography Module In Mulesoft
Introduction
What is JCE Cryptography?
The Java Cryptography Extension (JCE) is an officially released Standard Extension to the Java Platform and is included in the Java Cryptography Architecture (JCA). JCE offers a framework and implementations for encryption, key generation, key agreement, and Message Authentication Code (MAC) algorithms.
JCE Cryptography modules in Mulesoft
The JCE strategy allows us to utilize the extensive cryptographic features offered by the Java Cryptography Extension.
We can employ cryptographic capabilities in two ways:
- Password-based encryption (PBE): This approach enables us to encrypt and sign content by simply providing an encryption password.
- Key-based encryption: Similar to PGP and XML encryption, this method allows us to configure a symmetric or asymmetric key for encryption and signing operations.
We can encrypt all or part of a message using either of these methods.
In this blog, we are going to learn about JCE key-based encryption (KBE) implementation in Mulesoft.
Implementation
Step-1:
Create a mule application (jce-encryption-demo).

Step-2:
Drop an HTTP Listener on the message flow and configure its port to 8081 and path as “/encrypt”. We will first create a flow and endpoint to perform the JCE encrypt operation.


Step-3:
Now we need to import the crypto module from the exchange by default it is not available in the mule pallet.
Click on search in exchange

Type crypto in the search bar select the cryptography module and click on add

The crypto module will be added in the mule pallet

Step-4:
Now drag and drop the JCE encrypt component on the flow.


Step-5:
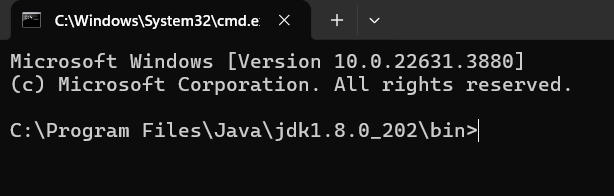
Now we need to create a keystore. We are going to use the Java key tool. For that, you need to have Java installed.
C:\Program Files\Java\jdk1.8.0_202\bin
Go to the above file location or go to the bin folder where your Java is insatlled there you will find Java keytool

Open cmd from that location. Or navigate into the bin directory in cmd.
Step-6:
 We need a command to generate the key store. The command is pasted below
keytool -genseckey -keystore C:\Certificates\blog-JCE-Certificates\blogkeystore.jck -storetype jceks -storepass mulesoft -keyalg AES -keysize 128 -alias blogkey -keypass mulesoft
- Keytool -genseckey means we will use keytool to generate a keystore
- Using -keystore we are going to mention where we are going to create the keystore and also mention the keystore name with extension
- -storetype is used to define the store type
- -storepass is used to give a password for the store
- -keyalg is used to mention the algorithy with which the key store will be generated
- -keysize is used to define the key size
- -alias is given to identify the certificate
- -keypass is used to give a password for the private key(certificate)
Step-7:
Copy and paste the above command in cmd and press enter. A keystore will be generated in the location specified.


Step-8:
Now copy and paste the Keystore in the src/main/resources folder.

Step-9:
Now we are going to configure the Jce encrypt component. Click on the + button
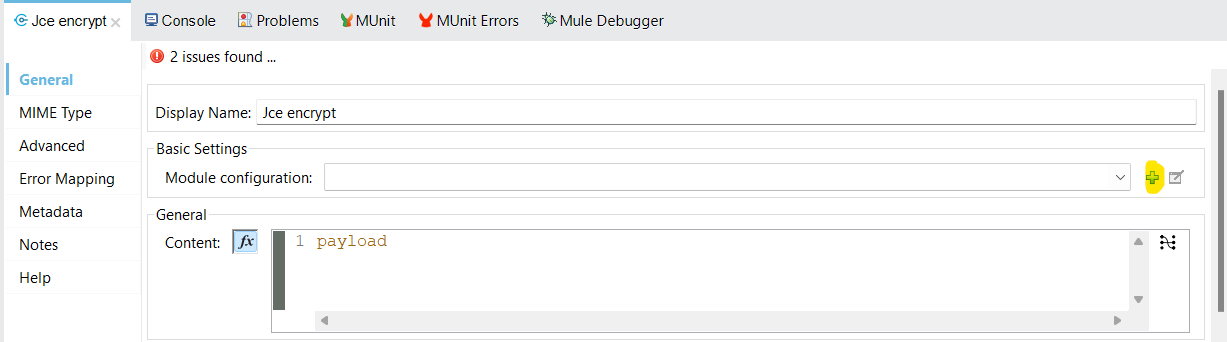

Give the values as follows
- Keystore – here we need to specify the location of the key store. Here we can give only the keystore name with the extension because it is in the src/main/resource folder. So I have given the name blogkeystore.jck
- Type – Give the type as JCEKS as we are using jceks type of keystore.
- Password – Here give the password for the keystore you have set. As I have set mulesoft I have given that.
Now click on the + button and select “Add Jce symetric key info”


Give the values as follows
Key id – You can give key ID as anything. I have given it as blogkey128.
Alias – give the alias that was set during the creation of the key store. My keys alias is “blogkey”.
Password – Here give the password set for the key. My keys password is mulesoft.
Then click on “Finish” and next “OK”
Step-10:

Now in the General section of the JCE encrypt component choose the
Algorithm as AES.
And give the key ID which you have given while setting up the Jce symetric key info.
Step-11:
Now drag and drop a Transform message in the flow and replace the below code in the transform message
%dw 2.0
import dw::Crypto
import toBase64 from dw::core::Binaries
output application/json
—
toBase64(payload)


This code will change the encrypted message into base64 format. This will help us to send the encrypted message as a response.
Step-12:
To see the encrypted message we can put a logger in between JCE encrypt and transform message and log the payload.


Now save and run the project
Step-13:
Send a request to the endpoint shown below and also send a body that will be encrypted.

You can see the encrypted message turned into base64 format in the response section. The actual encrypted message is printed in the logs shown below.

Step-14:
We have seen how to use the JCE encrypt component. Now we are going to see how to use the JCE decrypt component. The JCE decrypt component is used to decrypt the message encrypted using JCE encryption.
Now drag and drop another HTTP Listener on the Message flow use the same configuration and give the path as
/decrypt

Step-15:
Now drag and drop a transform message in the flow

In this transform message, we are going to convert the base64 encoded message to its binary form because after JCE encryption it converts the payload to an encrypted binary form.
To do the above we need a Data weave code. Copy and replace the Dataweave code below to the transform message.
%dw 2.0
import fromBase64 from dw::core::Binaries
output application/octet-stream
—
fromBase64(payload)

Step-16:
Now drag and drop a JCE decrypt component in the flow.

In the general section of the JCE decrypt component reuse the configuration that is already created. And give the
Algorithm as “AES”
Key id as “bolgkey128”

Step-17:
Now save the project. And redeploy the application.
Step 18:
Now send the request to the decrypt endpoint and send the encrypted message got from the encrypt endpoint as a response, in the body. You will get the decrypted message as a response.
