

Configuring SFTPV2 Connector in Boomi
SFTPV2 CONNECTOR
In this blog, you will learn what is SFTP and how to configure SFTPV2 connector in Boomi.
I will explain the use of each action present in sftpv2. By the end of this blog, you will be able to develop a process which helps you to List the files from sftp server.
What is SFTP?
SFTP stands for Secure File Transfer Protocol. It is a secure version of the File Transfer Protocol (FTP), which is used to transfer files between a client and a server over a network. SFTP provides encryption and authentication mechanisms to ensure that data is transferred securely.
Key features of SFTP
Security:
SFTP encrypts both the data being transmitted and the authentication credentials used to access the server. This ensures that sensitive information remains protected from unauthorized access or interception.
Authentication:
SFTP supports various authentication methods such as password authentication, public key authentication
SFTPV2 Connector
- The sftpv2 connector allows you to download files from or upload files to the SFTP-enabled server.
- Unlike the standard FTP connector, the SFTP V2 connector encrypts data to ensure that no sensitive data is exposed when transmitted over a network.
- Using this connector, you can use a Boomi Integration process to GET, CREATE, QUERY, UPSERT, DELETE, LIST, and LISTEN the data in any format.
- SFTPV2 connector supports multiple actions which includes
- Create
- Upsert
- Get
- Query
- List
- Delete
- Listen
Now we learn about each action in detail
Actions of SFTPV2 Connector
CREATE:
Create action is used to upload files to the SFTP server. If the file name is not set, or if the file name already exists, the connector uses the Action if file exists setting to determine the next step.
If the Create operation is successful, the file is uploaded and added to the server and the connector returns a JSON document with information about the file. The file information includes the name of the file, Remote Directory, when the file was last modified.
UPSERT:
Upsert action is used to either create a new file in the specified remote directory or perform an update to a file if it exists in the SFTP server.
- If file name already exists, the connector automatically overrides the existing file in the SFTP server and replaces it with the new file.
- If the file name does not exist, the connector will create a new file in the SFTP server.
- If the file name is not provided, the connector returns an error message.
GET:
Get action is used to fetch a file at a given location. When using Get to download a file from the server, the file name (ID) must be specified as the parameter. If not specified, the connector displays an error.
QUERY:
Query action is used to fetch zero or more files based on file filters.
After you select the Query action and use the Import Wizard, the operation component page contains configuration options to add filters and set parameters to limit the number of files returned.
DELETE:
Delete action is used to delete a file from a remote directory in the SFTP Server based providing the file name (i.e., ID) and file directory.
This operation returns an exception if the file name specified is invalid and does not match the ID. If the file directory is not specified, the connector will search for the file in the home directory of the SFTP server and will not return error message, if file not found.
Note: You cannot delete a directory with this operation.
LIST:
List action is used to get a list of files in the remote directory based on a specific criterion. However, the List operation only lists the metadata about files (not file content) based on the filters.
This operation returns a response profile for each file containing a JSON object describing the file’s metadata, such as File Name, Directory, Created Date, Modified Date, and File Size information and indicates if the file is a directory.
LISTEN:
Listen operation is to listen to the events in the root directory of the remote SFTP server. This operation allows listening to file creation, file deletion or any modification on the existing file in the SFTP server remote directory events.
Now we will learn how to set up an SFTP server using the CompleteFTP application.
Steps to set up SFTP Server:
Step 1: Open the below URL in the browser.
Step 2: click on the Download and install the CompleteFTP trial to install the application.

Step 3: Now go to the downloads. Right click on the CompleteFTP installer which is downloaded. Click on Run as administrator.

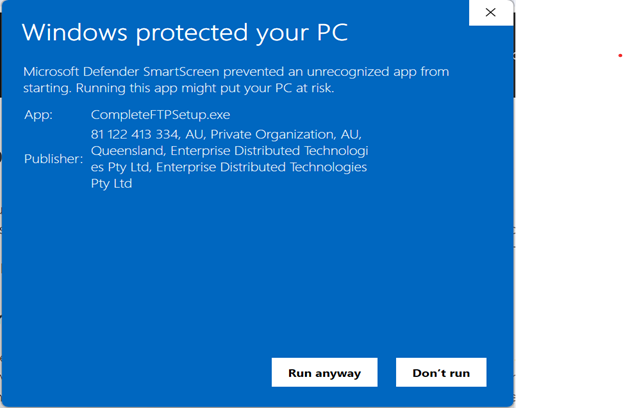
Step 4: Click On Run anyway
Step 5: Click on I agree

Step 6: Enter necessary details like email address, name and organization. Then Click on Next.

Step 7: Click on Install

Step 8: A new window will pop up as shown below. Click on Not now.

Step 9: Create one folder in your local system with name as SFTP and place some files in it as shown below.
(Recommended to give the name as SFTP but not mandatory)

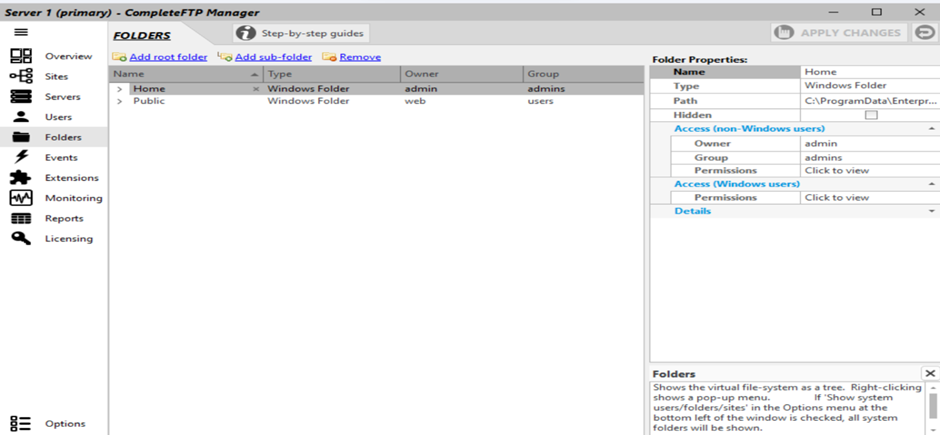
Step 10: Now in the CompleteFTP application, navigate to Folders. Click on
Add root folder à Windows folder.

Step 11: Select the folder which you have created in step9. Then, Click on OK.

Step 12: Now navigate to Users and click on Add User
Step 13: Click on Non-Windows user

Step 14: Configure the mandatory details like username (recommended to fill the optional details). Copy and paste the username in the notepad. Click on Next.

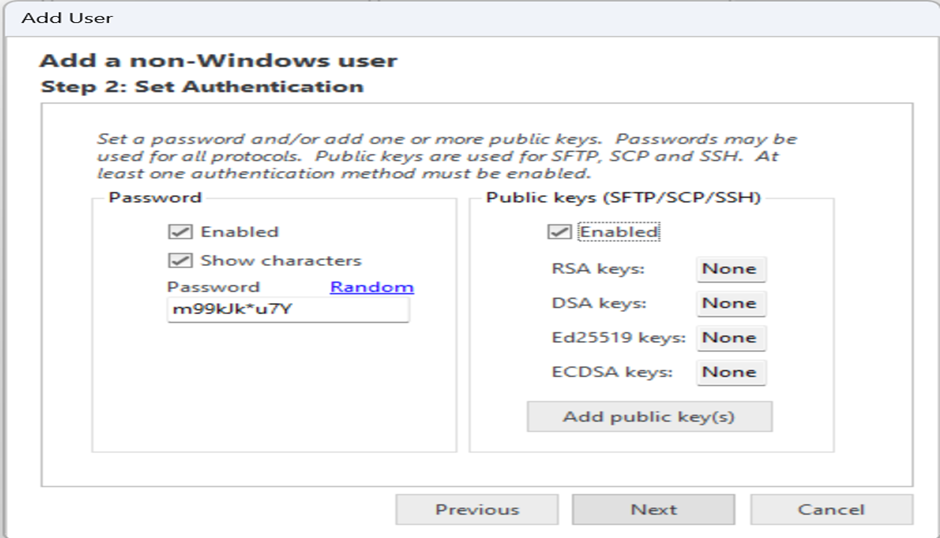
Step 15: To configure the Password, click on Random and copy and paste the generated password into the notepad. Configure everything as shown below and click on Add public key(s).
Step 16: Click on Generate a new keypair for this user and add it to the list

Step 17: Configure as shown below and click on OK.

Step 18: Now we will be redirected to our local storage. Here, we have to save the public key file which was generated in the CompleteFTP folder with any name. Click on save.

Step 19: Now we will be redirected back to CompleteFTP as shown below. Click on Random and click on OK.

A new tab will pop up as shown below. Just click on OK.

Step 20: Click on Next.

Step 21: Select the folder which you have configured previously as shown below and click on
Next.

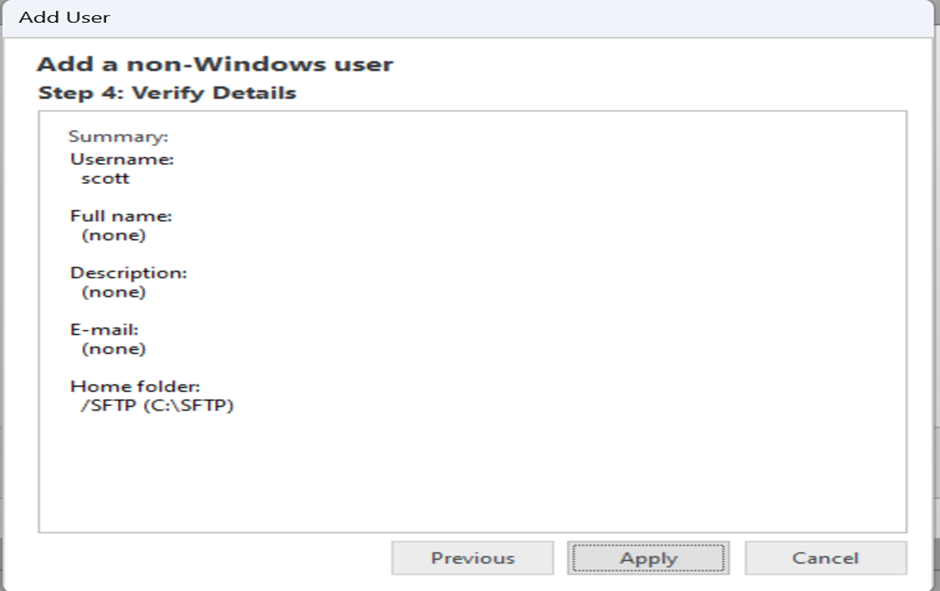
Step 22: Now we can see all the details which we have configured previously (like username, home folder). Click on Apply.
Step 23: Now we can see the new tab as shown below. Under the Users tab, we can see the status of the user scott which we have created. The status is enabled.

Step 24: Open the command prompt and type ipconfig and click on enter.

Now copy the IPv4 Address of your system which got generated and paste it in the notepad.
This address will be used as host when we are configuring the sftpv2 connector in Boomi.
By following all the above steps, we have successfully setup SFTP server in our local system.
Now we will leverage Boomi to integrate with this SFTP server and transfer the files to and from SFTP server using SFTPV2 connector.
Make sure you have noted the below mentioned details.
Username: ****************
Password: ****************
Host: ****************
Now we will log in to the Boomi platform and configure SFTPV2 connector Connection Component.
Steps to configure SFTPV2 connector Connection:
Step 2.1: Log onto the Boomi platform (https://platform.boomi.com/) with the required credentials (Email Address and Password).

Step 2.2: Under Services choose Integration

Step 2.3: Now click on + icon to create new connection component. Choose the Type as connection and connector as SFTPV2 as shown in below image. Click on create.

Step 2.4: Connection Component looks as shown below.

Authentication Type – Refers to an authentication type that can be selected: We have 2 types of authentications available.
1.Username and Password
2.Public key
Remote Directory (Optional) – Refers to the directory on the SFTP server where the connector reads files from or writes files to.
NOTE: If you leave this field blank, the connector uses the default working directory configured as the base folder on the SFTP server.
Host – Refers to a domain name or IP address of the SFTP host.
User Name – Refers to the username of the account on the SFTP server. This field is mandatory if the Authentication Type is username and password.
Password – Refers to the password of the account on the SFTP server. This field is mandatory if the Authentication Type is username and password.
Port – Refers to port on which the SFTP server listens for incoming connections from the SFTP client. The default port is 22.
Step2.5: configure the mandatory fields like Authentication Type, Host, Username, password and click on test connection
Authentication Type: username and password
Host: ****************
Port: 22
Username: ****************
Password: ****************

Step 2.6: Save the connection component and click on Test Connection and choose your run time engine and click on Next.

Step 2.7: we can see the status as Test connection successful. Click on Finish.

Now we will create a Boomi process which will list the metadata of all the files in specified directory.
Steps to develop integration process:
Step 3.1: Create a Process with the name List_files_from_SFTP
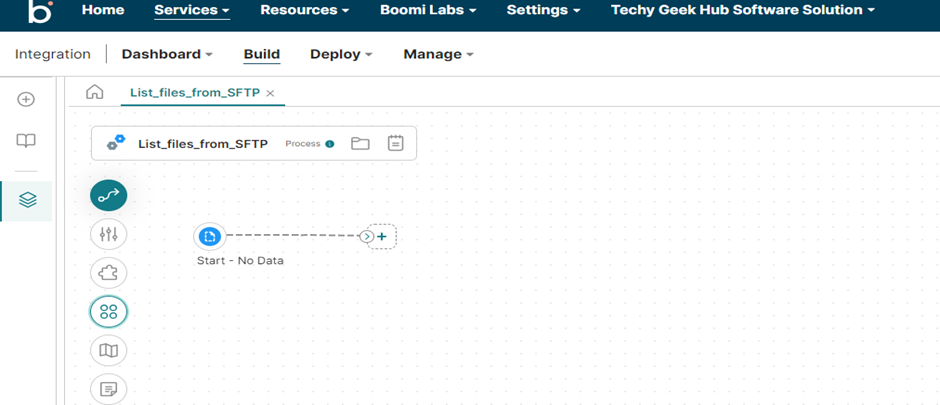
Step 3.2: Drag and drop an SFTPV2 connector into the process canvas and attach it to the start shape.

Step 3.3: Now configure the SFTP V2 connector.

Step 3.4: Choose the connection component that we have created just now and choose the action as LIST from the dropdown.

Step 3.5: Click on + to configure the operation component. The operation component looks as shown below.

Step 3.6: Click on Import Operation to automatically import profiles into the Boomi platform.
Step 3.7: A new wizard opens as shown below. Choose your atom and click on Next.

Step 3.8: Click on Next.

Step 3.9: Click on Finish.

Step 3.10: Now the complete operation component will look as shown below. Click on save and close.

Step 3.11: Now drag and drop a stop shape into the process canvas and attach it to the SFTPV2 connector. The complete process looks as shown below.

Step 3.12: Now save the process component and click Test button and choose your atom to test the process.
Step 3.13: We can see our process got executed successfully and three documents were retrieved.
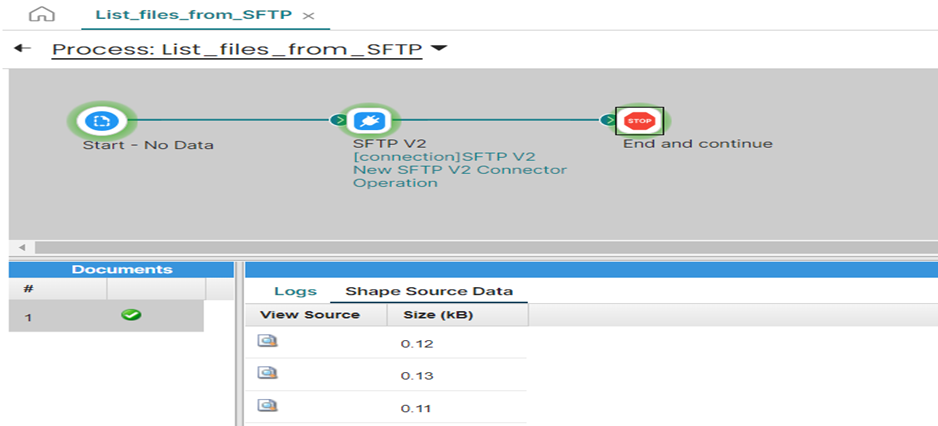
Step 3.14: Open any document. We can see the metadata of the file as shown below.

In this way we can configure the SFTPV2 Connection and integrate with SFTP enabled server from Boomi platform.
References:
- https://help.boomi.com/
- https://enterprisedt.com/products/completeftp/free/
- https://help.boomi.com/docs/Atomsphere/Integration/Connectors/int-SFTP_connector_2b8933d7-e4f5-4458-9c4c-04655f18ecf8
- https://help.boomi.com/docs/Atomsphere/Integration/Connectors/int-SFTP_connection_918014be-2d25-47f2-8319-8323ae033eb8
- https://help.boomi.com/docs/atomsphere/integration/connectors/int-sftp_operation_cd60cd67-a0a3-4d32-9a04-f37dfa8ba443