SYNCHRONIZING DATA BETWEEN SALESFORCE AND SNOWFLAKE
In this blog, we are going to see how to Integrate between Salesforce and Snowflake through Boomi.
What is Salesforce?
Salesforce is a cloud computing service as a software (SaaS) company that specializes in customer relationship management (CRM)
What is Snowflake?
Snowflake is a cloud computing-based data cloud that provides a data warehouse-as-a-service designed for the cloud
Here we will see how to synchronize data from Salesforce to Snowflake by using Boomi
Steps to establish connectivity between Salesforce, Snowflake and Boomi.
Step 1:-
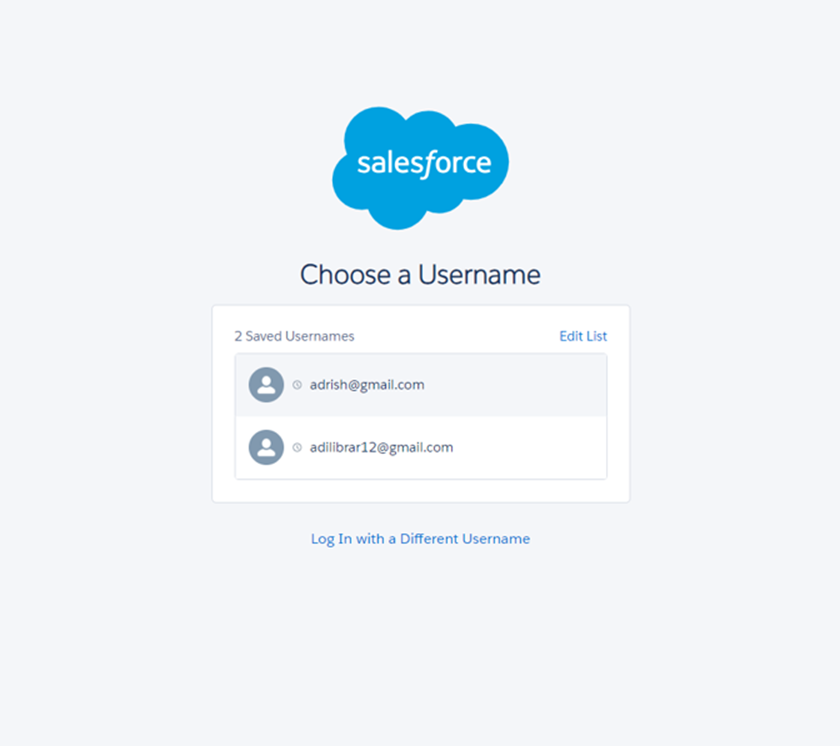
Navigate to the salesforce portal using the URL https://login.salesforce.com. If you already have Salesforce login details use those details for login otherwise you need to sign up for Salesforce.
Step 2:-
Once we login into Salesforce we need to generate a security token which we will use as a password.
• If you have a regular Salesforce account go to setup>My personal Information > Reset
Security Token.
• If you have a salesforce developer account from the home page, go to Manage
Users> Click your name > Change Password > Reset Security Token.
• We will Receive security tokens in the mail.

Step 3:-
Navigate to the Snowflake portal using the URL https://www.snowflake.com. If you already have Snowflake login details use those details for login otherwise you need to sign up for Snowflake.
Step 4:-
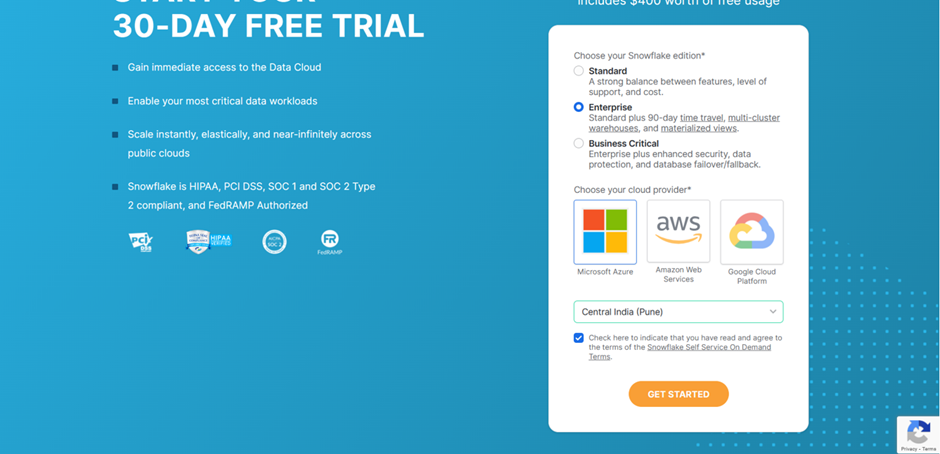
Start a free trial and fill in the required credentials.

Step 5:-
Select the Snowflake Editon as Enterprise and the cloud provider as AWS as per the below image.
Step 6:-
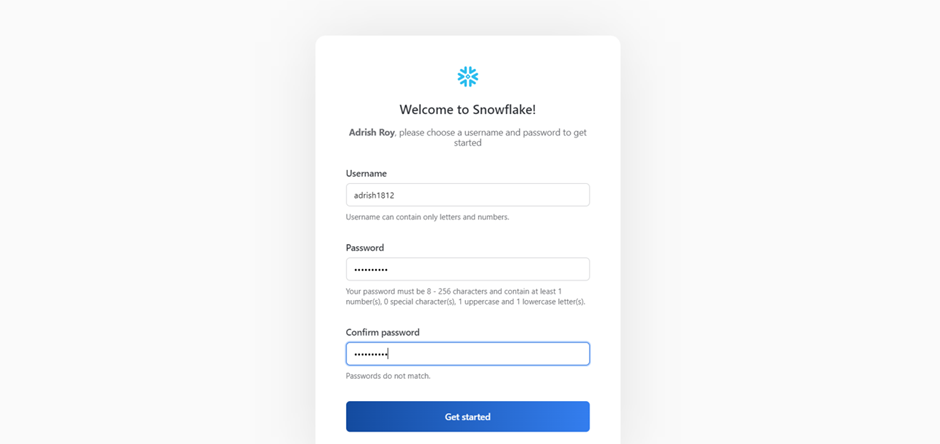
Activate link will be sent to your mail and activate the account by cling the link provided in the mail after that, you need to provide a password. and hit get started.
Step 7:-
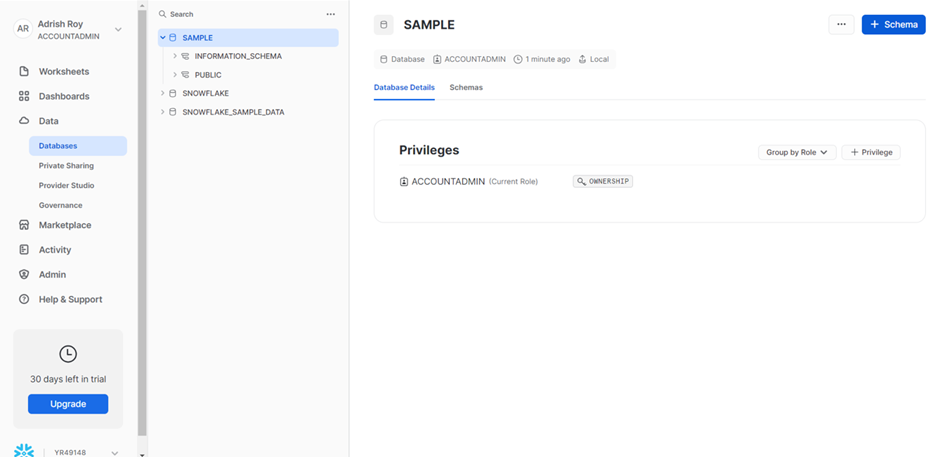
Create a Database by clicking on + Database and provide the name of the database and click Create.

Step 8:-
Now, create a schema by clicking on +Schema and providing the name of the schema and hitting create.
Step 9:-
Create a Table.
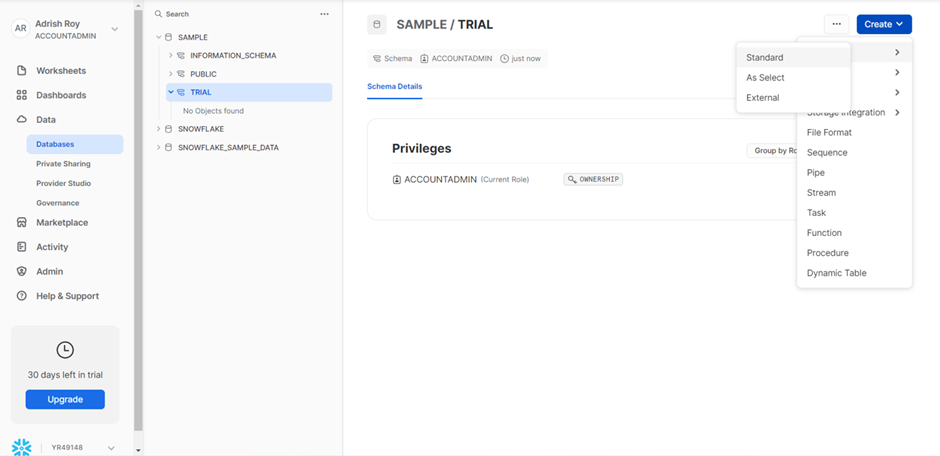
Step 10:-
Write the syntax of creating a Table. Add the column name and type of Column (Number / Varchar /Boolean / Date &Time) and click Create Table

Step 11:-
Now, log onto the Boomi platform https://platform.boomi.com with the required credentials i.e. Email Address and Password.
Step 12:-
Once you have logged into the Boomi platform, you will be able to view the Home page.
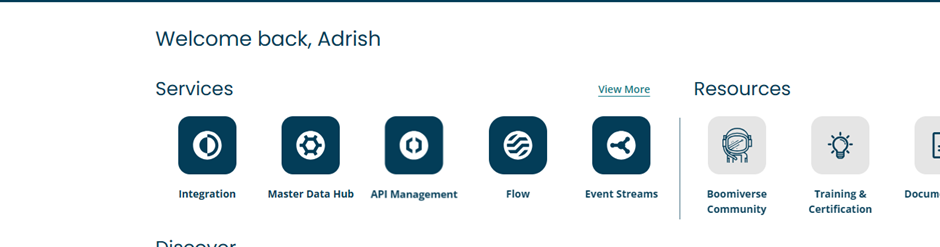
Step 13:-
Now, click on Services followed by Integration. You will see the Build page. Click on New.

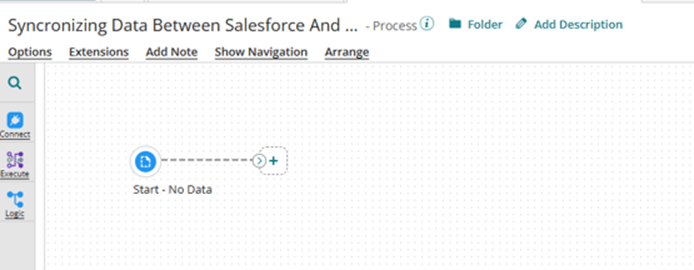
Step 14:-
Once you clicked on New, you will be able to create a process. You see that the process gets created with a start shape with a connector type
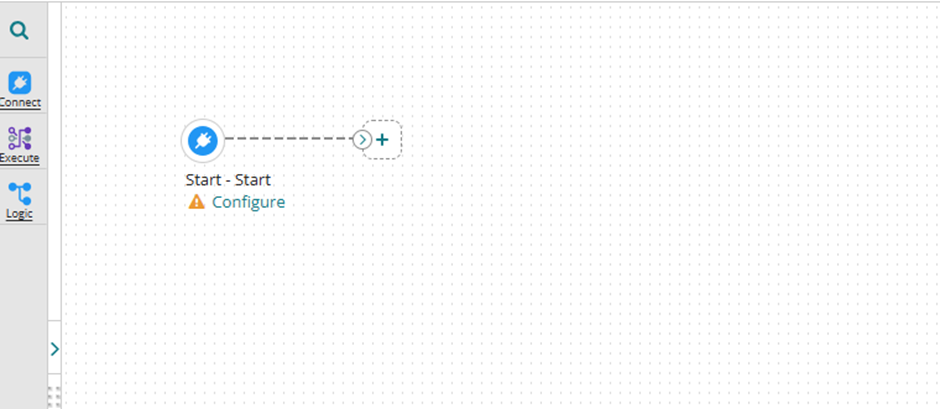
Step 15:-
Click on the start shape and select no data in Type. Select save.
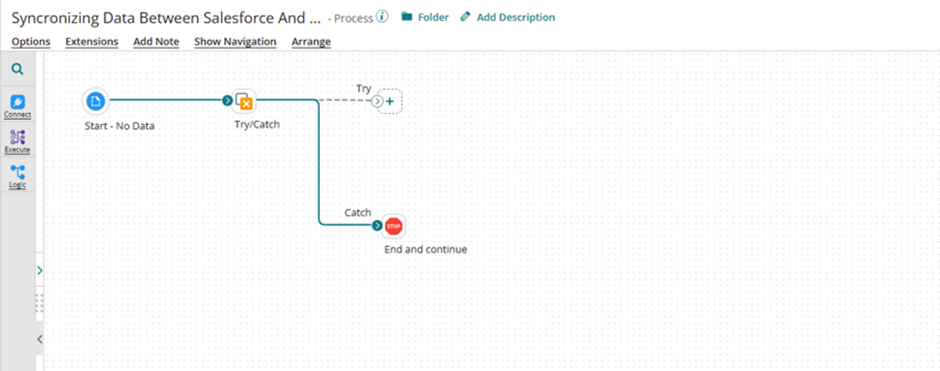
Step 16:-
Drag and Drop Try to catch the shape from the shape pallet and add the stop shape to the catch branch.
Step 17:-
Drag and drop the Salesforce connector and set the action as ‘GET’

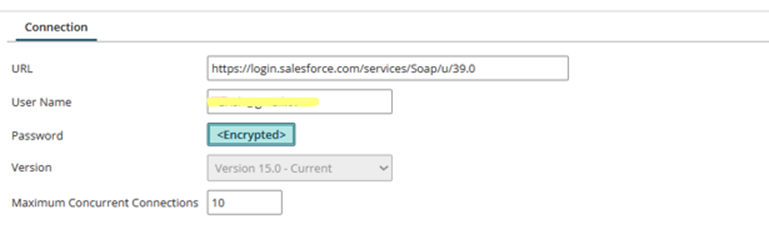
Step 18:-
Configure the connection of Salesforce Connector
To set up a connection we need to follow the below steps.
• URL:-By default, we will see the salesforce URL in the connection.
• Username:- From Step 1 we will get the Username . We will use the same in place of the user name.
The user must have sufficient permissions to use the API and perform the necessary actions
required by your integration scenario.
• Password:- Password will be a combination of password and token which we received through the mail. We are going to append a password& Token.
• Steps to Generate Token:-
o Log into Salesforce via the browser to request your security token.
o Do one of the following:
If you have a regular Salesforce account, go to Setup > My Personal Information >
Reset Security Token.
If you have a Salesforce developer account, from the home page, go to Manage Users >
Users > click your name > Change password > Reset Security Token.
o This triggers an email that contains your security token.
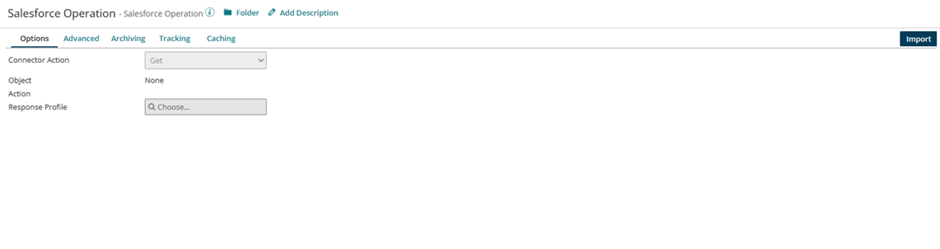
Step 19:-
Configure Salesforce Operation
Click on the import button to import the required object.
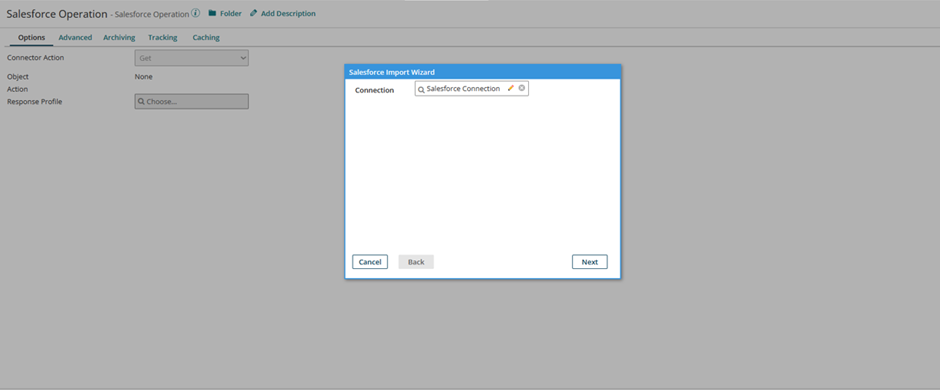
Step 20:-
We need to choose the connection to import objects.
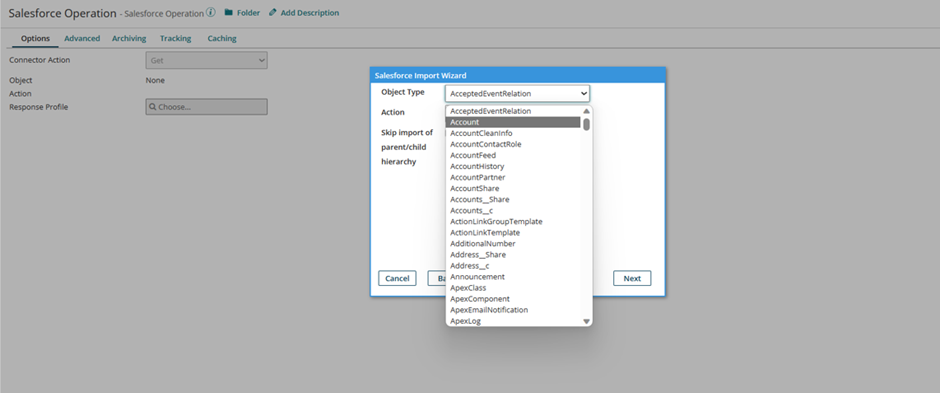
Step 21:-
Choose the object, which you want to import. In this exercise, we are going to work on the accounts object and action will be created. Click on the next.
Step 22:-
Now you will see all the fields under that object. click on next.

Step 23:-
With this our object is ready to import and then we need to click on finish.

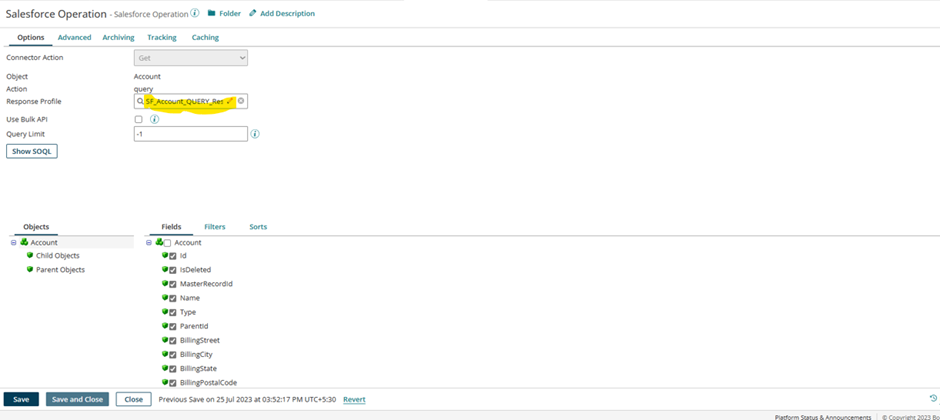
Step 24:-
We can see the object name and request profile which we are going to use in map shape. Save and close
Step 25:-
Drag and Drop Snowflake Connector and set the action as ‘CREATE’

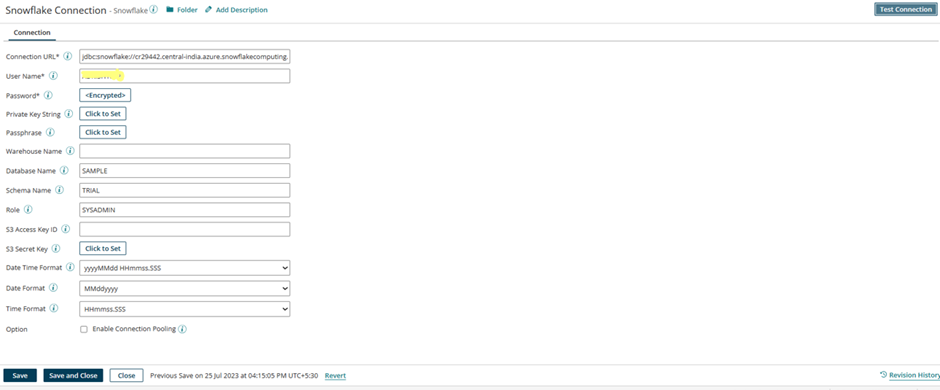
Step 26:-
Configure the connection of Snowflake Connector
To set up a connection we need to follow the below steps.
• URL:-By default, we will see a snowflake URL in the connection. Just provide the cloud storage in the URL as shown in the image below
• Username:- From Step 4 We will get the Username. We will use the same in place of the user name.
• Password:- Password will be the password we provide during signup as shown in Step 6.
After configuring click save and close.
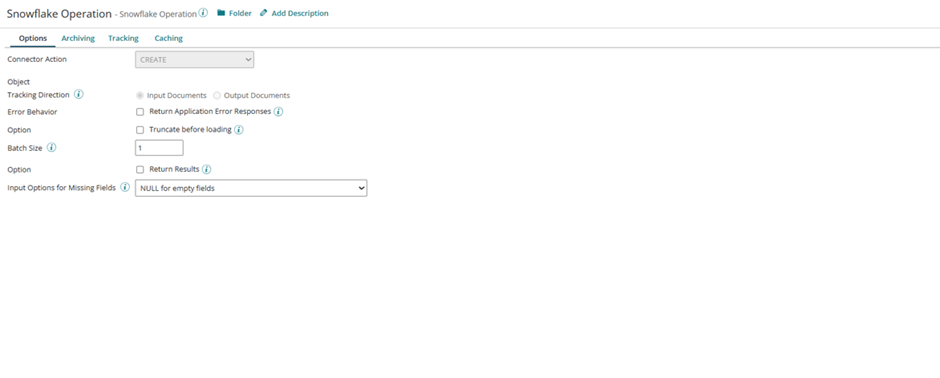
Step 27:-
Configure Snowflake Operation
Click on the import button to import the required object.
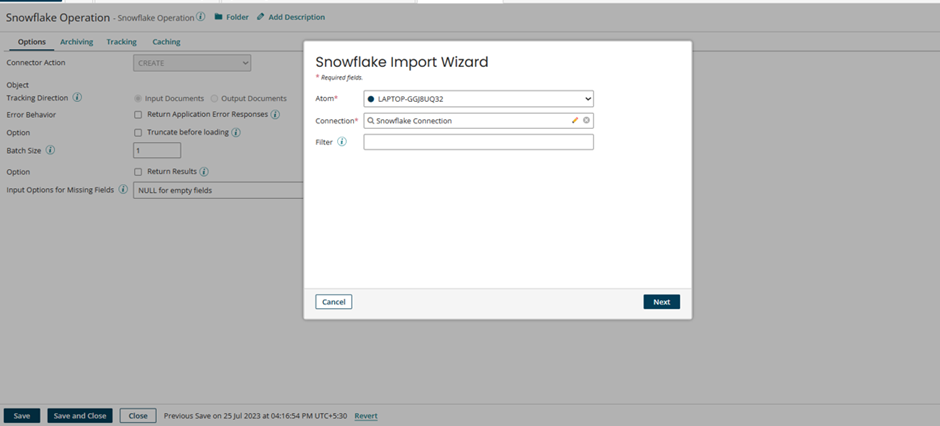
Step 28:-
We need to choose the connection and choose the atom to import objects.
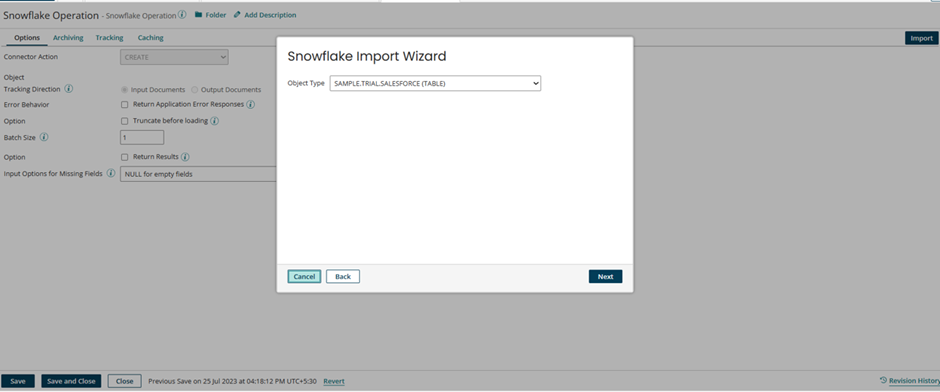
Step 29:-
Select the object (Table Name) and click next
Step 30:-
With this, our object is ready to import and then we need to click on finish.

Step 31:-
We can see the object name and request profile which we are going to use in map shape. Save and close
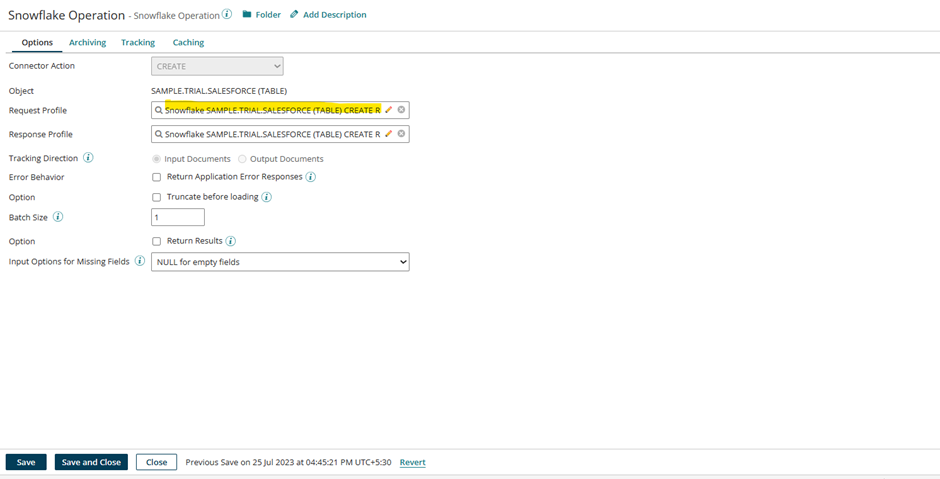
Step 32:-
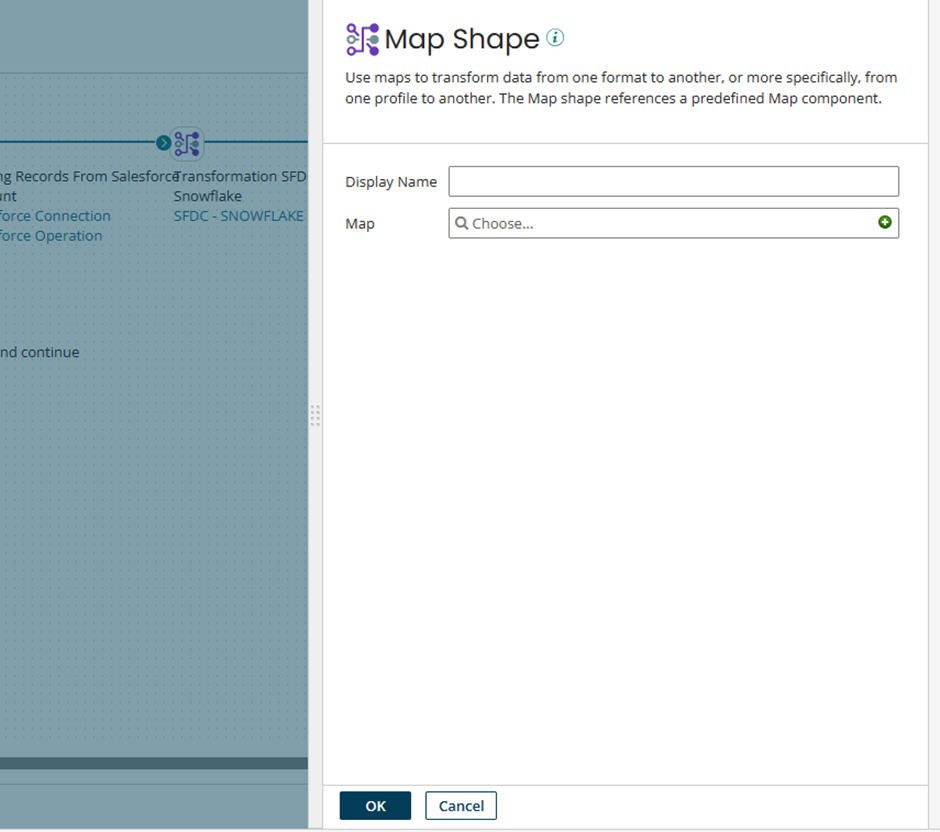
Drag and Drop map Shape
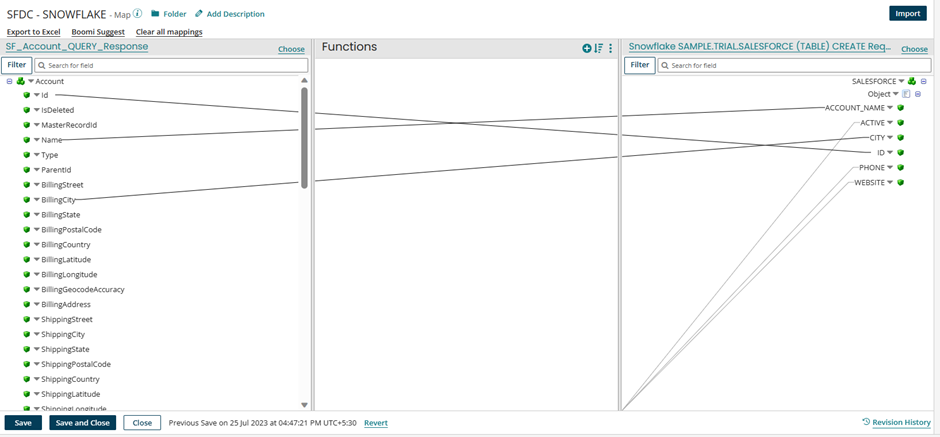
Step 33:-
Map the required fields according to the below image and click save and close.
Step 34:-
Drag and drop the stop shape and rearrange the shape according to the below image

Step 35:-
Click on the Test tab to send data from Salesforce to Snowflake
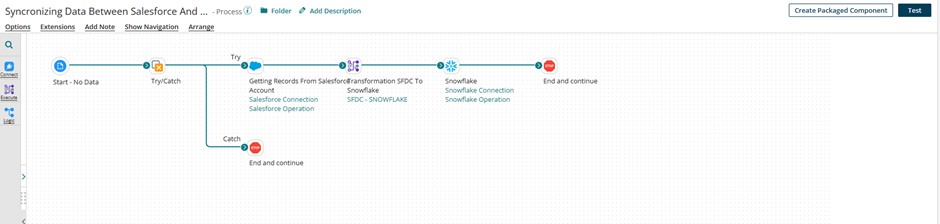
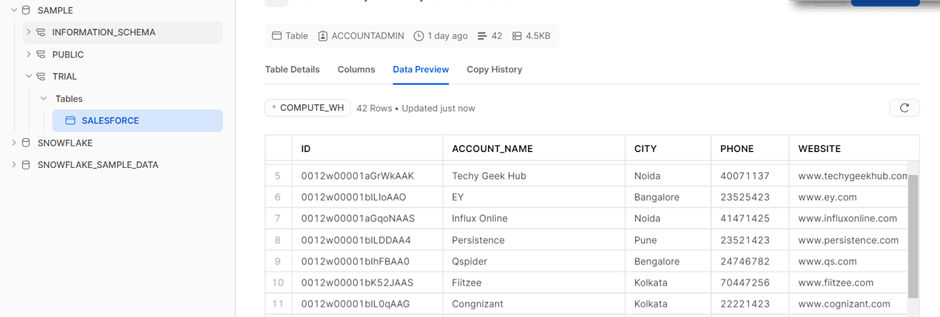
Data will be inserted successfully into the snowflake table