

Developing REST web service in Boomi
Developing REST web service in Boomi
In this blog, we will see how to develop REST web service in Boomi.
- To develop any REST service in Boomi, we have to configure a connector called as “Web Services Server” connector.
- In this example, we will develop a REST web service which will perform addition of two numbers.
Now, let us begin with the steps to develop REST web service.
Step 1: Log on to Boomi platform (https://platform.boomi.com/) with required credentials i.e., Email Address and Password.

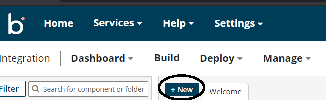
Step 2: Once logged into Boomi platform, we will be able to view Home page.

Step 3: Now, click on Services followed by Integration. We will see the Build page. Click on New.

Step 4: Once, clicked on New, you will be able to see three fields i.e., Type, Component Name and Folder.

- Select Type as process as we are creating the process to develop web service. Component Name and Folder can be given based on your choice (i.e., which name to be given and where do we want to create the process). Click on create.
Step 5: We see that the process gets created with a start shape which is configured with AS2 Shared Server by default.

Step 6: Now click on start shape and select the connector as “Web Services Server” connector. There will be only one action i.e., Listen (by default). Select + on operation to create a new one.

Step 7: Give a relevant name to the operation and configure the following.
- Operation Type: We have to choose the field based on the operation which we are going to perform. In this case, we are creating the web service for adding two numbers. Therefore, Operation would be created.
- Object: It can be given any name based on the operation. Here, we are giving it as add as we are adding the numbers.
- Expected Input Type: We have to choose input based on the profile we want to add i.e. (XML, JSON etc). Here, we are considering it to be as a single xml object as both request and response profiles are of XML formats.
- Request and Response profiles: These are the profiles which defines how the data looks like.
In this example, request and response profiles can be seen as follows.
Request Profile

Response Profile


Post choosing the request and response profiles, click on save and close.
Step 8: We can configure any shape after the web services server connector depending up on the requirement. Here, we are developing the web service which adds two numbers. Hence, we choose Math Add function which has inbuild add logic in it.


Step 9: Next, we have to place return document shape at the end to send back the response.

Step 10: Now, deploy the process which you have created. Click on the atom to which we have deployed the process and choose shared web server. Then, copy the URL and append it with the rest path which we have configured in the operation.


Complete URL is as follows:


Step 11: Now, test the webservice in postman. We can see the request and response in the below screenshots.
