

Formatting Date in Boomi
FORMATTING DATE FROM YYYY-MM-DD TO YYYYMMDD IN BOOMI.
In this blog, we will see how to format date from YYYY-MM-DD to YYYYMMDD in Boomi.
In this Use Case,
- We will pass a sample xml document through message shape which contains date in YYYY-MM-DD format.
- We will use map shape for custom scripting to convert the date from YYYY-MM-DD format to YYYYMMDD.
Let us begin with the steps.
Step 1: Log on to Boomi platform (https://platform.boomi.com/) with required credentials i.e Email Address and Password.

Step 2: Once logged into Boomi platform, we will be able to view Home page.

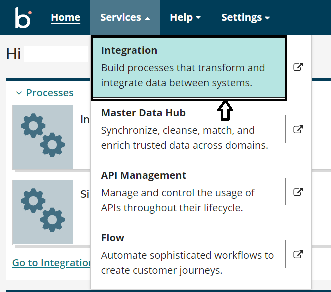
Step 3: Now, click on Services followed by Integration. We will see the Build page. Click on New.

Step 4: Once, clicked on New, we will be able to see three fields i.e., Type, Component Name and Folder.

- Select Type as process as we are building a process. Component Name and Folder can be given based on your choice (i.e., which name to be given and where do we want to create the process). Click on create.
Step 5: We see that the process gets created with a start shape which is configured with AS2 Shared Server by default.

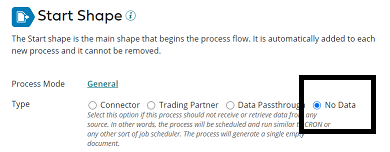
Step 6: Select the start shape and choose No Data. Click ok.
Step 7: Search for Message shape in search pallet. Drag and drop the shape onto process canvas and place it after start shape.

Step 8: Click on configure and pass the sample xml code through message shape and click ok. Create an xml file with code below and save it.
<?xml version=”1.0″ encoding=”UTF-8″?>
<class>
<Val>
<age>21</age>
<Name>A</Name>
<Date>2020-01-01</Date>
</Val>
</class>

Step 9: Search for Map shape in search pallet. Drag and drop the shape onto process canvas and place it after Message shape. Click on the plus button.

Step 10: Click on the choose button on the left side I.e., on the map source.

Step 11: Select XML from the drop down and click on the “Create new profile”.

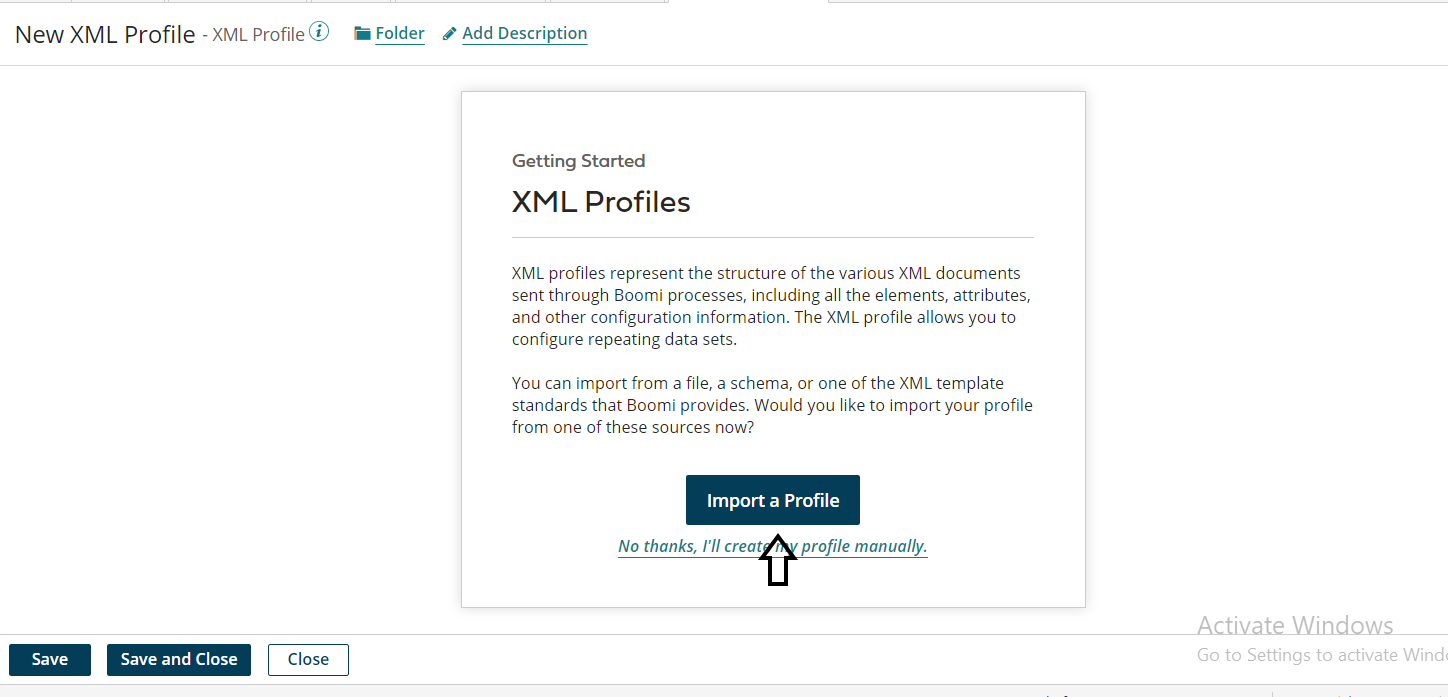
Step 12: Click on “Import a Profile”
Step 13: Click on choose a file and browse for the xml file we created and click next. Click on finish.


Step 14: Click on save and close.

Step 15: Follow the same process for right side I.e., Map Destination.

Step 16: Now, map the age and name fields as follow and click on the “+” in the Functions tab to add a new function.

Step 17: To add custom script, we need to select the “User defined” from drop down and click on “Create new function”.

Step 18: Give the input as “Input” and output as “Output” as below and click on “+”.

Step 19: Select “Custom scripting” from drop down and select “Scripting” and click ok.

Step 20: Select JavaScript from dropdown and add Input and output. Add the below script and click ok.
d = Input.toString();
regEx = new RegExp(‘-‘, “g”);
Output = d.replace(regEx,””);
- In the first line, we will convert Input to string using “toString()” and store in a variable “d”
- In the next two lines, we will replace “-” with “” using “replace()”.

Step 21: Map the input and output as below and click on “Save and close”.

Step 22: Provide one to one mapping as follows and click on “Save and close”.

Step 23: Search for Stop shape in search pallet. Drag and drop the Stop shape onto process canvas and place it after Map shape.

Step 24: Now Test the process by selecting the atom. Click on “Run Test”.


Step 25: Click on the stop shape and click on “Shape source data” and view the document.

Step 26: We see that the date had formatted to YYYYMMDD format.
