

Integrating with Twilio in Boomi
In this Blog, we will see how to integrate Twilio Connector in Dell Boomi.
What is Twilio?
Twilio is an application that facilitates communication by embedding internet-based messaging systems into the web, desktop, and mobile apps. It allows users to programmatically text and create messages, and phone calls and perform other communication-based services using API. It provides APIs and interfaces to build applications using programming languages like Microsoft, Java, .Net, and PHP.
In this Use Case, we will see how to read input from disk and send message to your number by configuring Twilio Connector in the Boomi Platform. To Integrate with Twilio Connector, we need to have an Account SID, Auth Token, FROM Number and TO Number.
We will follow the below steps to get the required details as mentioned above.
Step 1: Go to https://www.twilio.com/login and enter your email ID followed by the password which you have configured while creating the account. If you are a new user, choose Sign Up for free and create the account by following the required steps.

Step 2: Once, we complete the account set-up, we will be redirected to the Twilio Console. We see Account ID and Auth Token get populated and these will be responsible for creating Twilio Connection in Boomi.

Step 3: Here, we will be asked to get a Trial Number in the account by which we can send messages. Click on Get a Trial Number to get the Number.

Step 4: We can see the trial number and we will be asked to choose it. Click on Choose this Number.

Step 5: We will be allocated the number that is used while mentioning From in the message. Click on Done.

Step 6: Click on the 3 dots as shown to get the verified number. The verified number will be the number which we have given while creating the account.

Step 7: Click on Phone Numbers to get the Verified Number.

Step 8: We will see the number using which we can send the message (i.e. FROM in the message)

Step 9: To get the Verified Number, Click on Verified Caller IDs and we will get to see the TO number to which we can send the message.


As we have got the required details, we will see the steps to integrate the Twilio Connector in Boomi.
Step 1: Log on to the Boomi platform (https://platform.boomi.com/) with the required credentials i.e. Email Address and Password.

Step 2: Once logged into the Boomi platform, we will be able to view the Home page.

Step 3: Now, click on Services followed by Integration. We will see the Build page. Click on New.


Step 4: Once, click on New, we will be able to see three fields i.e. Type, Component Name and Folder.

- Select Type as process as we are building a process. Component Name and Folder can be given based on your choice (i.e., which name to be given and where do we want to create the process). Click on Create.
Step 5: We see that the process gets created with a start shape which is configured with AS2 Shared Server by default.

Step 6: Select the start shape and choose No Data. Click ok.

Step 7: Drag and drop the Twilio Connector onto the process canvas and configure it.

- We have many actions in Action and we need to select the Action based on the requirement.
QUERY – Retrieves records based on the filters.
GET — Retrieves single record.
CREATE – Creates new records.
UPDATE – Updates existing records.
DELETE — Deletes the existing records.
- Here, Action will be CREATE as we are creating the message.
Step 8: Click + on connection and name it. Give Account SID and Auth Token which we have received after creating the account in the above steps. Once we set it, click save and close.

Step 9: Click + on operation and name it. Choose import.

Step 10: Choose Browse in to browse in cloud or atom. Here, it is Atom

Step 11: Select Object Type as SMS Message as we are sending a message in this use case.

Step 12: We see that the profiles are imported.

- The request and response profiles look like,


- Click save and close.
Step 13: Drag and drop the Disk connector onto the process canvas to read a file from a specific directory.

- We have to configure 3 fields in connector i.e. Action, Connector and Operation.

- We see 2 actions i.e. Get and Send in Actions.
Get – To get the data from a disk location.
Send – To send to the disk location.
- Here, we will choose action as GET as we are reading the file.

- Click + on connection to create a new one.

- Name the file and give the directory from where we want to read the file. Here, we are reading XML files from D drive and BoomiExamples folder as shown in the screenshot.

- XML file existing in D:\BoomiExamples looks like,

NOTE: Here, From and To will be the Numbers which we have got from the Twilio Account in the above-mentioned steps.

- Click save and close
Step 14: Now, we will configure the operation. Click + on operation to create a new one.

- Name the operation and configure the following.

- File Filter: Read-only files with a file name that matches the file filter. Here, it will be Twilioreq.xml.

File Matching Type:
- Wildcards uses simple file filters like * and ?. * represents multiple characters and ? represents a single character.
- Regular Expressions can include complex regular expressions.
- Exact Match includes the filename that we are reading.

- Here, the file matching type would be Exact Match as we are giving the file name.

- Maximum files to read: It sets the maximum number of files to be read at one time. Let it be default i.e.
- Delete files after reading: If we want the file to be read and deleted, we can check this option. Here, we are leaving it to default. Click save and close
- The complete disk operation looks like this,

Step 15: Drag and drop the Map shape onto the process canvas. Click + and name the map.

- Add source side and Destination side profiles to the map. Here, the source side would be the XML profile coming from the Disk and the Destination side would be the Twilio SMS Message CREATE Request XML Profile. First, we will add a Source profile. Click choose and select the folder where we saved the profile.

- Here, the Profile Type will be XML and click on Create New Profile.

- Name the profile and click on import.

- Choose the file from the directory where we have saved the file. Click on Next.

- We see that the profile is imported. Click Finish.

- The request profile looks like this,

Step 16: Now, add the destination profile. Click choose on the right side as shown.

- Profile Type will be XML and choose Twilio SMS Message CREATE Request profile which we have imported in the previous steps. Click ok.

- We see that source and destination profiles have been imported. Provide one-to-one mapping from source to destination i.e. From 🡪 From, To 🡪 To and Message 🡪 Body. Click Save and close.

Step 17: Drag and drop the stop shape onto the process canvas to indicate the end of the flow.

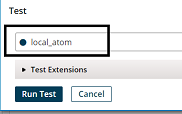
Step 18: Arrange all the shapes in an order and test them by configuring the local atom.

Step 19: We see that the process has been executed. Click on view source to see the output.

Step 20: Once, we open the document, this is how the file looks like

Step 21: This is the message which we have received on mobile once the process gets executed.
![]()