

Validation of XML file against XSD Schema
In this blog, we will validate the XML file against the XSD Schema file using Groovy Scripting.
What is XSD?
XSD stands for XML schema definition.XSD files are made up of tags just like an XML file. Like an XML file, an XSD file has elements and each element must have a name and a type. It describes the relationship between elements and attributes in an XML document and also how the XML files should be structured.
In this Use Case, we will read the XSD schema file from disk and store it in a Dynamic Process Property. We will hard code the XML files in message shape and validate it against dynamic process property in Groovy script.
There are 2 Dynamic Document Properties created out of Groovy script using which we check if the XML files are routed to the true or false branch. True indicates that the XML file is in the correct format and sent to disk and the false branch contains the XML file with a bad format.
Let us implement the use case by creating the process in Boomi.
Step 1: Log on to the Boomi platform (https://platform.boomi.com/) with the required credentials i.e. Email Address and Password.

Step 2: Once logged into the Boomi platform, we will be able to view the Home page.

Step 3: Now, click on Services followed by Integration. We will see the Build page. Click on New.


Step 4: Once, click on New, we will be able to see three fields i.e. Type, Component Name and Folder.

- Select Type as process as we are building a process. Component Name and Folder can be given based on your choice (i.e. which name to be given and where do we want to create the process). Click on Create.
Step 5: We see that the process gets created with a start shape which is configured with AS2 Shared Server by default.

Step 6: Select the start shape and choose Type as Connector as we are getting the XSD schema file from Disk Connector. Here, we have to configure 3 fields in connector i.e. Action, Connector and Operation. Choose connector as Disk.

Get – To get the data from a disk location.
Send – To send to the disk location.
- Here, we will choose action as GET as we are reading the file.

- Click + on connection to create a new one.

- Name the file and give the directory from where we want to read the file. Here, we are reading the XSD file from the D drive and BoomiExamples folder as shown in the screenshot.
![]()


- Click save and close
- Now, we will configure the operation. Click + on operation to create a new one.

- Name the operation and configure the following.

- File Filter: Read-only files with a file name that matches the file filter. Here, it will be schema.XSD

File Matching Type:
- Wildcards uses simple file filters like * and. * represent multiple characters and ? represents a single character.
- Regular Expressions can include complex regular expressions.
- Exact Match includes the filename that we are reading.

- Here, the file matching type would be Exact Match as we are giving the file name.

- Maximum files to read: It sets the maximum number of files to be read at one time. Let it be default i.e..
- Delete files after reading: If we want the file to be read and deleted, we can check this option. Here, we are leaving it to default. Click save and close
- The complete disk operation looks like this,

- This is how the sample XSD file looks like,

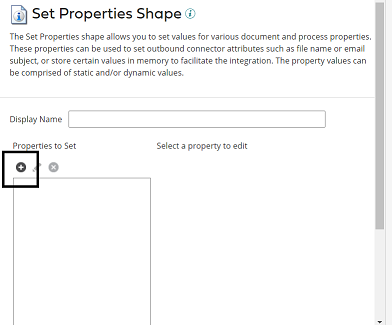
Step 7: Drag and drop set properties shape onto the process canvas to create Dynamic Process Property.
- Click + on Properties as shown.

- Choose Dynamic Process Property from the drop-down.

- Give the property name as “xsd schema” and click ok.

- Now, we have to set parameters for the Dynamic Process Property. Select the Dynamic Process property and choose + on parameters.

Step 8: Here, we are selecting Type as current data which holds the XSD file coming from disk. Click ok.

- After setting the value for Dynamic Process Property, it looks like as follows.

Step 9: Drag and drop the message shape onto the process canvas and place the correct format of hard-coded XML data in the message body as shown. Click ok.

Step 10: Also, add another message shape and place the incorrect format of the XML file in the message body. Click ok.

Step 11: Drag and drop branch shape and set the number of branches to 3.

Step 12: Set the 1st branch to Set Properties shape which holds Dynamic Process property and the rest of the 2 branches are set to the message shapes where we hard code the values.

Step 13: Drag and drop the data process shape onto the process canvas to write a Groovy script that validates XML files against XSD files.

Step 14: Select Data Process Shape and click +.

- Choose Process Type as custom scripting from the drop-down. Click on edit.


Step 15: Now, we will be able to see the command prompt as shown in the screenshot.

- Now we write a groovy script that validates XML files against Dynamic Process Property and creates Dynamic Document Property as “Format” in the script with 2 values as True and False.

- Add script in the command prompt and click ok.

Step 16: Drag and drop the Decision shape onto the process canvas to validate with Dynamic Document Property which was created in custom script. If the value of the Dynamic Document property is True then it goes to the True Branch and if the value is false it goes to the False branch.

Step 17: Click on the shape and configure the first value.

Step 18: Here, the first value will be Dynamic Document Property which was created in a custom script. The type will be document property.

Step 19: Choose Dynamic Property as Dynamic Document Property as shown.

Step 20: Give Dynamic Document Property name which got generated in the script. Here, the property name is Format. Click ok.

Step 21: Comparison will be Equal To.

Step 22: Click on the Second value and choose Type as static and the Static value will be true.


Step 23: After configuring the decision shape, it looks like

Step 24: In the true branch, we will place set properties shape to set the file name which comes to the disk. Select + on properties.
Step 25: Select the disk connector from Connectors and choose the file name. Click ok.

Step 26: Select + on the parameters side and assign a value to the disk.

Step 27: Choose type as static and static value as contact.xml.

- After configuring the properties in a set properties shape, it looks like

Step 28: Drag and drop the disk connector shape onto the process canvas to send a response to the disk.

Step 29: We have to configure 3 fields in the connector i.e. Action, Connector and Operation.

Get – To get the data from a disk location.
Send – To send to the disk location.
- Here, we will choose action as SEND as we are sending a response to the file.

- Click + on connection to create a new one.

- Name the file and give the directory to save the response file. Here, it is the D drive and BoomiExamples folder as shown in the screenshot.

- Click save and close.
Step 30: Click + on operation and name it. Leave everything to default. Click save and close.

Step 31: In false brach, we will just place a stop shape to indicate the end of the flow.

Step 32: Arrange all the shapes in order and run the test by clicking on Run Test and configuring the local atom.


Step 33: We see that the process is executed and one file has gone to True shape and the other one to False. Click on disk connector and view the source to see the file which went to disk in the True branch.

Step 34: Click on view source and we see the XML file with the correct format.

Step 35: Now, select the False branch and we see that a file is sent.

Step 36: Click on view source and we see the file with incorrect format.

Step 37: Navigate to the folder which we have configured in the disk location and we see that the file named contact.xml is sent to the disk location.

