

Snowflake Database Configuration In MuleSoft
Snowflake connector configuration
In this blog, we will discuss how can we create a developer trail account in Snowflake and create a MuleSoft Snowflake connection configuration. By following below steps:
- Creating a Snowflake developer account.
- Configuration of custom database and schema.
- Configuration of MuleSoft Snowflake connection.
- Demo on select and insert opeartions
Step 1: Creating a Snowflake account:
- First, let’s go to https://www.snowflake.com/login/

- Choose ‘start for free’ option as shown in the image
- Now enter the necessary information in the fields.
- We can use any mail like corporate, business and personal but we cannot use any temporary mails.
- Hit the continue button.


- Use the default settings for the Snowflake edition type and choose your favorite cloud provider.
- I would suggest you choose a cloud provider that your company uses the most, low cost and the cloud should be near to your data center to avoid latency.

- We can skip the survey and proceed to the further steps.
- They will ask multiple questions we can skip all of them.
- After completing all of them we will receive a link to the mail which we have provided.
- Go to the mail and click on “click to activate” button.

- We can also see one more link at the bottom of the mail, with that link we can login to the Snowflake account which we have created.
- We can also login to our account via https://www.snowflake.com/login/m as well.

- It will open a new window in the default browser.
- It will ask to configure username and password.
Step 2: Configuration of database and schema in Snowflake
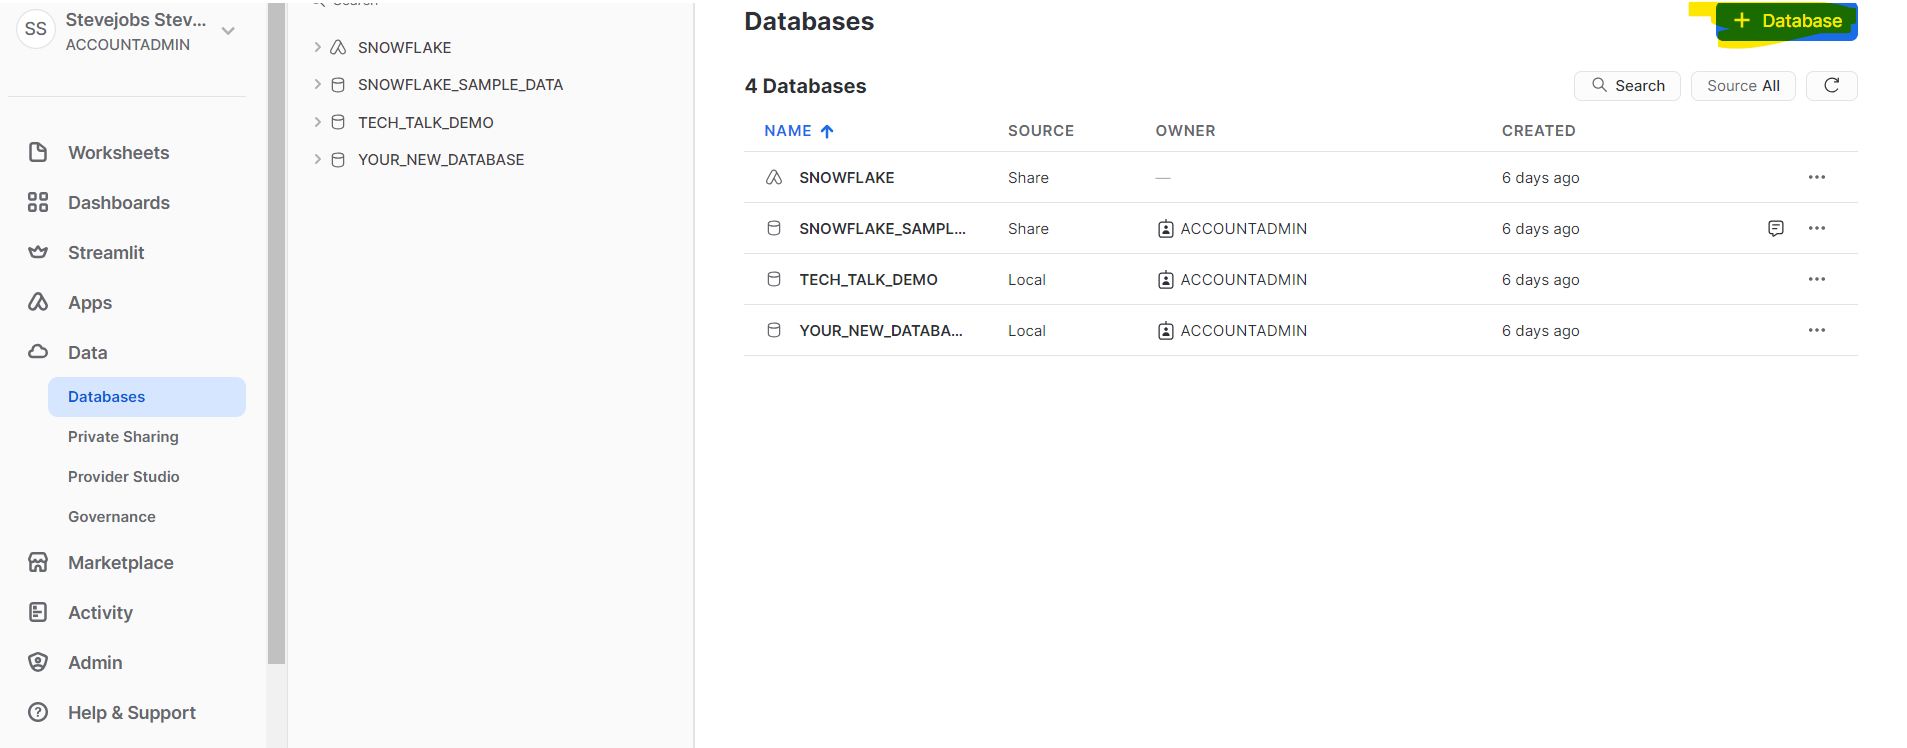
- After logging to the Snowflake account, go to data and choose databases.
- Click on +Database button highlighted in the image.
- Then go to the database that you have created and click on the +schema button highlighted in the image.
- Once database and schemas are created then we can create our tables in the schema.
![]()

- To create a table, go to worksheets and open a work sheet.
- Worksheets are used to perform operations on the database, schemas and tables to modify, create and delete the data.
- Once we click on the worksheets it will navigate to new page to write Snowflake queries.


![]()
- Now we have completed our prerequisites for the Snowflake connection configuration.
- Now we will go to MuleSoft and create a new connection for Snowflake.
Step 3: Snowflake connection configuration in MuleSoft
- Open Anypoint studio and create a project and go to “search in exchange”

- Then enter “snowflake” in the search box.
- Choose Snowflake Connector with the latest version from the available modules.
- Then click on the add option which is in between the available modules and selected modules. It will add the Snowflake connector in the selected modules.
- Click on finish button to add to Anypoint studio. Refer to the below image for steps sequence.

![]()
- Now go to global elements in the project file.

- Choose create and search for snowflake config and click on it. It will open the Snowflake configuration.


- Choose the configure option and choose “Add Maven dependency” to add the snowflake jar file. Click on the finish button to add the dependency to the local repository.

- In the above image we can see the Group id, Artifact id, version and more.
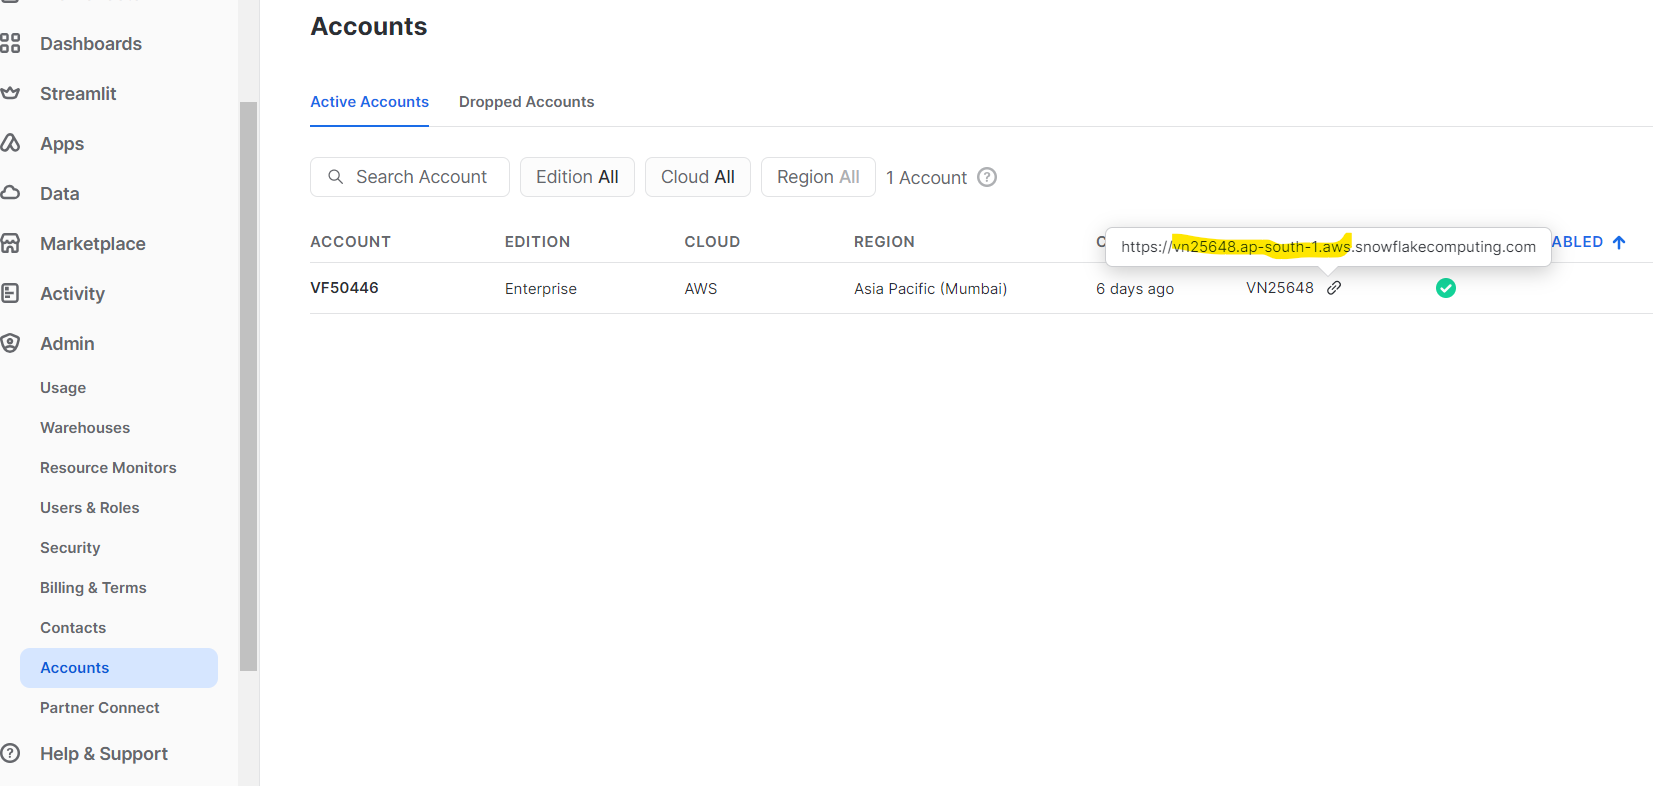
- For account name go to snow flake and click on Admin -> Accounts -> hover on to the Locator.
- Now you can see the https://youraccountname.snowflakecomputing.com as highlighted in the image below.
- For username go to your account option on the top left corner, then choose profile inside that you can find the username.


- You have to provide your password which you have created after activating the account.
- For now, we are leaving warehouse as its default value COMPUTE_WH. If you want to know your warehouse name, check in the profile section.
- We need to provide the database name and the schema name which we need to access in MuleSoft.
- For now, we are using the ACCOUNTADMIN role, so we need to change the role according to the level of authorization.
- We can leave the remaining values as default. Or you can modify according to your business requirements.
- Please refer to the below mentioned image to check you have configured as expected.
- We can test connection now.

![]()
Step 4: Demo on select and insert operations
Now we will see a dome on select and insert operations.
Step 1: Add the components to the flow
- Add a listener to the process canvas

2. Add select operation from Snowflake 
3. Add transform from core module after that add logger 
4. Flow will look like this

Step 2: Now configure the operations
- Open listener and add connection choose the connection configuration use the default configuration for now and add path to the listener


2. Now open Snowflake select operation it will automatically choose the connection. Now add the select statement for the particular table we want to retrieve data.

3. We will get Java object from the snow flake, so we will transform it to JSON using transform message component.

4. Now open the logger and log the same payload.

Step 3: Run the project and test it using postman
- Open postman and add the URL: – http://localhost:8081/selectDemo here selectDemo is the path which we created in the listener and remaining are the default values given in the listener component.

2. Now run the project as Mule application once it is deployed then send the request from postman, we will get the response from the API.

3. The data in the employees is retrieved from Snowflake.